メインコンテンツにスキップ

Acer Spin 5 SP513-51-57TP CMOS Battery Replacement

必要な工具と部品

  1. Acer Spin 5 SP513-51-57TP CMOS Battery Replacement, Battery: 手順 1、 1の画像 1
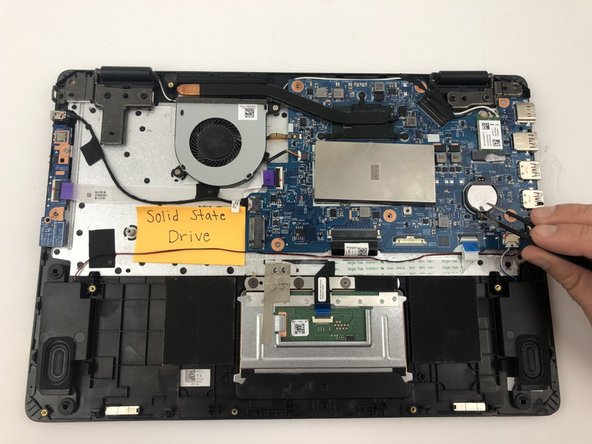
    • Flip your laptop over so that the model sticker is facing upward towards the ceiling.

    • Make sure your computer is turned off before starting to avoid getting shocked.

  2. Acer Spin 5 SP513-51-57TP CMOS Battery Replacement: 手順 2、 2の画像 1 Acer Spin 5 SP513-51-57TP CMOS Battery Replacement: 手順 2、 2の画像 2
    • Use a Phillips #1 screwdriver to remove the thirteen 6.5mm screws that secure the back cover.

  3. Acer Spin 5 SP513-51-57TP CMOS Battery Replacement: 手順 3、 3の画像 1 Acer Spin 5 SP513-51-57TP CMOS Battery Replacement: 手順 3、 3の画像 2 Acer Spin 5 SP513-51-57TP CMOS Battery Replacement: 手順 3、 3の画像 3
    • Use a plastic opening tool to gently separate the back cover from the laptop. A snapping sound will be heard as a signal that the clips are being disengaged.

    • Do not use any metal tools to pry open the device.

    • It is recommended that you start from one corner and run the tool along the edges of your laptop from corner to corner for a safe removal.

  4. Acer Spin 5 SP513-51-57TP CMOS Battery Replacement: 手順 4、 3の画像 1 Acer Spin 5 SP513-51-57TP CMOS Battery Replacement: 手順 4、 3の画像 2 Acer Spin 5 SP513-51-57TP CMOS Battery Replacement: 手順 4、 3の画像 3
    • Use a Phillips #1 screwdriver to remove two 4 mm screws that secure the battery.

  5. Acer Spin 5 SP513-51-57TP CMOS Battery Replacement: 手順 5、 3の画像 1 Acer Spin 5 SP513-51-57TP CMOS Battery Replacement: 手順 5、 3の画像 2 Acer Spin 5 SP513-51-57TP CMOS Battery Replacement: 手順 5、 3の画像 3
    • Use your hand to carefully pull out the wiring harness from its port that is located between the battery and the motherboard.

    • Remove the battery from the case.

  6. Acer Spin 5 SP513-51-57TP CMOS Battery Replacement, CMOS Battery: 手順 6、 3の画像 1 Acer Spin 5 SP513-51-57TP CMOS Battery Replacement, CMOS Battery: 手順 6、 3の画像 2 Acer Spin 5 SP513-51-57TP CMOS Battery Replacement, CMOS Battery: 手順 6、 3の画像 3
    この手順で使用する道具:
    Tweezers
    $4.99
    購入する
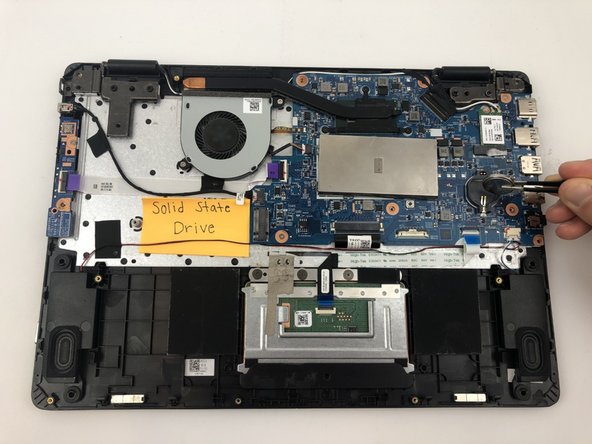
    • Grasp the CMOS battery with the tweezers and remove it from the motherboard.

終わりに

To reassemble your device, follow these instructions in reverse order.

ある他の人がこのガイドを完成しました。

作成者

4人の作成者と共同で作成されました。

Anthony Vansell

メンバー登録日: 01/24/20

872 ポイント

5のガイドは作成済み

チーム

Hufflepuff Hufflepuff人のメンバー

Local Repair Groups

3 メンバー

5のガイドは作成済み

0 件のコメント

コメントを追加

統計データ:

過去 24時間: 0

過去 7 日: 3

過去 30 日: 14

今までの合計 842