メインコンテンツにスキップ

Acer Iconia W510 Rear Cover Replacement

必要な工具と部品

  1. Acer Iconia W510 Rear Cover Replacement, Rear Cover: 手順 1、 3の画像 1 Acer Iconia W510 Rear Cover Replacement, Rear Cover: 手順 1、 3の画像 2 Acer Iconia W510 Rear Cover Replacement, Rear Cover: 手順 1、 3の画像 3
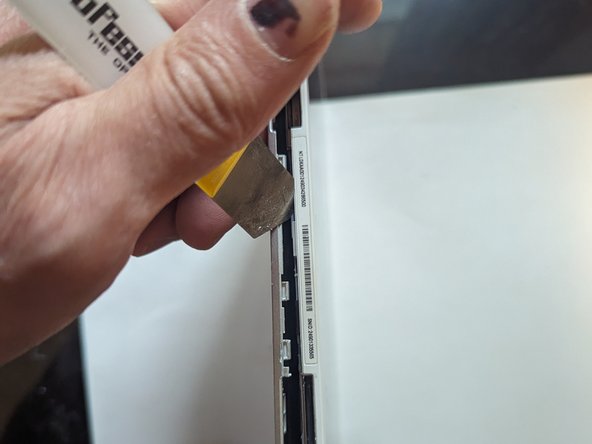
    • Carefully insert your metal pry tool between the back cover and the frame at an angle as shown.

    • Give the tool a twist to the left to start separating the clips.

    • Work your way to the corner, prying and twisting to pop the clips as you go.

  2. Acer Iconia W510 Rear Cover Replacement, Right Side: 手順 2、 3の画像 1 Acer Iconia W510 Rear Cover Replacement, Right Side: 手順 2、 3の画像 2 Acer Iconia W510 Rear Cover Replacement, Right Side: 手順 2、 3の画像 3
    • Insert an opening pick to make sure the clips don't close down again as you round the corner and start working on the right side of the tablet.

    • Continue as before, prying and twisting to release the catches.

  3. Acer Iconia W510 Rear Cover Replacement, Top Edge: 手順 3、 2の画像 1 Acer Iconia W510 Rear Cover Replacement, Top Edge: 手順 3、 2の画像 2
    • Continue along the top edge as before

    • When you get to the corner, be careful not to insert the tool in the space below the power on symbol. There is a delicate clip there that is easy to break if you're prying with the tool. (Yes, I'm speaking from experience. Don't be me.)

  4. Acer Iconia W510 Rear Cover Replacement, Left Side: 手順 4、 2の画像 1 Acer Iconia W510 Rear Cover Replacement, Left Side: 手順 4、 2の画像 2
    • Unclip the left side of the tablet.

  5. Acer Iconia W510 Rear Cover Replacement, Bottom Edge: 手順 5、 2の画像 1 Acer Iconia W510 Rear Cover Replacement, Bottom Edge: 手順 5、 2の画像 2
    • Back to the bottom side again, this little part by itself is a little finicky to get unclipped, just follow the same procedure as with the first one.

    • And finally the home stretch between the keyboard/power connector and the right hand guide pin, back to where you started.

  6. Acer Iconia W510 Rear Cover Replacement: 手順 6、 1の画像 1
    • The rear cover is removed.

終わりに

To reassemble your device, simply place the rear cover back in position and squeeze the edges together all the way around.

作成者

1人の作成者と共同作成されました。

Jerry Wheeler

メンバー登録日: 03/21/22

57,899 ポイント

69のガイドは作成済み

チーム

Oregonians Oregonians人のメンバー

Community

7 メンバー

176のガイドは作成済み

0 件のコメント

コメントを追加

統計データ:

過去 24時間: 1

過去 7 日: 2

過去 30 日: 8

今までの合計 41