メインコンテンツにスキップ

Acer Iconia A110 Speaker Replacement

必要な工具と部品

  1. Acer Iconia A110 Speaker Replacement, Battery: 手順 1、 2の画像 1 Acer Iconia A110 Speaker Replacement, Battery: 手順 1、 2の画像 2
    • Before taking apart your tablet, make sure the device is powered off.

    • Pry open the right side of case with the plastic opening tool. If necessary, keep a tool lodged into the side to keep the case from closing.

    • During this process, the volume button and/or power button may fall out.

  2. Acer Iconia A110 Speaker Replacement: 手順 2、 3の画像 1 Acer Iconia A110 Speaker Replacement: 手順 2、 3の画像 2 Acer Iconia A110 Speaker Replacement: 手順 2、 3の画像 3
    • Pry open the left side of the case with a plastic opening tool. The backside of the tablet should now separate completely from the front.

  3. Acer Iconia A110 Speaker Replacement: 手順 3、 3の画像 1 Acer Iconia A110 Speaker Replacement: 手順 3、 3の画像 2 Acer Iconia A110 Speaker Replacement: 手順 3、 3の画像 3
    • Using the plastic opening tool and spudger, carefully pry up the battery from the case.

    • You should hear the adhesive ripping as you do this.

    • Once the battery is no longer adhered to the case, detach the dongle that connects the battery to the motherboard.

  4. Acer Iconia A110 Speaker Replacement, Speaker: 手順 4、 2の画像 1 Acer Iconia A110 Speaker Replacement, Speaker: 手順 4、 2の画像 2
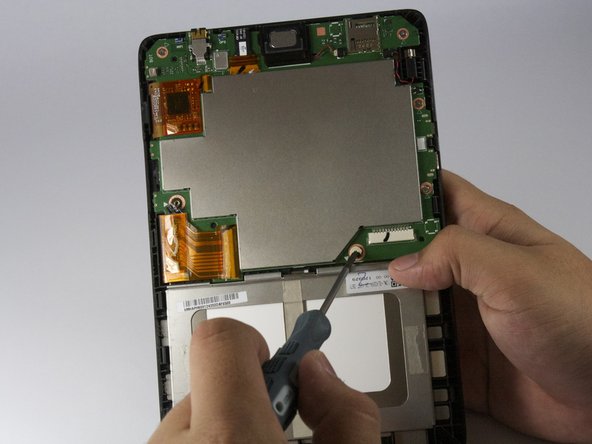
    • With the Phillips #00 screwdriver, remove the following screws securing the motherboard to the back panel:

    • Two 2.0 mm screws (with the bigger head)

    • Four 2.5 mm screws (with the smaller head)

  5. Acer Iconia A110 Speaker Replacement: 手順 5、 2の画像 1 Acer Iconia A110 Speaker Replacement: 手順 5、 2の画像 2
    • On the top right side of the motherboard, is the vibration motor. With tweezers, carefully pull the vibration motor out from underneath the motherboard.

    • The vibration motor is still connected to the motherboard by a small wire connection, so be careful not to rip the wire out.

    • With your fingers, carefully disconnect the cable securing the vibration motor to the motherboard. Set aside.

  6. Acer Iconia A110 Speaker Replacement: 手順 6、 2の画像 1 Acer Iconia A110 Speaker Replacement: 手順 6、 2の画像 2
    • The speaker located on the top of the motherboard should easily slide out. Take note that there is still a wire connected, so do so carefully.

    • With your fingers, slowly pull out the wire connecting the speaker to the motherboard.

終わりに

To reassemble your device, follow these instructions in reverse order.

ある他の人がこのガイドを完成しました。

作成者

5人の作成者と共同で作成されました。

Andrea

メンバー登録日: 04/14/14

757 ポイント

5のガイドは作成済み

チーム

Cal Poly, Team 3-42, Maness Spring 2014 Cal Poly, Team 3-42, Maness Spring 2014人のメンバー

CPSU-MANESS-S14S3G42

4 メンバー

5のガイドは作成済み

0 件のコメント

コメントを追加

統計データ:

過去 24時間: 0

過去 7 日: 0

過去 30 日: 0

今までの合計 736