メインコンテンツにスキップ

Acer E5-571-54FL Cooling Fan Replacement

必要な工具と部品

  1. Acer E5-571-54FL Cooling Fan Replacement, Battery: 手順 1、 1の画像 1
    • Power down the laptop prior to beginning.

    • Turn the laptop over with the battery closest to your body.

  2. Acer E5-571-54FL Cooling Fan Replacement: 手順 2、 2の画像 1 Acer E5-571-54FL Cooling Fan Replacement: 手順 2、 2の画像 2
    • Insert the pointed end of a spudger into the battery release.

    • Slide the release gently all the way to the left.

    • You should hear a sound after the slide is all the way left. This lets you know the battery has disengaged.

  3. Acer E5-571-54FL Cooling Fan Replacement: 手順 3、 2の画像 1 Acer E5-571-54FL Cooling Fan Replacement: 手順 3、 2の画像 2
    • Place your hands on each end of the battery.

    • Pull the battery towards your body to remove it.

  4. Acer E5-571-54FL Cooling Fan Replacement, Keyboard: 手順 4、 1の画像 1
    • Using a #0 Phillips screwdriver, remove a total of eighteen identical 8mm Phillips screws and set them aside.

  5. Acer E5-571-54FL Cooling Fan Replacement: 手順 5、 1の画像 1
    • Rotate the laptop 180 degrees so that the battery compartment is now furthest away from your body.

  6. Acer E5-571-54FL Cooling Fan Replacement: 手順 6、 1の画像 1
    • Turn the laptop over so that you can easily open the screen to a vertical position.

  7. Acer E5-571-54FL Cooling Fan Replacement: 手順 7、 1の画像 1
    • Put your fingers under the top of the keyboard assembly directly below the Acer logo.

    • Carefully pull up on the center until you hear the tabs disengage from the bottom.

  8. Acer E5-571-54FL Cooling Fan Replacement: 手順 8、 3の画像 1 Acer E5-571-54FL Cooling Fan Replacement: 手順 8、 3の画像 2 Acer E5-571-54FL Cooling Fan Replacement: 手順 8、 3の画像 3
    • Work your way around the seam with the plastic opening tool carefully prying the base and top cover apart.

    • If you have difficulty with the plastic opening tool, use a metal spudger but be more cautious to not damage or mar your laptop case.

  9. Acer E5-571-54FL Cooling Fan Replacement: 手順 9、 1の画像 1
    • When the two halves are separated, carefully lift up the front of the keyboard and touchpad assembly.

    • You will see three ribbon cables attached to the motherboard.

  10. Acer E5-571-54FL Cooling Fan Replacement: 手順 10、 3の画像 1 Acer E5-571-54FL Cooling Fan Replacement: 手順 10、 3の画像 2 Acer E5-571-54FL Cooling Fan Replacement: 手順 10、 3の画像 3
    • Closest to the ribbon cable on the zero insertion force (ZIF) connector is a white locking tab.

    • Carefully lift up on the locking tab with the plastic opening tool to release the ribbon cable. (Picture 2)

    • Remove the ribbon cable from the connector.

  11. Acer E5-571-54FL Cooling Fan Replacement: 手順 11、 3の画像 1 Acer E5-571-54FL Cooling Fan Replacement: 手順 11、 3の画像 2 Acer E5-571-54FL Cooling Fan Replacement: 手順 11、 3の画像 3
    • Closest to the ribbon cable on the ZIF connector is a black locking tab.

    • Carefully lift up on the locking tab with the plastic opening tool to release the ribbon cable. (Picture 2)

    • Remove the ribbon cable from the connector.

  12. Acer E5-571-54FL Cooling Fan Replacement: 手順 12、 3の画像 1 Acer E5-571-54FL Cooling Fan Replacement: 手順 12、 3の画像 2 Acer E5-571-54FL Cooling Fan Replacement: 手順 12、 3の画像 3
    • On each side of the large connector there are two white tabs.

    • Carefully push away from you with the plastic opening tool on each white tab to release the cable. (Picture 2)

    • Remove the ribbon cable from the connector.

  13. Acer E5-571-54FL Cooling Fan Replacement: 手順 13、 3の画像 1 Acer E5-571-54FL Cooling Fan Replacement: 手順 13、 3の画像 2 Acer E5-571-54FL Cooling Fan Replacement: 手順 13、 3の画像 3
    • Once all three ribbon cables are disconnected, lift off the top cover with the keyboard and touchpad.

  14. Acer E5-571-54FL Cooling Fan Replacement, Cooling Fan: 手順 14、 3の画像 1 Acer E5-571-54FL Cooling Fan Replacement, Cooling Fan: 手順 14、 3の画像 2 Acer E5-571-54FL Cooling Fan Replacement, Cooling Fan: 手順 14、 3の画像 3
    • Locate the CPU cooling fan in the upper left corner of the laptop.

    • Using a Phillips #0 screwdriver, remove the two 4.5 mm screws that secure the fan to the case.

  15. Acer E5-571-54FL Cooling Fan Replacement: 手順 15、 3の画像 1 Acer E5-571-54FL Cooling Fan Replacement: 手順 15、 3の画像 2 Acer E5-571-54FL Cooling Fan Replacement: 手順 15、 3の画像 3
    この手順で使用する道具:
    Tweezers
    $4.99
    購入する
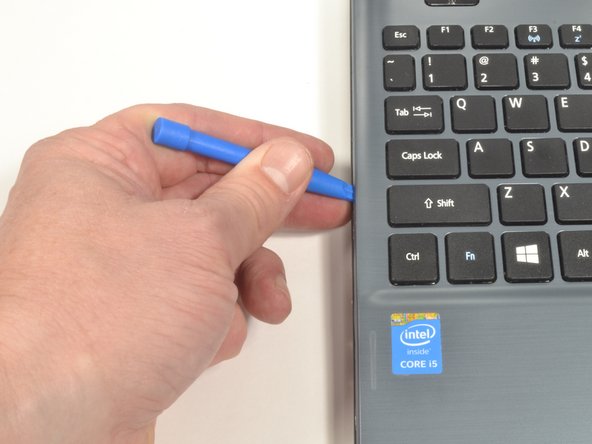
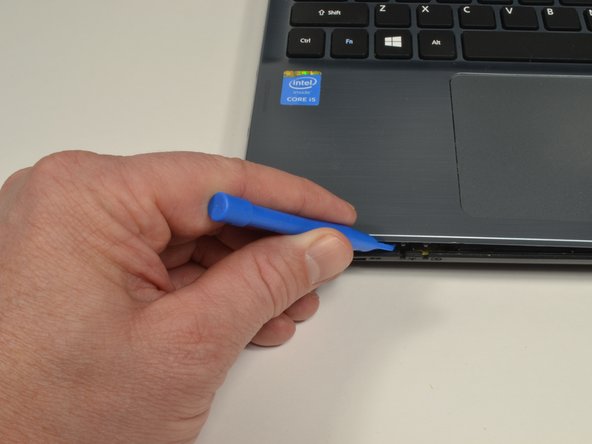
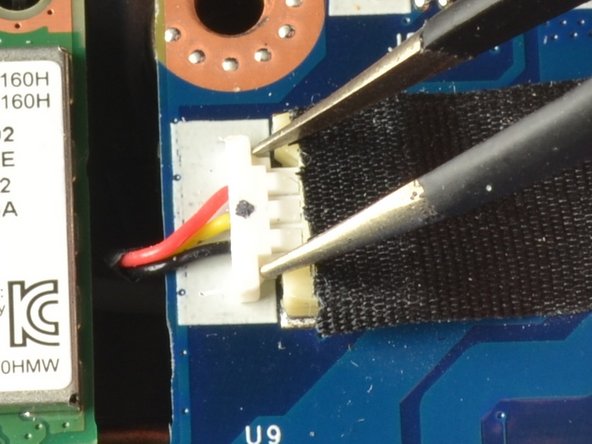
    • Place the tips of the ESD safe pointed tweezers between the plug and the socket of the fan connection.

    • Gently push the tweezers to the left to disconnect the fan plug.

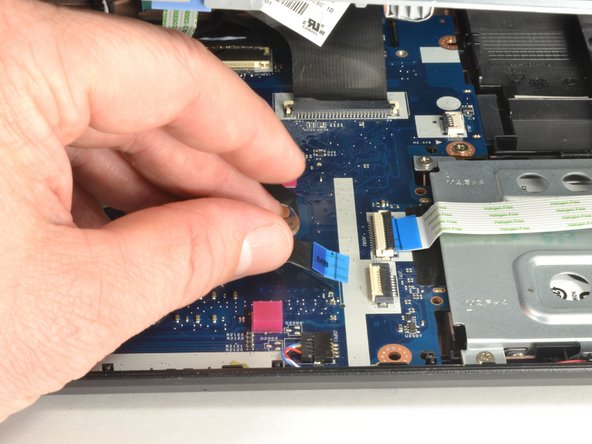
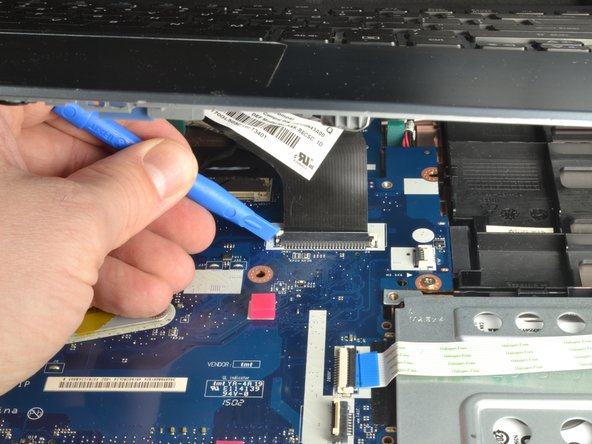
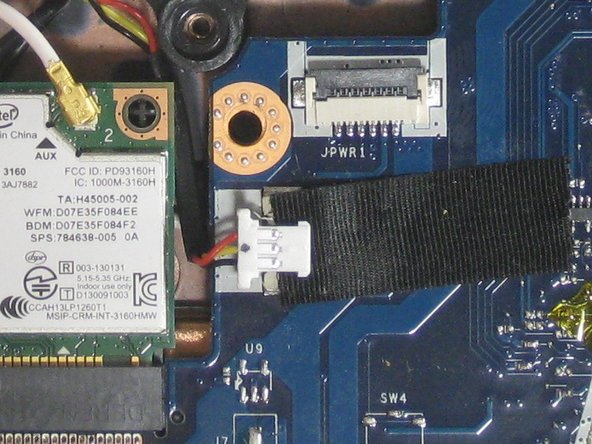
    • Move the fan connector and its wires to free them from the motherboard and the Wi-Fi card.

  16. Acer E5-571-54FL Cooling Fan Replacement: 手順 16、 2の画像 1 Acer E5-571-54FL Cooling Fan Replacement: 手順 16、 2の画像 2
    • Lift the curved end of the fan by about 30 degrees.

    • Use your hand to lift the fan up and to the right until it is clear of the case.

    • If you feel resistance, check if the fan connector and wires are stuck under the motherboard or under the Wi-Fi card. If the connector or wires are stuck, gently free them.

終わりに

To reassemble your device, follow these instructions in reverse order.

作成者

6人の作成者と共同で作成されました。

Aaron Weissman

メンバー登録日: 10/23/17

1,004 ポイント

7のガイドは作成済み

チーム

UMass Dartmouth, Team S3-G8, Bailey Fall 2017 UMass Dartmouth, Team S3-G8, Bailey Fall 2017人のメンバー

UMASSD-BAILEY-F17S3G8

3 メンバー

8のガイドは作成済み

0 件のコメント

コメントを追加

統計データ:

過去 24時間: 3

過去 7 日: 3

過去 30 日: 23

今までの合計 323