メインコンテンツにスキップ

Acer Chromebook CB5-312T-K 8Z9 Battery Replacement

必要な工具と部品

  1. Acer Chromebook CB5-312T-K 8Z9 Battery Replacement, Acer Chromebook CB5-312T-K 8Z9 Back Cover: 手順 1、 2の画像 1 Acer Chromebook CB5-312T-K 8Z9 Battery Replacement, Acer Chromebook CB5-312T-K 8Z9 Back Cover: 手順 1、 2の画像 2
    • First begin by flipping the laptop on its back and having the back cover face you directly.

    • Then unscrew the ten Phillips head screws that hold down the back cover using a Phillips #0 Screw Driver.  

  2. Acer Chromebook CB5-312T-K 8Z9 Battery Replacement: 手順 2、 1の画像 1
    • Using a plastic spudger, open the back cover and remove it from the laptop.

  3. Acer Chromebook CB5-312T-K 8Z9 Battery Replacement, Battery: 手順 3、 3の画像 1 Acer Chromebook CB5-312T-K 8Z9 Battery Replacement, Battery: 手順 3、 3の画像 2 Acer Chromebook CB5-312T-K 8Z9 Battery Replacement, Battery: 手順 3、 3の画像 3
    • look for the battery in the bottom half of the computer

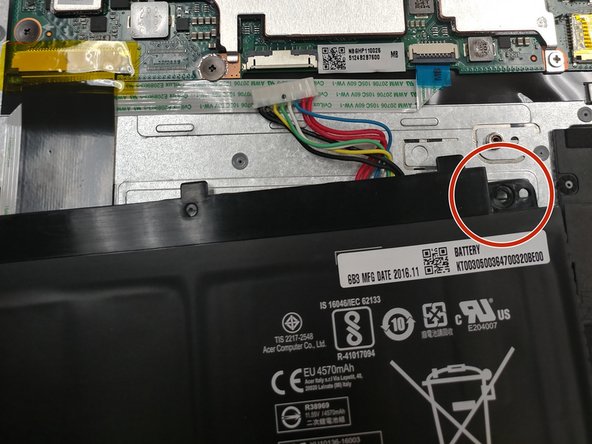
    • Once you have found the battery, look for the screws that secure the battery, in the upper left and right corners.

  4. Acer Chromebook CB5-312T-K 8Z9 Battery Replacement: 手順 4、 3の画像 1 Acer Chromebook CB5-312T-K 8Z9 Battery Replacement: 手順 4、 3の画像 2 Acer Chromebook CB5-312T-K 8Z9 Battery Replacement: 手順 4、 3の画像 3
    • Begin by unscrewing the two Phillips head screws that hold down the battery using a J1 sized screwdriver.

    • Finally remove the battery from the laptop.

終わりに

To reassemble your device, follow these instructions in reverse order.

作成者

3人の作成者と共同で作成されました。

Alonso

メンバー登録日: 09/25/17

224 ポイント

2のガイドは作成済み

チーム

University of North Texas, Team S1-G4, Thompson Fall 2017 University of North Texas, Team S1-G4, Thompson Fall 2017人のメンバー

UNT-THOMPSON-F17S1G4

4 メンバー

10のガイドは作成済み

0 件のコメント

コメントを追加

統計データ:

過去 24時間: 0

過去 7 日: 5

過去 30 日: 14

今までの合計 1,482