メインコンテンツにスキップ

Acer Chromebook C720-2848 Screen Replacement

必要な工具と部品

  1. Acer Chromebook C720-2848  Screen Replacement, Screen: 手順 1、 2の画像 1 Acer Chromebook C720-2848  Screen Replacement, Screen: 手順 1、 2の画像 2
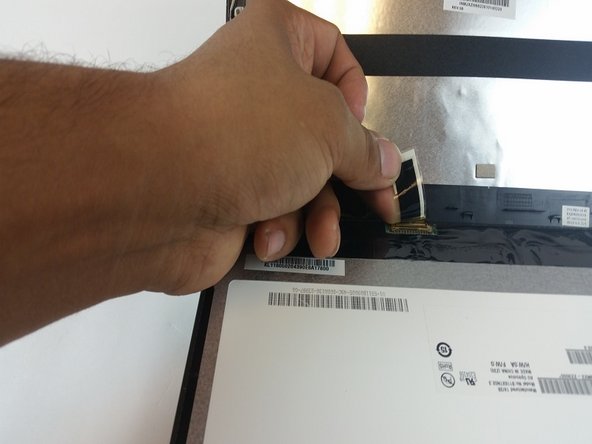
    • Insert a metal spudger around the inner side of the screens plastic perimeter.

    • Move along the perimeter while leveraging to pop the faceplate out like so.

  2. Acer Chromebook C720-2848  Screen Replacement: 手順 2、 2の画像 1 Acer Chromebook C720-2848  Screen Replacement: 手順 2、 2の画像 2
    • Remove the faceplate's bottom hinges that connect to the body of the device with the metal spudger. This will free the plastic perimeter, which may now be removed.

  3. Acer Chromebook C720-2848  Screen Replacement: 手順 3、 1の画像 1
    • Use a Phillips #0 screwdriver to remove the 6 screws in these circled locations.

  4. Acer Chromebook C720-2848  Screen Replacement: 手順 4、 1の画像 1
    • Reposition so the screen will lay flat on the keyboard of the laptop.

  5. Acer Chromebook C720-2848  Screen Replacement: 手順 5、 2の画像 1 Acer Chromebook C720-2848  Screen Replacement: 手順 5、 2の画像 2
    • Locate the bar code adhesion strip at the base of the screen, and then peel it back carefully. Once peeled back the plug-in will come free.

終わりに

To reassemble your device, follow these instructions in reverse order.

4 の人々がこのガイドを完成させました。

作成者

6人の作成者と共同で作成されました。

Cory Provost

メンバー登録日: 09/27/17

212 ポイント

1ガイドが承認済み

チーム

USF Tampa, Team S9-G3, Remmell Fall 2017 USF Tampa, Team S9-G3, Remmell Fall 2017人のメンバー

USFT-REMMELL-F17S9G3

4 メンバー

9のガイドは作成済み

コメント 1 件

In step 2, "the faceplate's bottom hinges" are plastic hinge covers that are (or, at least, were) part of the bezel. You may be able to take the bezel off while they're still attached, or you may have to break the flexing points so that they come off separately. Either way, it doesn't seem to cause a problem.

Thanks, Cory.

Lance ==)--------------

Lance - 返信

コメントを追加

統計データ:

過去 24時間: 2

過去 7 日: 7

過去 30 日: 11

今までの合計 1,710