メインコンテンツにスキップ

Acer Chromebook C720-2420 Keyboard Replacement

必要な工具と部品

  1. Acer Chromebook C720-2420 Keyboard Replacement, Back Cover Replacement: 手順 1、 2の画像 1 Acer Chromebook C720-2420 Keyboard Replacement, Back Cover Replacement: 手順 1、 2の画像 2
    • Place your Chromebook upside down.

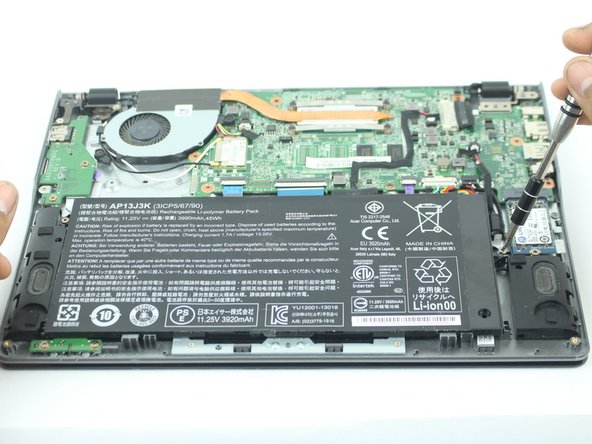
    • Utilizing the precision magnetized Phillips #0 screwdriver, remove all thirteen 6.5 mm Phillips screws that secure the back cover.

    • Before doing anything, make sure your Acer Chromebook is completely turned off.

  2. Acer Chromebook C720-2420 Keyboard Replacement: 手順 2、 1の画像 1
    • Use the plastic opening tool to carefully remove the bottom.

  3. Acer Chromebook C720-2420 Keyboard Replacement, Battery: 手順 3、 2の画像 1 Acer Chromebook C720-2420 Keyboard Replacement, Battery: 手順 3、 2の画像 2
    • Remove the two 3.6 mm Phillips screws holding the battery in place.

  4. Acer Chromebook C720-2420 Keyboard Replacement: 手順 4、 2の画像 1 Acer Chromebook C720-2420 Keyboard Replacement: 手順 4、 2の画像 2
    • Disconnect the connector that attaches the battery to the Chromebook with a pair of pliers or tweezers.

    • Alternatively, you could use your hands, as it may be difficult to unhook the connector.

  5. Acer Chromebook C720-2420 Keyboard Replacement: 手順 5、 1の画像 1
    • Remove the battery.

  6. Acer Chromebook C720-2420 Keyboard Replacement, cooling fan / CPU heat sink assembly: 手順 6、 2の画像 1 Acer Chromebook C720-2420 Keyboard Replacement, cooling fan / CPU heat sink assembly: 手順 6、 2の画像 2
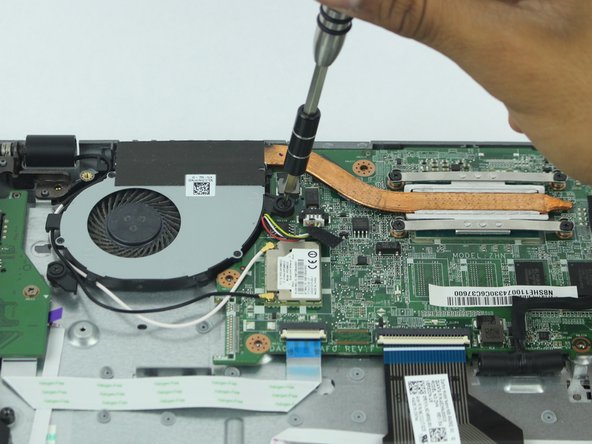
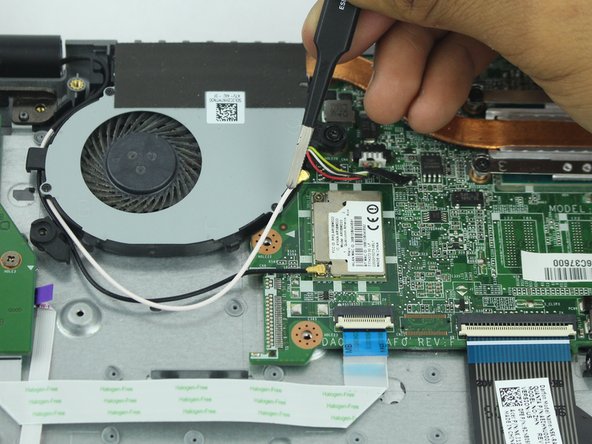
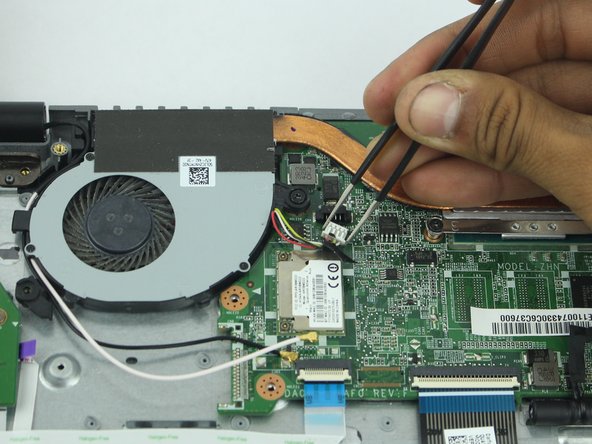
    • Remove the six 4.7 mm Phillips screws that secure the fan.

  7. Acer Chromebook C720-2420 Keyboard Replacement: 手順 7、 3の画像 1 Acer Chromebook C720-2420 Keyboard Replacement: 手順 7、 3の画像 2 Acer Chromebook C720-2420 Keyboard Replacement: 手順 7、 3の画像 3
    • Disconnect these cables from the motherboard using the tweezers.

    • Alternatively, you may use your hands.

    • Pull out the fan.

  8. Acer Chromebook C720-2420 Keyboard Replacement, Memory: 手順 8、 2の画像 1 Acer Chromebook C720-2420 Keyboard Replacement, Memory: 手順 8、 2の画像 2
    • Remove the 3.6 mm Phillips screw that secures the SSD in place.

  9. Acer Chromebook C720-2420 Keyboard Replacement: 手順 9、 2の画像 1 Acer Chromebook C720-2420 Keyboard Replacement: 手順 9、 2の画像 2
    • Pull out the SSD.

  10. Acer Chromebook C720-2420 Keyboard Replacement, Motherboard: 手順 10、 1の画像 1
    • Disconnect the speaker cable from the motherboard.

  11. Acer Chromebook C720-2420 Keyboard Replacement: 手順 11、 1の画像 1
    • Disconnect the display cable from the motherboard.

  12. Acer Chromebook C720-2420 Keyboard Replacement: 手順 12、 1の画像 1
    • Gently pull out the wire for the 2 PIC connectors.

  13. Acer Chromebook C720-2420 Keyboard Replacement: 手順 13、 1の画像 1
    • Remove the two 3.7 mm Phillips screws that hold the motherboard in place.

  14. Acer Chromebook C720-2420 Keyboard Replacement: 手順 14、 1の画像 1
    • Lift up the black tab on the ZIF connector to release the ribbon cable.

    • Carefully remove the ribbon cable.

  15. Acer Chromebook C720-2420 Keyboard Replacement: 手順 15、 1の画像 1
    • Lift up the black tab on the ZIF connector to release the ribbon cable.

    • Gently remove the ribbon cable

  16. Acer Chromebook C720-2420 Keyboard Replacement: 手順 16、 1の画像 1
    • Lift up the black tab on the ZIF connector to release the ribbon cable.

    • Remove the ribbon cable.

  17. Acer Chromebook C720-2420 Keyboard Replacement: 手順 17、 1の画像 1
    • Lift up and remove the motherboard.

  18. Acer Chromebook C720-2420 Keyboard Replacement, Keyboard: 手順 18、 2の画像 1 Acer Chromebook C720-2420 Keyboard Replacement, Keyboard: 手順 18、 2の画像 2
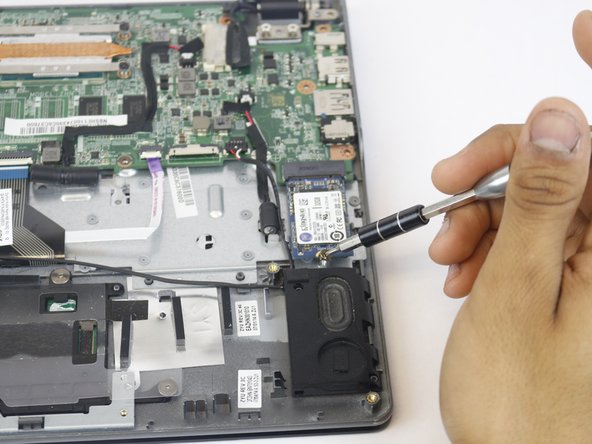
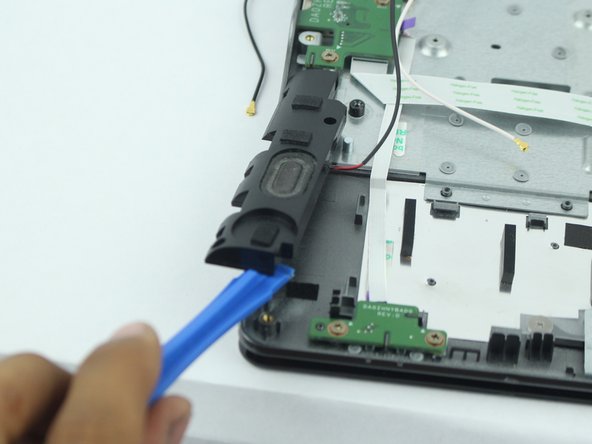
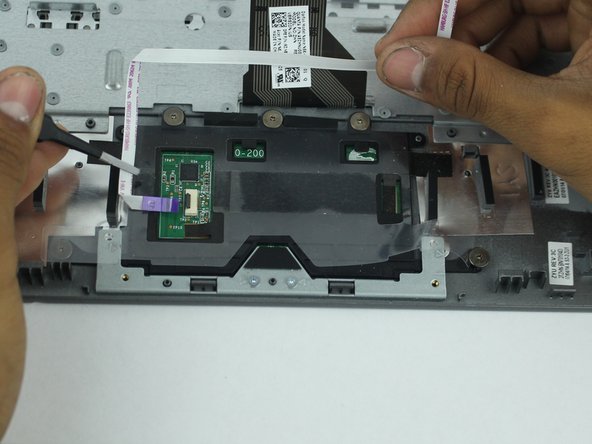
    • Remove the speakers located on both left and right bottom corners of the Chromebook with a plastic opening tool.

  19. Acer Chromebook C720-2420 Keyboard Replacement: 手順 19、 2の画像 1 Acer Chromebook C720-2420 Keyboard Replacement: 手順 19、 2の画像 2
    • Remove the two 3.6 mm Phillips screws holding the USB and SD card port with a PH0 screwdriver.

    • Lift out and remove the port.

  20. Acer Chromebook C720-2420 Keyboard Replacement: 手順 20、 3の画像 1 Acer Chromebook C720-2420 Keyboard Replacement: 手順 20、 3の画像 2 Acer Chromebook C720-2420 Keyboard Replacement: 手順 20、 3の画像 3
    • Remove the two 3.6 mm Phillips screws holding the LED sensors.

    • Remove the LED Sensors.

  21. Acer Chromebook C720-2420 Keyboard Replacement: 手順 21、 2の画像 1 Acer Chromebook C720-2420 Keyboard Replacement: 手順 21、 2の画像 2
    • Flip up the black tab on the ZIF connector to release the ribbon cable.

    • Remove the ribbon cable.

    • This ribbon is fragile, do not use excessive force.

  22. Acer Chromebook C720-2420 Keyboard Replacement: 手順 22、 1の画像 1
    • Leave only the single ribbon cable.

終わりに

To reassemble your device, follow these instructions in reverse order.

4 の人々がこのガイドを完成させました。

作成者

4人の作成者と共同で作成されました。

Jessica Beckford

メンバー登録日: 02/12/18

527 ポイント

4のガイドは作成済み

チーム

USF Tampa, Team S15-G4, Boczar Spring 2018 USF Tampa, Team S15-G4, Boczar Spring 2018人のメンバー

USFT-BOCZAR-S18S15G4

4 メンバー

12のガイドは作成済み

2 件のコメント

Huh? This doesn’t tell how to replace the keyboard.

Dave Burton - 返信

After the last step unscrew the 3 screws at the top of the device holding the display assembly to the top portion, then bend those up and you can pull the whole cover with the keyboard and touchpad off and slide the new one in.

Jacob Pearlson -

コメントを追加

統計データ:

過去 24時間: 0

過去 7 日: 10

過去 30 日: 21

今までの合計 5,196