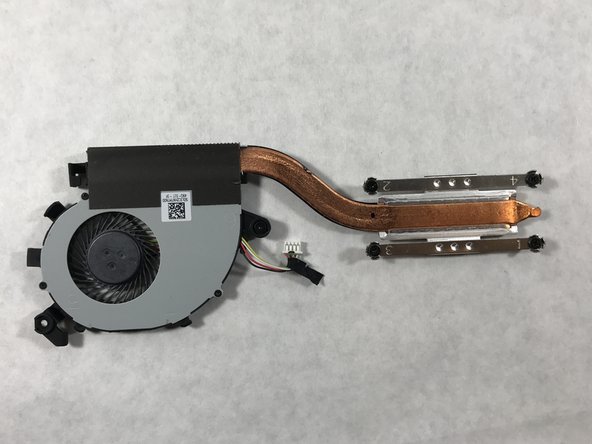
メインコンテンツにスキップ

Acer Chromebook C720-2103 Fan Replacement

必要な工具と部品

  1. Acer Chromebook C720-2103 Fan Replacement, Battery: 手順 1、 2の画像 1 Acer Chromebook C720-2103 Fan Replacement, Battery: 手順 1、 2の画像 2
    • Shut the device off.

    • Turn the device over so the bottom is facing up.

    • Remove all thirteen 6mm screws using a Phillips #0 screwdriver.

    • Remember to keep screws separated by step and their locations in the device. This will help prevent confusion during reassembly.

    • Removing the battery is necessary to prevent electric shock during part replacement.

  2. Acer Chromebook C720-2103 Fan Replacement: 手順 2、 1の画像 1
    • Wedge a plastic opening tool between the back casing and the rest of the device.

    • Apply pressure up and down carefully, until backing pops up. Repeat this process in multiple spots if needed.

    • It is easiest to start at the back of the device, between the hinges of the screen.

    • Do not apply too much force. This will crack the plastic.

  3. Acer Chromebook C720-2103 Fan Replacement: 手順 3、 1の画像 1
    • Remove the three 6mm screws indicated by the red circles with a Phillips #0 screwdriver.

  4. Acer Chromebook C720-2103 Fan Replacement: 手順 4、 2の画像 1 Acer Chromebook C720-2103 Fan Replacement: 手順 4、 2の画像 2
    • Pull the rainbow cable connector out of the white terminal by wiggling it gently from side to side with your fingers.

    • Be careful when removing the cable. Too much force can damage the motherboard or the cable connector.

  5. Acer Chromebook C720-2103 Fan Replacement: 手順 5、 2の画像 1 Acer Chromebook C720-2103 Fan Replacement: 手順 5、 2の画像 2
    • Lift the battery straight up and out of the device with your hands. Take care not to knock the battery against another component.

  6. Acer Chromebook C720-2103 Fan Replacement, Fan: 手順 6、 2の画像 1 Acer Chromebook C720-2103 Fan Replacement, Fan: 手順 6、 2の画像 2
    • Remove all four 6mm screws attaching the fan to the motherboard with a Phillips #0 screwdriver.

    • Remove the two 6mm screws attaching the fan to the device base with the Phillips #0 screwdriver.

    • These screws are permanently set into the fan. Once unscrewed from the base, the two screws will still be attached to the fan.

  7. Acer Chromebook C720-2103 Fan Replacement: 手順 7、 2の画像 1 Acer Chromebook C720-2103 Fan Replacement: 手順 7、 2の画像 2
    • Unsnap the two coaxial connectors from the motherboard.

    • To avoid damaging the wires, wedge a spudger under their rounded, metal ends and gently pop them up from the motherboard one at a time.

    • Unhook the coaxial wires from the side of the fan by gently pulling them downward and away from the hooks.

    • During reassembly, these two wires can be surprisingly difficult to reconnect to the motherboard. The easiest method is to hold the wires in place over their terminals and click the metal bases down with the tip of a spudger.

  8. Acer Chromebook C720-2103 Fan Replacement: 手順 8、 2の画像 1 Acer Chromebook C720-2103 Fan Replacement: 手順 8、 2の画像 2
    • Peel up the tape attaching the rainbow connector wire to the motherboard, but leave the tape attached to the wire itself.

    • Removing the tape from the wire can damage the wire.

    • Pull the rainbow cable connector out of the black terminal by wiggling it gently from side to side with your fingers.

  9. Acer Chromebook C720-2103 Fan Replacement: 手順 9、 2の画像 1 Acer Chromebook C720-2103 Fan Replacement: 手順 9、 2の画像 2
    • Lift the fan component up and out of device with your hands. Take care not to knock the fan against the motherboard.

終わりに

To reassemble your device, follow these instructions in reverse order.

ある他の人がこのガイドを完成しました。

作成者

4人の作成者と共同で作成されました。

Matthew Holt

メンバー登録日: 10/17/17

633 ポイント

5のガイドは作成済み

チーム

UMass Dartmouth, Team S66-G3, Rockett Fall 2017 UMass Dartmouth, Team S66-G3, Rockett Fall 2017人のメンバー

UMASSD-ROCKETT-F17S66G3

3 メンバー

10のガイドは作成済み

0 件のコメント

コメントを追加

統計データ:

過去 24時間: 0

過去 7 日: 1

過去 30 日: 1

今までの合計 507