メインコンテンツにスキップ

Acer Chromebook C710-2833 Hard Drive Replacement

必要な工具と部品

  1. Acer Chromebook C710-2833 Hard Drive Replacement, Hard Drive: 手順 1、 1の画像 1
    • Flip your Chromebook over so the bottom is facing up.

  2. Acer Chromebook C710-2833 Hard Drive Replacement: 手順 2、 2の画像 1 Acer Chromebook C710-2833 Hard Drive Replacement: 手順 2、 2の画像 2
    • Locate the 6 mm Phillips #00 screw that holds the back cover together. Use your driver with the PH00 bit attached to unscrew it.

    • Once completely unscrewed, carefully lift the cover off.

    • Place the screw and cover safely to the side for now.

  3. Acer Chromebook C710-2833 Hard Drive Replacement: 手順 3、 2の画像 1 Acer Chromebook C710-2833 Hard Drive Replacement: 手順 3、 2の画像 2
    この手順で使用する道具:
    Anti-Static Wrist Strap
    $7.95
    購入する
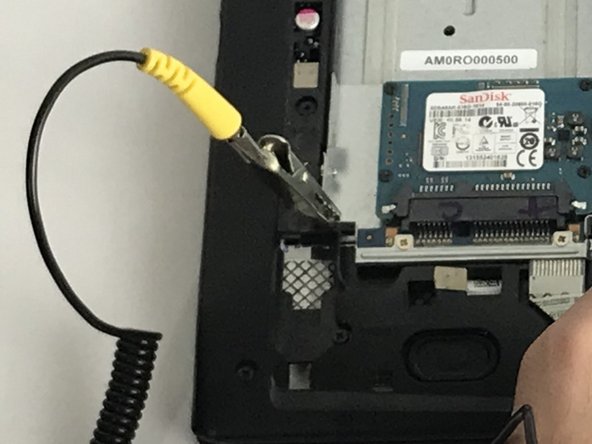
    • Now take your anti-static wrist strap and place it tightly on your wrist.

    • Attach the alligator clamp of the wrist strap to something that will ground yourself to avoid possible electric zaps.

    • The location chosen in the picture is recommended.

  4. Acer Chromebook C710-2833 Hard Drive Replacement: 手順 4、 1の画像 1
    • Locate the hard drive.

    • Locate the four 3 mm Phillips #00 screws on each corner of the hard drive.

    • Take your driver with the PH00 bit attached and unscrew all four screws.

    • Place the screws off to the side for now.

  5. Acer Chromebook C710-2833 Hard Drive Replacement: 手順 5、 2の画像 1 Acer Chromebook C710-2833 Hard Drive Replacement: 手順 5、 2の画像 2
    • Once all the screws are out, gently pull the hard drive out as pictured.

終わりに

To reassemble your device, follow these instructions in reverse order.

ある他の人がこのガイドを完成しました。

作成者

4人の作成者と共同で作成されました。

Nicholas Latorre

メンバー登録日: 09/28/17

558 ポイント

5のガイドは作成済み

チーム

USF Tampa, Team S1-G6, Nance Fall 2017 USF Tampa, Team S1-G6, Nance Fall 2017人のメンバー

USFT-NANCE-F17S1G6

4 メンバー

10のガイドは作成済み

0 件のコメント

コメントを追加

統計データ:

過去 24時間: 1

過去 7 日: 3

過去 30 日: 9

今までの合計 1,195