はじめに
Wondering what is going on with your hard drive? Are you confused on how to change your laptops hard drive? This guide is here to teach you exactly how to carefully replace your hard drive.
必要な工具と部品
-
-
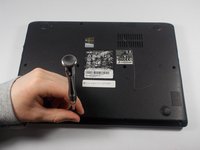
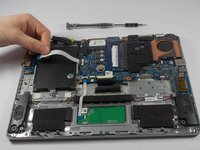
Start the process of removing the bottom cover of the laptop by unscrewing the 8mm screws in the top right and left corners.
-
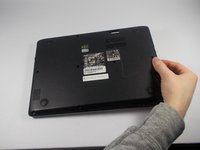
Remove the remaining 9 visible screws, which are 5mm in length.
-
-
-
-
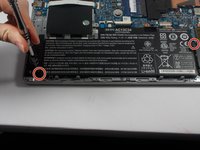
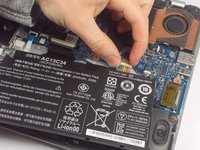
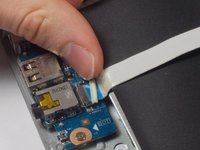
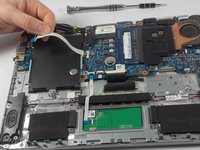
Use your fingernail to remove the plastic white piece that holds the ribbon cable in place. You can remove the cable from either side of the hard drive, but the left side is recommended.
-
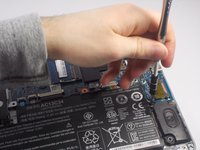
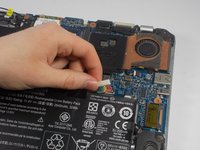
After removing the plastic piece that holds the cable in place, you can lift the ribbon cable up high enough to remove the hard drive.
-


To reassemble your device, follow these instructions in reverse order.
To reassemble your device, follow these instructions in reverse order.
6 の人々がこのガイドを完成させました。
チーム

UMass Dartmouth, Team 5-1, Landers Spring 2016 UMass Dartmouth, Team 5-1, Landers Spring 2016人のメンバー
UMASSD-LANDERS-S16S5G1
3 メンバー
10のガイドは作成済み
3件のガイドコメント
Man, I know you posted this forever ago, but do you know the size of the screws holding the hard drive in place? I need to replace them.
Even if you never get back to me, thanks for this guide, it was super helpful!
Step 9 looked different in my case; the colors were just swapped on the motherboard’s cable-connector and I just had to flip upside a tiny black ‘cable-holder/presser’ from the side of the harddisk. @ Colin Jaffe: the size of the screws holding the harddisk-caddy to motherboard are PH1.5 cross, 2mm thick and only 3mm length. BTW: I had only 2 screws attaching the caddy around the harddisk itself (‘diagonally’ positioned) and they were standard-size; 3mm thick, 4mm long, also PH1.5 screwdriver.
Awesomely helpful