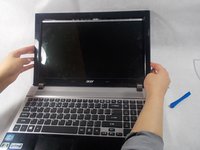
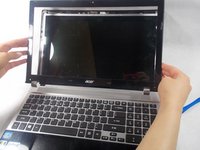
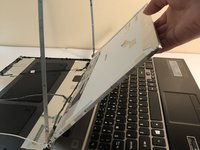
メインコンテンツにスキップ

Acer Aspire V3-571G Screen Replacement

必要な工具と部品

  1. Acer Aspire V3-571G Screen Replacement, Battery: 手順 1、 2の画像 1 Acer Aspire V3-571G Screen Replacement, Battery: 手順 1、 2の画像 2
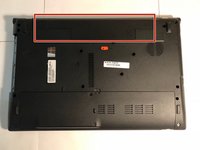
    • Turn the laptop upside down to locate the battery at the top of the laptop.

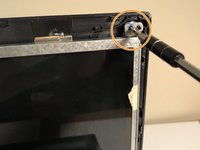
    • Use a screwdriver to shift the orange lever to the right.
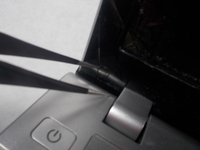
  2. Acer Aspire V3-571G Screen Replacement: 手順 2、 1の画像 1
    • While holding the lever to the right, use your fingers to lift the battery up and out of the compartment.

  3. Acer Aspire V3-571G Screen Replacement, Screen: 手順 3、 2の画像 1 Acer Aspire V3-571G Screen Replacement, Screen: 手順 3、 2の画像 2
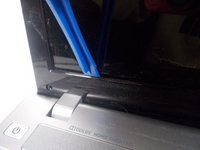
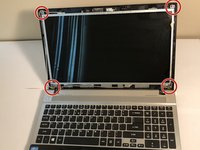
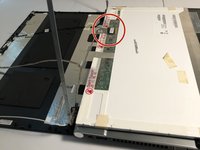
    • Use a pair of tweezers to carefully remove the two small pieces of plastic at the bottom of the screen.

  4. Acer Aspire V3-571G Screen Replacement: 手順 4、 1の画像 1
    • Use a Phillips #0 screwdriver to remove both screws.

  5. Acer Aspire V3-571G Screen Replacement: 手順 5、 3の画像 1 Acer Aspire V3-571G Screen Replacement: 手順 5、 3の画像 2 Acer Aspire V3-571G Screen Replacement: 手順 5、 3の画像 3
    • Use an opening tool to carefully loosen the casing from the screen.

    • After the casing has been loosened, gently remove it with your hands.

  6. Acer Aspire V3-571G Screen Replacement: 手順 6、 2の画像 1 Acer Aspire V3-571G Screen Replacement: 手順 6、 2の画像 2
    • Remove four screws from the screen using a Phillips #0 screwdriver.

    • Potential for device damage: When you remove the screws, the back of the screen will fall as it is no longer supported. As you remove the last screw, carefully rest it on your work station to prevent damage.

  7. Acer Aspire V3-571G Screen Replacement: 手順 7、 2の画像 1 Acer Aspire V3-571G Screen Replacement: 手順 7、 2の画像 2
    • Use the Phillips #0 screwdriver to remove the three screws on each side of the screen.

    • Potential for device damage: Hold the screen when removing the last screw so it does not fall and damage the device.

  8. Acer Aspire V3-571G Screen Replacement: 手順 8、 2の画像 1 Acer Aspire V3-571G Screen Replacement: 手順 8、 2の画像 2
    • Use an opening tool to carefully pull the tape up and slide the connection out of place.

    • The screen is now completely detached.

終わりに

To reassemble your device, follow these instructions in reverse order.

5 の人々がこのガイドを完成させました。

作成者

5人の作成者と共同で作成されました。

Christopher Wilson

メンバー登録日: 03/19/18

435 ポイント

2のガイドは作成済み

チーム

UMass Dartmouth, Team S4-G6, Covino Spring 2018 UMass Dartmouth, Team S4-G6, Covino Spring 2018人のメンバー

UMASSD-COVINO-S18S4G6

3 メンバー

5のガイドは作成済み

0 件のコメント

コメントを追加

統計データ:

過去 24時間: 0

過去 7 日: 3

過去 30 日: 18

今までの合計 2,579