はじめに
This guide teaches you how to replace the hard drive in an Acer Aspire M5-581T-6807 Ultrabook.
必要な工具と部品
-
-
Open the lid othe the netbook. Use the Jimmy from the upper left corner of the keyboard. Put it between the keyboard and th casing and move it to the right. It might help to use a metal spudger to push in the pins holding the keyboard in place.
-
Then move down along the sides where there is one pin on each side. After that twist the keyboard towards you.
-
-
-
-
Open the lid othe the netbook. Use the Jimmy from the upper left corner of the keyboard. Put it between the keyboard and th casing and move it to the right. It might help to use a metal spudger to push in the pins holding the keyboard in place.
-
Then move down along the sides where there is one pin on each side. After that twist the keyboard towards you.
-
-
-
Now open the brown connector so the flat cable is loose. Then you can remove the keyboard.
Lets see, the most delicate operation of all- flexible flat cable removal- and you say open it till loose. How ? Is the type of retainer that moves backwards, flips up or has side clips. Guess wrong and you are buying a new motherboard. Of course that could be the point of the ommission
-
-
-
Remove the 12 screws securing the palmrest.
-
Slowly lift the palmrest up at the front, and stop when you feel the cable slack run out.
-
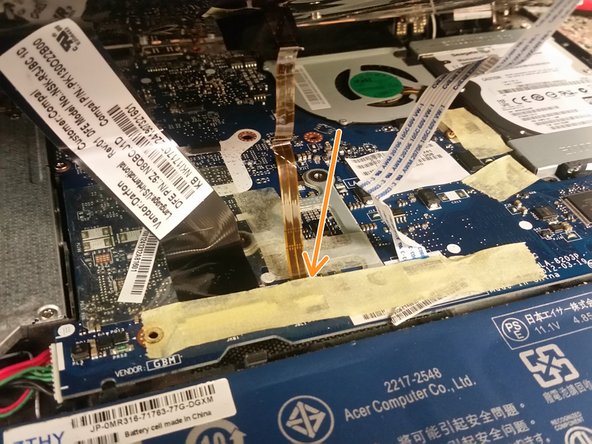
Remove the tape covering the connectors.
-
-
-
Unlock the three connectors, and remove their cables.
-
Continue to lift the palmrest upwards in the front, to the point that it hinges over onto the laptop screen, so as not to pull on the remaining cable on the palmrest. You don't need to disconnect this one.
Be careful of the smaller middle cable connector. In my case the top moveable white retianer of this small cable was not attached to motherboard portion and I had a very hard time getting it back in the right way round. Perhaps take a picture before detaching it and use a long thin tweezer to help inserting this little tab again once the cable is inserted.
As well, retain the tape. In my opinion is is vet important stability of all three cables to put it back after. Make sure the cables are in as deep as the can go and attach the tape as you work from left to right (broad cable first) - this adds stability as you work.
Also, when you have reatattched these afterwards, boot up the computer before snapping it all together and inserting all the back screws. Test the keyboard and trackpad to ensure the cables are in properly.
-
-
-
Remove the four short screws securing the hard drive caddy to the base.
-
Remove the screws securing the caddy to the hard drive. You're done!
-


To reassemble your device, follow these instructions in reverse order.
To reassemble your device, follow these instructions in reverse order.
5 の人々がこのガイドを完成させました。
