メインコンテンツにスキップ

Acer Aspire Switch 10 SW5-011-18R3 Motherboard Replacement

必要な工具と部品

  1. Acer Aspire Switch 10 SW5-011-18R3 Motherboard Replacement, Motherboard: 手順 1、 3の画像 1 Acer Aspire Switch 10 SW5-011-18R3 Motherboard Replacement, Motherboard: 手順 1、 3の画像 2 Acer Aspire Switch 10 SW5-011-18R3 Motherboard Replacement, Motherboard: 手順 1、 3の画像 3
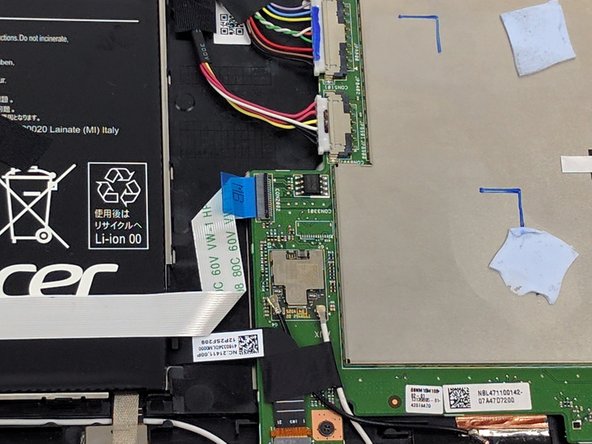
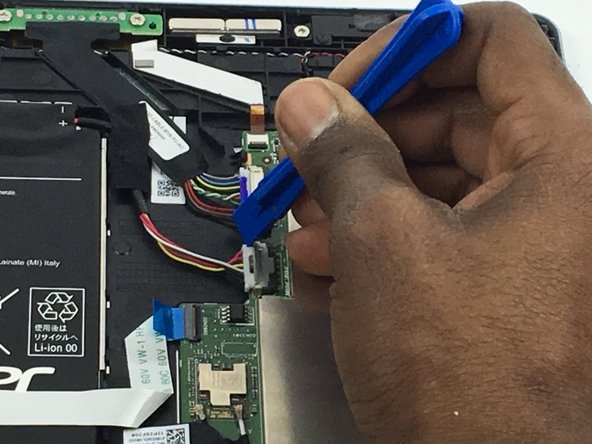
    • Wedge your plastic opening tool into the crevice between the volume button and casing to create space.

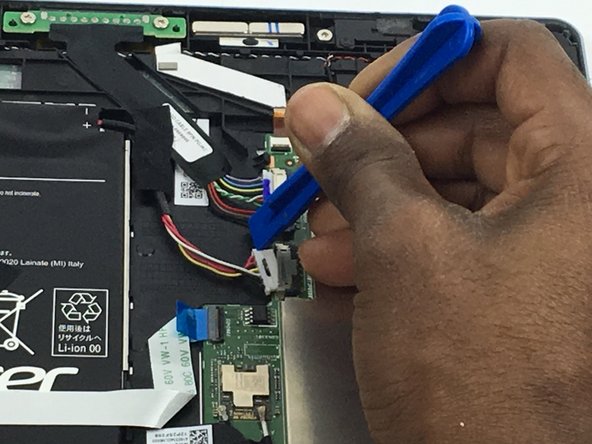
    • Slide the plastic opening tool along this crevice to pry apart the backing of the tablet.

  2. Acer Aspire Switch 10 SW5-011-18R3 Motherboard Replacement: 手順 2、 3の画像 1 Acer Aspire Switch 10 SW5-011-18R3 Motherboard Replacement: 手順 2、 3の画像 2 Acer Aspire Switch 10 SW5-011-18R3 Motherboard Replacement: 手順 2、 3の画像 3
    • There are four zero insertion force connectors that need to be removed.

    • Use your plastic opening tool to flip up the black clips that secure the ribbon cables to the motherboard.

    • Once the clips are flipped up, the ribbon cables will be safe to remove.

  3. Acer Aspire Switch 10 SW5-011-18R3 Motherboard Replacement: 手順 3、 3の画像 1 Acer Aspire Switch 10 SW5-011-18R3 Motherboard Replacement: 手順 3、 3の画像 2 Acer Aspire Switch 10 SW5-011-18R3 Motherboard Replacement: 手順 3、 3の画像 3
    • Use your plastic opening tool to pry up and lift the antenna cables from the motherboard.

    • The connectors are delicate so use a gentle touch when prying them.

  4. Acer Aspire Switch 10 SW5-011-18R3 Motherboard Replacement: 手順 4、 3の画像 1 Acer Aspire Switch 10 SW5-011-18R3 Motherboard Replacement: 手順 4、 3の画像 2 Acer Aspire Switch 10 SW5-011-18R3 Motherboard Replacement: 手順 4、 3の画像 3
    • To remove the four bundle cable connectors, push against the edges of the connector to loosen it up.

    • Pull the cable away from the connector.

  5. Acer Aspire Switch 10 SW5-011-18R3 Motherboard Replacement: 手順 5、 2の画像 1 Acer Aspire Switch 10 SW5-011-18R3 Motherboard Replacement: 手順 5、 2の画像 2
    • Use your screwdriver with the Phillips PH000 attachment to remove the three 4mm screws.

    • Remove the motherboard from the tablet.

終わりに

To reassemble your device, follow these instructions in reverse order.

9 の人々がこのガイドを完成させました。

作成者

2人の作成者と共同で作成されました。

Max Francois

メンバー登録日: 09/28/16

684 ポイント

2のガイドは作成済み

チーム

USF Tampa, Team 3-4, Passmore Fall 2016 USF Tampa, Team 3-4, Passmore Fall 2016人のメンバー

USFT-PASSMORE-F16S3G4

4 メンバー

4のガイドは作成済み

0 件のコメント

コメントを追加

統計データ:

過去 24時間: 0

過去 7 日: 7

過去 30 日: 24

今までの合計 7,356