メインコンテンツにスキップ

Acer Aspire R7 AC Socket Replacement

必要な工具と部品

  1. Acer Aspire R7 AC Socket Replacement, Cover: 手順 1、 1の画像 1
    • Shut down the laptop and disconnect the power cord.

    • Failing to disconnect or shut down the laptop could result in damage to the laptop or a shock hazard.

    • Turn the laptop over.

  2. Acer Aspire R7 AC Socket Replacement: 手順 2、 3の画像 1 Acer Aspire R7 AC Socket Replacement: 手順 2、 3の画像 2 Acer Aspire R7 AC Socket Replacement: 手順 2、 3の画像 3
    • Remove seven 10 mm T7 screws.

    • Remove four 6 mm T7 screws.

    • Use the blue plastic opening tool to carefully remove both rubber pads which cover the four remaining screws.

    • Remove the remaining four 10 mm T7 screws.

  3. Acer Aspire R7 AC Socket Replacement: 手順 3、 1の画像 1
    • Carefully lift the cover upwards.

    • If the cover seems stuck, use a spudger tool to pry the sides.

  4. Acer Aspire R7 AC Socket Replacement, AC Socket: 手順 4、 3の画像 1 Acer Aspire R7 AC Socket Replacement, AC Socket: 手順 4、 3の画像 2 Acer Aspire R7 AC Socket Replacement, AC Socket: 手順 4、 3の画像 3
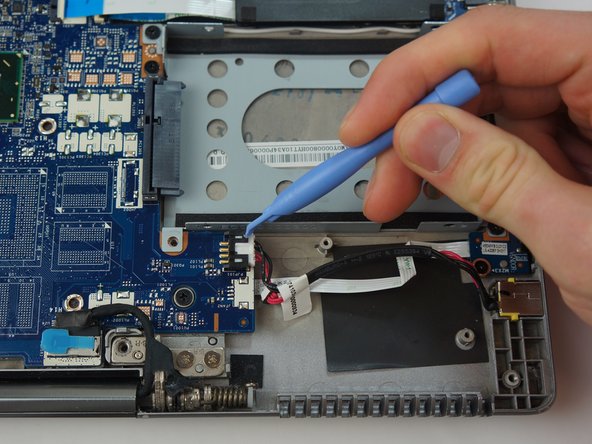
    • Locate the AC Socket ribbon connector

    • Loosen the ribbon connector using the plastic opening tool

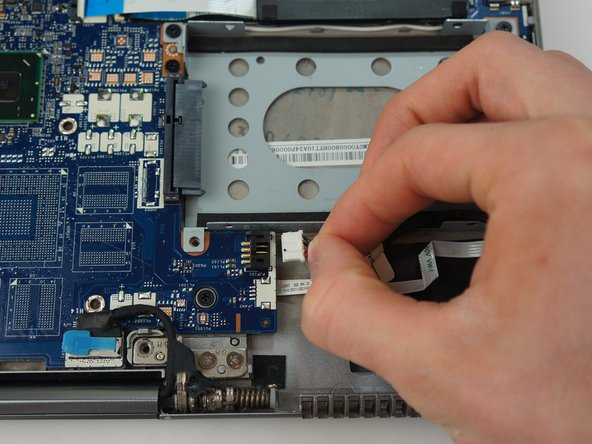
    • Pull the ribbon connector away from the motherboard

  5. Acer Aspire R7 AC Socket Replacement: 手順 5、 2の画像 1 Acer Aspire R7 AC Socket Replacement: 手順 5、 2の画像 2
    • Use the plastic opening tool to pry up on the yellow tabs holding the Socket in place

    • There is two sided tape holding this component to the case

    • Once the tape on the Socket is loose, pull up and away from the case to remove it.

終わりに

To reassemble your device, follow these instructions in reverse order.

ある他の人がこのガイドを完成しました。

作成者

2人の作成者と共同で作成されました。

Andrew Rodiek

メンバー登録日: 01/13/15

601 ポイント

4のガイドは作成済み

チーム

USF Tampa, Team 3-4, Hickman Winter 2015 USF Tampa, Team 3-4, Hickman Winter 2015人のメンバー

USFT-HICKMAN-W15S3G4

4 メンバー

7のガイドは作成済み

0 件のコメント

コメントを追加

統計データ:

過去 24時間: 0

過去 7 日: 1

過去 30 日: 2

今までの合計 1,398