はじめに
The hard drive in your Acer Aspire R5-571T-57Z0 is responsible for the long-term storage on your device. It will store all of your files along with essential applications and processes. Serious problems with your hard drive will make your computer inoperative until it is replaced.
If your files are not being properly stored, or your computer warns that it cannot recognize your hard drive, you will likely have to replace the hard drive. There is also a possibility that your hard drive may simply be filled. In that case, try and delete unnecessary files that are stored on the hard drive. Consult our troubleshooting guide to confirm these issues and determine if your hard drive should be replaced.
This guide will provide you with instructions to replace your hard drive. Before starting this process, make sure to completely shut down your device and disconnect any external devices.
必要な工具と部品
-
-
Remove twelve 4.0 mm screws from the back of the laptop using a Phillips #00 screwdriver.
-
-
-
-
Remove the three 4.0 mm screws from the battery using a Phillips #00 screwdriver.
-
Unplug the cable connected to the RAM.
-
Carefully remove the battery.
-
-
-
Lift the hard drive either by hand or with a spudger.
-
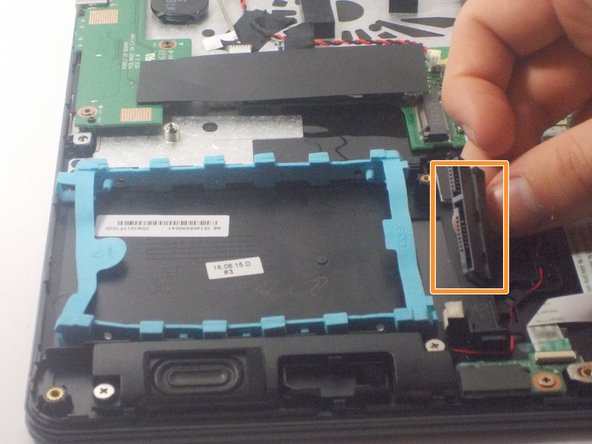
Unplug the connector cable to remove the hard drive from the laptop.
-


To reassemble your device, follow these instructions in reverse order.
To reassemble your device, follow these instructions in reverse order.

チーム

UMass Dartmouth, Team 1-2, Botvin Spring 2022 UMass Dartmouth, Team 1-2, Botvin Spring 2022人のメンバー
UMASSD-BOTVIN-S22S1G2
3 メンバー
5のガイドは作成済み