メインコンテンツにスキップ

Acer Aspire R11 R3-131T-C1Z5 Motherboard Replacement

必要な工具と部品

  1. Acer Aspire R11 R3-131T-C1Z5 Motherboard Replacement, Battery: 手順 1、 2の画像 1 Acer Aspire R11 R3-131T-C1Z5 Motherboard Replacement, Battery: 手順 1、 2の画像 2
    • Flip the laptop on to its front, so that the back is facing up

    • Unscrew the twelve 19.05 mm PH#0 screws.

  2. Acer Aspire R11 R3-131T-C1Z5 Motherboard Replacement: 手順 2、 2の画像 1 Acer Aspire R11 R3-131T-C1Z5 Motherboard Replacement: 手順 2、 2の画像 2
    • At the left front corner of the laptop, under the intel sticker, press the sharp end of a metal spudger between the keyboard and the back cover to pry it apart.

  3. Acer Aspire R11 R3-131T-C1Z5 Motherboard Replacement: 手順 3、 1の画像 1
    この手順で使用する道具:
    Anti-Static Wrist Strap
    $7.95
    購入する
    • Connect the clip of an anti-static wrist strap to any piece of metal on the computer.

    • It is important to ground yourself to avoid static.

  4. Acer Aspire R11 R3-131T-C1Z5 Motherboard Replacement: 手順 4、 2の画像 1 Acer Aspire R11 R3-131T-C1Z5 Motherboard Replacement: 手順 4、 2の画像 2
    • Locate the large black rectangle at the bottom . This is your battery.

    • If you see that your battery is oozing or bulging, step away from the device.

    • Remove the black electric tape that is on the rainbow colored cable at the top of the battery.

    • Gently pull on the cable to disconnect.

  5. Acer Aspire R11 R3-131T-C1Z5 Motherboard Replacement: 手順 5、 3の画像 1 Acer Aspire R11 R3-131T-C1Z5 Motherboard Replacement: 手順 5、 3の画像 2 Acer Aspire R11 R3-131T-C1Z5 Motherboard Replacement: 手順 5、 3の画像 3
    • Remove the two 12.7 mm PH#0 screws. One of these screws is located on the top of the left side of the battery and the other is located in the top of the right side of the battery.

    • Remove the battery

  6. Acer Aspire R11 R3-131T-C1Z5 Motherboard Replacement, Motherboard: 手順 6、 1の画像 1
    • Locate the blue circuit board. This can be identified by locating the two USB ports.

  7. Acer Aspire R11 R3-131T-C1Z5 Motherboard Replacement: 手順 7、 1の画像 1
    • Remove the four 12.7 mm PH#0 screws that are surrounded by a copper ring.

  8. Acer Aspire R11 R3-131T-C1Z5 Motherboard Replacement: 手順 8、 3の画像 1 Acer Aspire R11 R3-131T-C1Z5 Motherboard Replacement: 手順 8、 3の画像 2 Acer Aspire R11 R3-131T-C1Z5 Motherboard Replacement: 手順 8、 3の画像 3
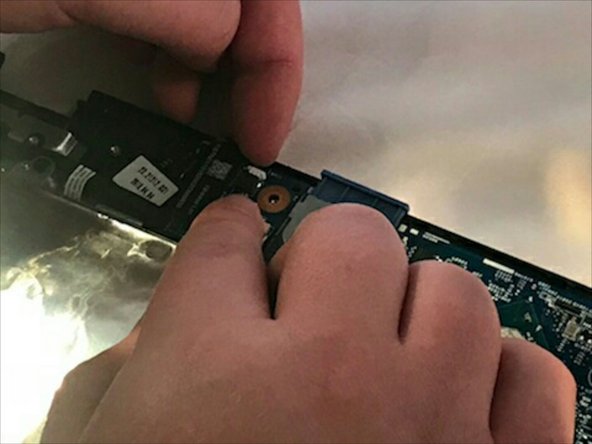
    • Unclip and remove the three ribbon cables. The ribbon cables clip in with a white clip.

    • Disconnect the three wires from the blue circuit board.

  9. Acer Aspire R11 R3-131T-C1Z5 Motherboard Replacement: 手順 9、 1の画像 1
    • Remove the blue circuit board.

終わりに

To reassemble your device, follow these instructions in reverse order.

2 の人々がこのガイドを完成させました。

作成者

5人の作成者と共同で作成されました。

Davyd Goff

メンバー登録日: 09/27/17

464 ポイント

4のガイドは作成済み

チーム

0 件のコメント

コメントを追加

統計データ:

過去 24時間: 3

過去 7 日: 5

過去 30 日: 13

今までの合計 3,991