はじめに
Welcome to the Acer Aspire One Cloudbook AO1-132-C3T3 Motherboard Replacement Guide. In this comprehensive tutorial, we will walk you through the process of replacing the motherboard. The purpose of this guide is to assist you in replacing the motherboard . Whether you're experiencing hardware malfunctions or seeking an upgrade, this guide will provide you with step-by-step instructions to accomplish this task effectively. The motherboard is a crucial component of your laptop, serving as the main circuit board that houses the CPU, RAM, and other essential hardware components. It facilitates communication between these components and ensures the proper functioning of your device. Symptoms indicating a faulty motherboard may include:
- Failure to power on
- Random shutdowns or freezes
- Unresponsive USB ports
- Display issues
Tips and Warnings:
- Exercise caution when handling electronic components, and use ESD-safe tools to prevent damage from static electricity.
- Disconnect the power source and remove the battery before performing any repairs to avoid electrical hazards.
- Ensure you have backed up important data from your hard drive before beginning the replacement process.
- Properly dispose of the old motherboard and other electronic waste according to local regulations.
By following this guide diligently and adhering to the safety precautions outlined, you can successfully replace the motherboard of your Acer Aspire One Cloudbook AO1-132-C3T3 and restore its functionality. Let's get started!
必要な工具と部品
-
-
-
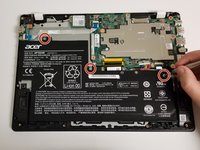
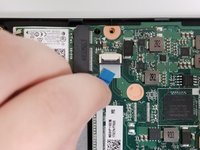
Remove two 4 mm screws holding down the metal plate using a Phillips #1 screwdriver.
-
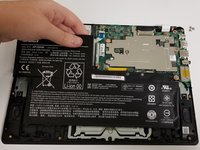
Remove the plate using your fingers.
-
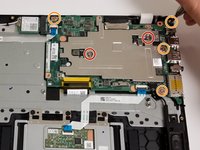
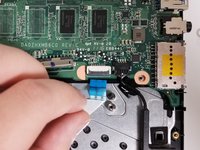
Remove four 5 mm screws holding the motherboard in place using a Phillips #1 screwdriver.
-


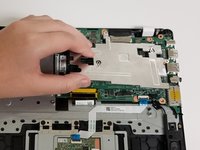


To reassemble your device, follow these instructions in reverse order.
To reassemble your device, follow these instructions in reverse order.
ある他の人がこのガイドを完成しました。
チーム

University of North Texas, Team S6-G3, Thomas Fall 2017 University of North Texas, Team S6-G3, Thomas Fall 2017人のメンバー
UNT-THOMAS-F17S6G3
3 メンバー
4のガイドは作成済み
1 Guide Comment
Hello, can you please advise on how to replace the ram on this laptop