はじめに
The touchpad is an easy component of the laptop to become dysfunctional because it is the most used component. If it becomes non-responsive, it should be replaced. The removal of the touchpad requires that the battery, back cover, and keyboard be removed first. Then the removal of the touchpad is just a matter of pulling it out of the laptop.
必要な工具と部品
-
-
Orient the ACER Aspire One to where the bottom of the laptop is facing upward as shown in the picture.
-
-
-
Locate the single 6 mm Phillips screw in the lower middle of the back plate.
-
Remove the screw using a Phillips #0 Screwdriver.
-
-
-
-
Locate the eighteen 6 mm Phillips screws that are required to remove the keyboard.
-
Remove all screws using a Phillips #0 screwdriver.
-
-
-
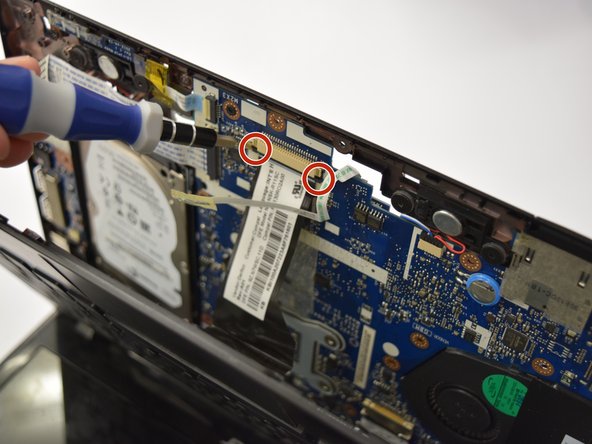
Remove the green dotted ribbon cable by sliding it straight out of the clamp holding it in using a plastic spudger.
-
Locate the two tabs that are holding the larger black ribbon cable in place.
-
Remove the larger black ribbon cable by pressing in the tabs and sliding it straight out of the clamp holding it in using a plastic spudger.
-
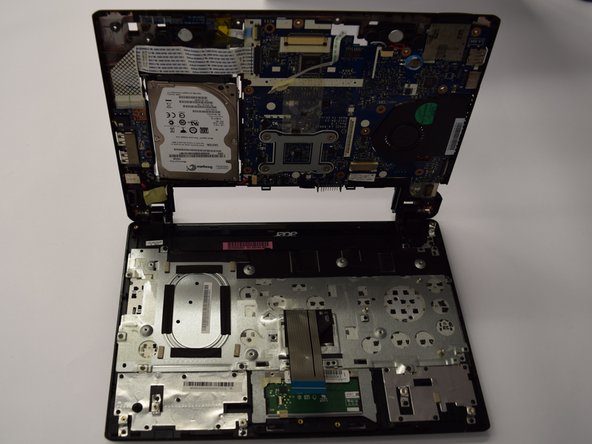
To remove the keyboard, lift the keyboard straight away from the rest of the laptop.
-
-
-
Locate the ten 6 mm Phillips screws that connect the keyboard to the rest of the laptop and remove them with a Phillips #0 Screwdriver.
-
Locate the four 6 mm Phillips screws hidden beneath black tape by lifting up the black tape and remove them with a Phillips #0 Screwdriver.
-
To remove keyboard from the rest of the laptop, pull keyboard straight up.
-
-
-
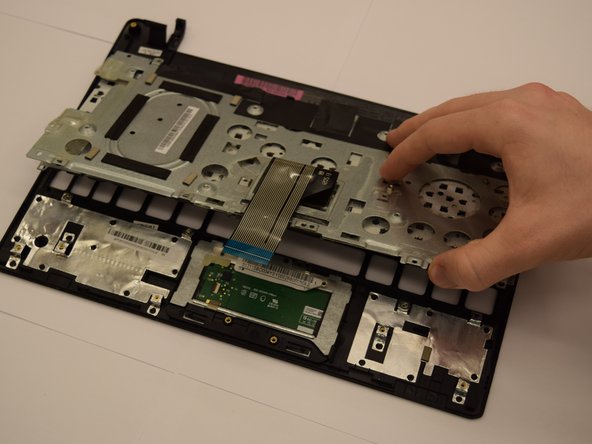
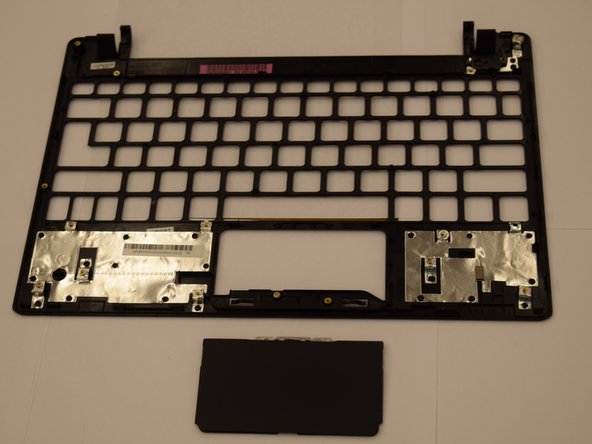
Take the keyboard frame and place it face down as shown.
-
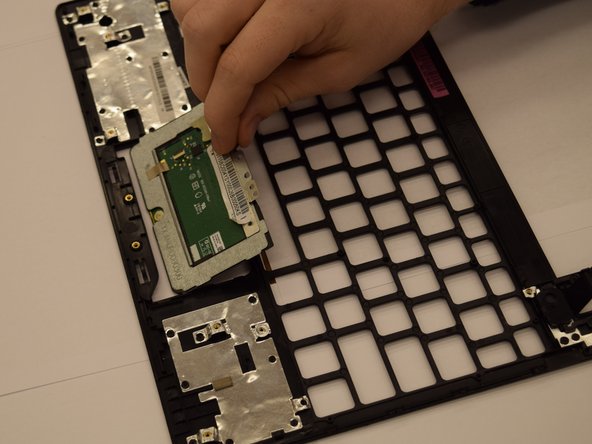
To remove the touchpad from the rest of the laptop, pull it straight out.
-


To put the laptop together, follow these instructions in the reverse order.
To put the laptop together, follow these instructions in the reverse order.
チーム

Clemson, Team 7-1, Benson Spring 2016 Clemson, Team 7-1, Benson Spring 2016人のメンバー
CLEM-BENSON-S16S7G1
4 メンバー
14のガイドは作成済み