メインコンテンツにスキップ

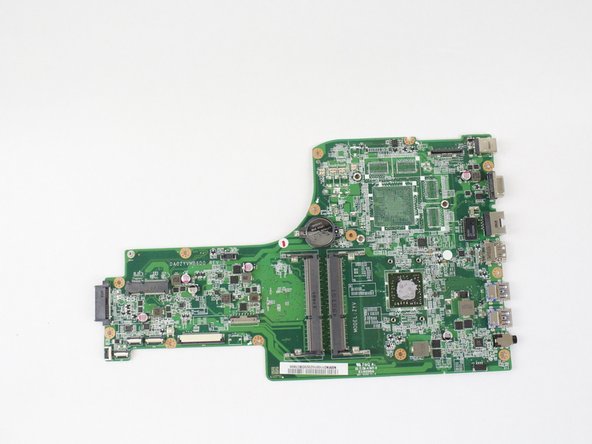
Acer Aspire E5-721-64T8 Motherboard Replacement

必要な工具と部品

  1. Acer Aspire E5-721-64T8 Motherboard Replacement, Motherboard: 手順 1、 1の画像 1
    • Remove the two 6mm J0 screws located in the right and left side of the battery.

    • Make sure to unplug of disconnect the power cable before removing the battery.

  2. Acer Aspire E5-721-64T8 Motherboard Replacement: 手順 2、 2の画像 1 Acer Aspire E5-721-64T8 Motherboard Replacement: 手順 2、 2の画像 2
    • Remove the connector from the motherboard.

  3. Acer Aspire E5-721-64T8 Motherboard Replacement: 手順 3、 3の画像 1 Acer Aspire E5-721-64T8 Motherboard Replacement: 手順 3、 3の画像 2 Acer Aspire E5-721-64T8 Motherboard Replacement: 手順 3、 3の画像 3
    • Remove the two 6mm Phillips J0 screws located in the right and left side of heatsink mounts.

    • Remove the four 6mm Phillips J0 screws located on the heatsink power mount.

    • Lift and remove heatsink from motherboard completely.

  4. Acer Aspire E5-721-64T8 Motherboard Replacement: 手順 4、 2の画像 1 Acer Aspire E5-721-64T8 Motherboard Replacement: 手順 4、 2の画像 2
    • Remove wi-fi card by pulling from socket.

  5. Acer Aspire E5-721-64T8 Motherboard Replacement: 手順 5、 1の画像 1
    • Remove screen connector by pulling it upwards.

  6. Acer Aspire E5-721-64T8 Motherboard Replacement: 手順 6、 1の画像 1
    • Remove speaker connector from the motherboard by pulling on the tab.

  7. Acer Aspire E5-721-64T8 Motherboard Replacement: 手順 7、 3の画像 1 Acer Aspire E5-721-64T8 Motherboard Replacement: 手順 7、 3の画像 2 Acer Aspire E5-721-64T8 Motherboard Replacement: 手順 7、 3の画像 3
    • Remove the four blue tabbed ribbon connectors to the motherboard by lifting white clamps and pulling out connector.

  8. Acer Aspire E5-721-64T8 Motherboard Replacement: 手順 8、 2の画像 1 Acer Aspire E5-721-64T8 Motherboard Replacement: 手順 8、 2の画像 2
    • Remove black ribbon connector by lifting white clamp and pulling connector out.

  9. Acer Aspire E5-721-64T8 Motherboard Replacement: 手順 9、 2の画像 1 Acer Aspire E5-721-64T8 Motherboard Replacement: 手順 9、 2の画像 2
    • Finally lift motherboard from narrow side and jiggle it out so all ports going through the laptop case on the left slide out.

終わりに

To reassemble your device, follow these instructions in reverse order.

作成者

3人の作成者と共同で作成されました。

Ed Herrera

メンバー登録日: 01/25/18

390 ポイント

3のガイドは作成済み

チーム

USF Tampa, Team S7-G3, Passmore Spring 2018 USF Tampa, Team S7-G3, Passmore Spring 2018人のメンバー

USFT-PASSMORE-S18S7G3

4 メンバー

6のガイドは作成済み

0 件のコメント

コメントを追加

統計データ:

過去 24時間: 0

過去 7 日: 0

過去 30 日: 5

今までの合計 173