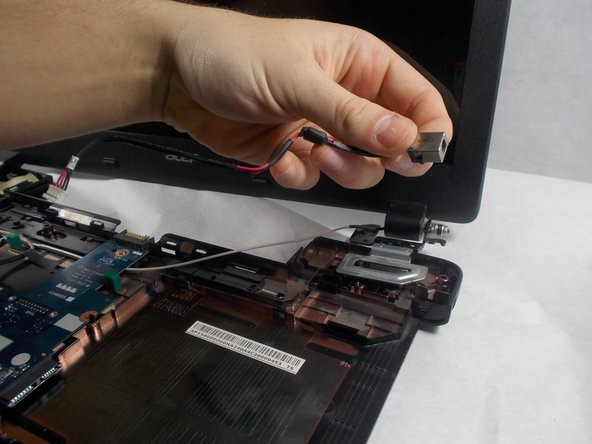
メインコンテンツにスキップ

Acer Aspire E5-571-58CG Power Jack Replacement

必要な工具と部品

  1. Acer Aspire E5-571-58CG Power Jack Replacement, Battery: 手順 1、 2の画像 1 Acer Aspire E5-571-58CG Power Jack Replacement, Battery: 手順 1、 2の画像 2
    • Make sure the laptop is powered off.

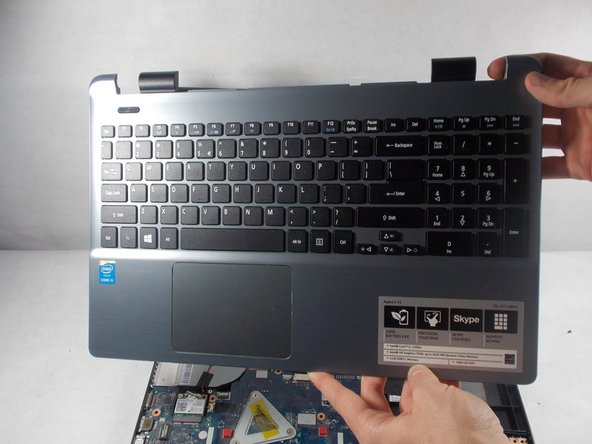
    • Flip the laptop over and locate the battery release switch.

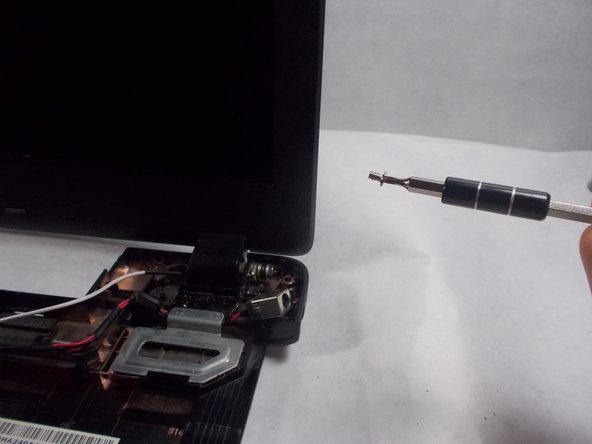
    • Insert the pointed end of the spudger into the battery release switch.

    • Push the battery release switch to the right.

  2. Acer Aspire E5-571-58CG Power Jack Replacement: 手順 2、 3の画像 1 Acer Aspire E5-571-58CG Power Jack Replacement: 手順 2、 3の画像 2 Acer Aspire E5-571-58CG Power Jack Replacement: 手順 2、 3の画像 3
    • While the battery release switch is pushed to the right, carefully slide the battery out of its socket.

  3. Acer Aspire E5-571-58CG Power Jack Replacement, Power Jack: 手順 3、 3の画像 1 Acer Aspire E5-571-58CG Power Jack Replacement, Power Jack: 手順 3、 3の画像 2 Acer Aspire E5-571-58CG Power Jack Replacement, Power Jack: 手順 3、 3の画像 3
    • Remove the top panel of the laptop with the plastic opening tool.

  4. Acer Aspire E5-571-58CG Power Jack Replacement: 手順 4、 2の画像 1 Acer Aspire E5-571-58CG Power Jack Replacement: 手順 4、 2の画像 2
    • Remove the plastic safeguard from the CD drive slot.

  5. Acer Aspire E5-571-58CG Power Jack Replacement: 手順 5、 3の画像 1 Acer Aspire E5-571-58CG Power Jack Replacement: 手順 5、 3の画像 2 Acer Aspire E5-571-58CG Power Jack Replacement: 手順 5、 3の画像 3
    • Remove the marked screws with the JIS #00 screwdriver.

  6. Acer Aspire E5-571-58CG Power Jack Replacement: 手順 6、 2の画像 1 Acer Aspire E5-571-58CG Power Jack Replacement: 手順 6、 2の画像 2
    • Disconnect the opposite end of the power jack from the motherboard by carefully pulling the wire.

  7. Acer Aspire E5-571-58CG Power Jack Replacement: 手順 7、 2の画像 1 Acer Aspire E5-571-58CG Power Jack Replacement: 手順 7、 2の画像 2
    • Lift the bottom right side of the screen to move the metal plate covering the power jack.

  8. Acer Aspire E5-571-58CG Power Jack Replacement: 手順 8、 2の画像 1 Acer Aspire E5-571-58CG Power Jack Replacement: 手順 8、 2の画像 2
    • Carefully lift the power jack out of the laptop.

終わりに

To reassemble your device, follow these instructions in reverse order.

ある他の人がこのガイドを完成しました。

作成者

2人の作成者と共同で作成されました。

Aliana Johnson

メンバー登録日: 10/24/18

145 ポイント

1ガイドが承認済み

チーム

UMass Dartmouth, Team S7-G7, Valliere Fall 2018 UMass Dartmouth, Team S7-G7, Valliere Fall 2018人のメンバー

UMASSD-VALLIERE-F18S7G7

5 メンバー

5のガイドは作成済み

0 件のコメント

コメントを追加

統計データ:

過去 24時間: 1

過去 7 日: 3

過去 30 日: 10

今までの合計 1,257