メインコンテンツにスキップ

Acer Aspire E5-511p-C6US RAM Replacement

必要な工具と部品

  1. Acer Aspire E5-511p-C6US RAM Replacement, Battery: 手順 1、 3の画像 1 Acer Aspire E5-511p-C6US RAM Replacement, Battery: 手順 1、 3の画像 2 Acer Aspire E5-511p-C6US RAM Replacement, Battery: 手順 1、 3の画像 3
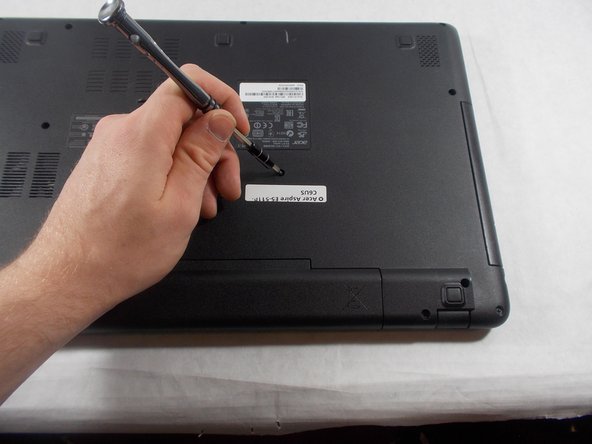
    • On the back of the laptop, there is a sliding lock. Push the slider and the battery will unlock

  2. Acer Aspire E5-511p-C6US RAM Replacement: 手順 2、 1の画像 1
    • Pull battery to remove.

  3. Acer Aspire E5-511p-C6US RAM Replacement, Optical Drive: 手順 3、 2の画像 1 Acer Aspire E5-511p-C6US RAM Replacement, Optical Drive: 手順 3、 2の画像 2
    • Remove the 1 screw just above the battery with a Phillips #1 screwdriver.

  4. Acer Aspire E5-511p-C6US RAM Replacement: 手順 4、 2の画像 1 Acer Aspire E5-511p-C6US RAM Replacement: 手順 4、 2の画像 2
    • Pull the Optical Drive out

  5. Acer Aspire E5-511p-C6US RAM Replacement, Keyboard: 手順 5、 1の画像 1
    • Remove the 17 Phillips #1 screws remaining on the back side of the laptop

  6. Acer Aspire E5-511p-C6US RAM Replacement: 手順 6、 3の画像 1 Acer Aspire E5-511p-C6US RAM Replacement: 手順 6、 3の画像 2 Acer Aspire E5-511p-C6US RAM Replacement: 手順 6、 3の画像 3
    • Flip over the laptop, Using the spudger separate the body of the keyboard from the base of the laptop.

  7. Acer Aspire E5-511p-C6US RAM Replacement: 手順 7、 2の画像 1 Acer Aspire E5-511p-C6US RAM Replacement: 手順 7、 2の画像 2
    • Carefully lift the keyboard and disconnect the 3 ribbon style connectors from the computers boards.

  8. Acer Aspire E5-511p-C6US RAM Replacement, Fan: 手順 8、 2の画像 1 Acer Aspire E5-511p-C6US RAM Replacement, Fan: 手順 8、 2の画像 2
    • Disconnect the cord from the fan

  9. Acer Aspire E5-511p-C6US RAM Replacement: 手順 9、 1の画像 1
    • Remove the 2 #1 Phillips screws

  10. Acer Aspire E5-511p-C6US RAM Replacement: 手順 10、 1の画像 1
    • now the fan can be pulled from the laptop

  11. Acer Aspire E5-511p-C6US RAM Replacement, RAM: 手順 11、 1の画像 1
    • Disconnect the 2 plugs remaining on the computer

  12. Acer Aspire E5-511p-C6US RAM Replacement: 手順 12、 1の画像 1
    • Remove the last 2 #1 Philips screws from the body

  13. Acer Aspire E5-511p-C6US RAM Replacement: 手順 13、 1の画像 1
    • Remove the 2 #1 Phillips screws, then slide the metal cover back and away

  14. Acer Aspire E5-511p-C6US RAM Replacement: 手順 14、 1の画像 1
    • Remove the board from the laptop body, flip over for access to the ram

  15. Acer Aspire E5-511p-C6US RAM Replacement: 手順 15、 2の画像 1 Acer Aspire E5-511p-C6US RAM Replacement: 手順 15、 2の画像 2
    • Press down on the spring clips on either side of the ram, It will unlock and can be removed

終わりに

To reassemble your device, follow these instructions in reverse order.

作成者

1人の作成者と共同作成されました。

Aaron

メンバー登録日: 03/19/18

562 ポイント

5のガイドは作成済み

チーム

UMass Dartmouth, Team S2-G1, Bernier Spring 2018 UMass Dartmouth, Team S2-G1, Bernier Spring 2018人のメンバー

UMASSD-BERNIER-S18S2G1

3 メンバー

5のガイドは作成済み

0 件のコメント

コメントを追加

統計データ:

過去 24時間: 0

過去 7 日: 1

過去 30 日: 3

今までの合計 650