はじめに
If your system overheating you must to clean the Heatsink system and/or change the thermal paste compound.
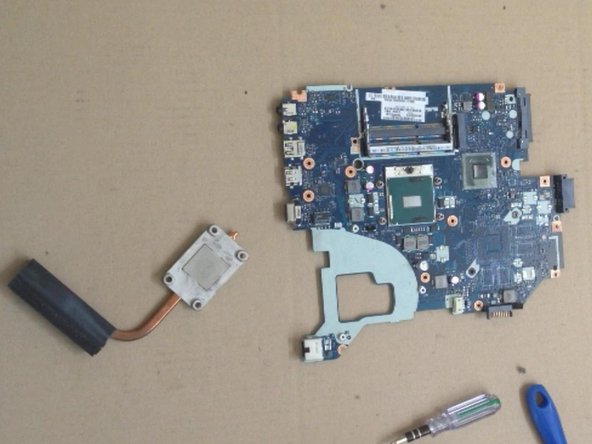
You must be very careful when you working with the motherboard. There are small components that can easily pulled down.
必要な工具と部品
ビデオの概要
-
-
Switch-off the laptop.
-
Remove the battery and the DVD drive.
-
-
-
Remove the SATA HDD, RAM meory module and WiFi mini PCI card
-
More detailed information for this step you can found in this manual: Acer Aspire E1-571 - HDD / RAM Memory / WiFi card Replacement
-
.
-
-
-
The Keyboard is held by 6x locking clips at up and 2x at both sides.
-
Use plastic tool to unlock 6x upper clips.
-
Disconnect the keyboard flex cable and you are ready to install the new keyboard.
-
More detailed information for this step you can found in this manual: Acer Aspire E1-571 - Keyboard Replacement
-
-
-
-
Remove the 2x screws and disconnect 5x flex cable connectors:
-
2x Loudspeakers cable connectors
-
LCD Display cable connector
-
Microphone cable connector
-
USB board flex cable connector
-
Don't forget to remove the Card Reader Blanking Plate.
-
To take out the Motherboard, pick-up it first from the right side (near to the DVD drive connector).
-


To reassemble your device, follow these instructions in reverse order.
To reassemble your device, follow these instructions in reverse order.
7 の人々がこのガイドを完成させました。

チーム

4 件のコメント
Sir acer e1 571 me cpu kon sa hota hy matlb uska no kya hota hy core i5 kaa hmko confrm karna hy kyu ki maine apna lapie dukan pe diya tha aur mujhe dr hy ki wo nera cpu to nhi change kardiya
This video was a lifesaver. It helped me take apart My E1 in order to replace the thermalpaste and cleanup he cooling. Big Thanks!
Thank You, this worked great on an Acer V3-571, totally removed cooling/fan issues, Thank You.
My laptop wont turn on after doing this, please help me!