メインコンテンツにスキップ

Acer Aspire E1-510P-4637 Keyboard Replacement

必要な工具と部品

  1. Acer Aspire E1-510P-4637 Keyboard Replacement, Battery: 手順 1、 1の画像 1
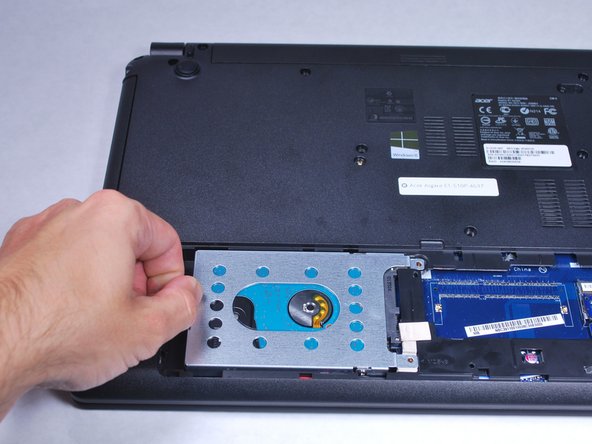
    • To release the battery, depress the battery release with a nylon spudger. Hold the latch down and slide it over.

  2. Acer Aspire E1-510P-4637 Keyboard Replacement: 手順 2、 1の画像 1
    • Firmly grab hold of the battery and slide it out of the laptop.

  3. Acer Aspire E1-510P-4637 Keyboard Replacement, Hard Drive: 手順 3、 1の画像 1
    • Remove the M2.5x8 screw with a PH1 screwdriver.

  4. Acer Aspire E1-510P-4637 Keyboard Replacement: 手順 4、 1の画像 1
    • Use the plastic opening tool to pop off the small back cover.

  5. Acer Aspire E1-510P-4637 Keyboard Replacement: 手順 5、 1の画像 1
    • Use a PH0 Phillips screwdriver to remove the screw securing the hard drive.

  6. Acer Aspire E1-510P-4637 Keyboard Replacement: 手順 6、 2の画像 1 Acer Aspire E1-510P-4637 Keyboard Replacement: 手順 6、 2の画像 2
    • Use a nylon spudger to slightly pry up the hard drive near the screw holes.

  7. Acer Aspire E1-510P-4637 Keyboard Replacement: 手順 7、 3の画像 1 Acer Aspire E1-510P-4637 Keyboard Replacement: 手順 7、 3の画像 2 Acer Aspire E1-510P-4637 Keyboard Replacement: 手順 7、 3の画像 3
    • Grab hold of the plastic tab and pull the hard drive away from the connectors. This will release the hard drive.

    • The hard drive connector is fragile. Handle with care.

  8. Acer Aspire E1-510P-4637 Keyboard Replacement, Keyboard: 手順 8、 1の画像 1
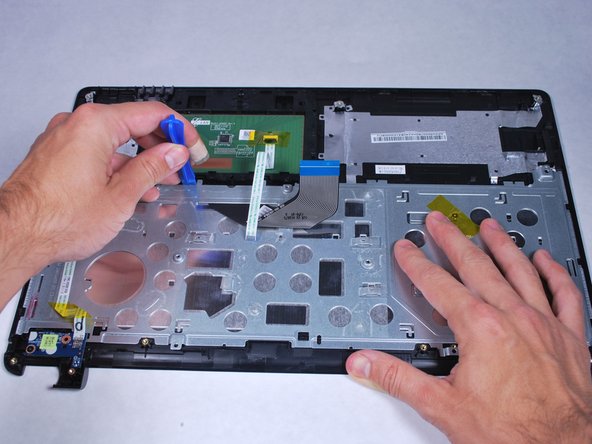
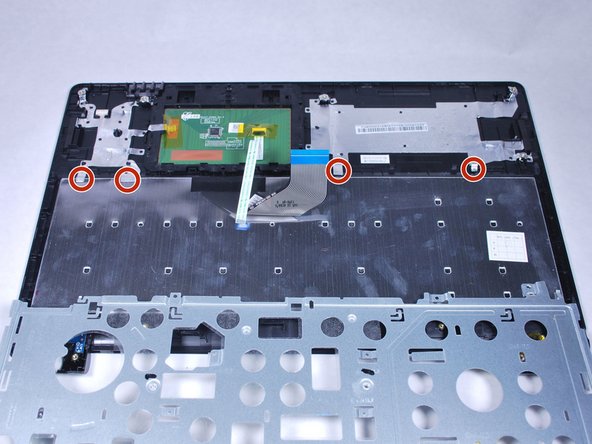
    • Remove the fourteen M2.5x8 screws highlighted in the picture with a PH0 Phillips screwdriver.

  9. Acer Aspire E1-510P-4637 Keyboard Replacement: 手順 9、 1の画像 1
    • Slide out the disk drive tray.

  10. Acer Aspire E1-510P-4637 Keyboard Replacement: 手順 10、 1の画像 1
    • Use the plastic opening tool to gently pry open the laptop.

  11. Acer Aspire E1-510P-4637 Keyboard Replacement: 手順 11、 3の画像 1 Acer Aspire E1-510P-4637 Keyboard Replacement: 手順 11、 3の画像 2 Acer Aspire E1-510P-4637 Keyboard Replacement: 手順 11、 3の画像 3
    • Rotate the back cover up a little to reveal the cables connected to the motherboard.

    • Unplug the cables by sliding them out of their receptacle.

    • The connectors are very small and fragile. Handle with care.

  12. Acer Aspire E1-510P-4637 Keyboard Replacement: 手順 12、 1の画像 1
    • Remove the four center panel M1.6x3 screws with a PH0 Phillips screwdriver.

    • Remove the two M2x3 screws with a PH0 Phillips screwdriver.

  13. Acer Aspire E1-510P-4637 Keyboard Replacement: 手順 13、 3の画像 1 Acer Aspire E1-510P-4637 Keyboard Replacement: 手順 13、 3の画像 2 Acer Aspire E1-510P-4637 Keyboard Replacement: 手順 13、 3の画像 3
    • Use the plastic opening tool to slide the metal part out to release it from the retaining tabs.

  14. Acer Aspire E1-510P-4637 Keyboard Replacement: 手順 14、 2の画像 1 Acer Aspire E1-510P-4637 Keyboard Replacement: 手順 14、 2の画像 2
    • Peel off the foil adhesive stuck to the keyboard.

  15. Acer Aspire E1-510P-4637 Keyboard Replacement: 手順 15、 1の画像 1
    • Remove the keyboard.

終わりに

To reassemble your device, follow these instructions in reverse order.

2 の人々がこのガイドを完成させました。

作成者

4人の作成者と共同で作成されました。

Caleb lindsay

メンバー登録日: 04/11/16

778 ポイント

6のガイドは作成済み

チーム

Cal Poly, Team 34-15, Maness Spring 2016 Cal Poly, Team 34-15, Maness Spring 2016人のメンバー

CPSU-MANESS-S16S34G15

4 メンバー

6のガイドは作成済み

0 件のコメント

コメントを追加

統計データ:

過去 24時間: 0

過去 7 日: 1

過去 30 日: 7

今までの合計 1,168