メインコンテンツにスキップ

このバージョンは誤った内容を含んでいる可能性があります。最新の承認済みスナップショットに切り替えてください。

必要な工具と部品

  1. この手順は未翻訳です。 翻訳を手伝う。

    : 手順 1、 3の画像 1 : 手順 1、 3の画像 2 : 手順 1、 3の画像 3
    • Retrieve all Screw's from the bottom of the laptop and organize them into 2 different sets.

    • When removing the back cover gently press on audio connections on the back right of the laptop.

  2. この手順は未翻訳です。 翻訳を手伝う。

    : 手順 2、 3の画像 1 : 手順 2、 3の画像 2 : 手順 2、 3の画像 3
    • Carefully release and unplug every wire that connects to the fan.

  3. この手順は未翻訳です。 翻訳を手伝う。

    : 手順 3、 3の画像 1 : 手順 3、 3の画像 2 : 手順 3、 3の画像 3
    • Release the screw that connects the fan to the base of the laptop. Carefully remove your fan and heat sink.

    • Apply heat paste to the center before replacing the fan and heat sink. Then reinsert the screw and plugs.

ゴール

8 の人々がこのガイドを完成させました。

作成者

6人の作成者と共同で作成されました。

JeanChristophe

メンバー登録日: 11/19/10

523 ポイント

3のガイドは作成済み

5 件のコメント

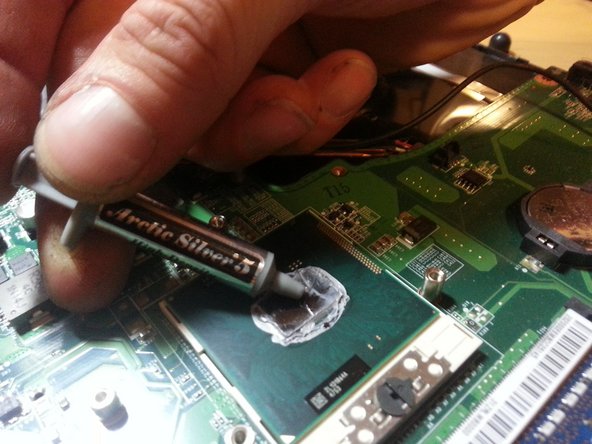
May need to expand the "apply heat paste to center" section. Need to remove old paste first, etc. etc. A good bird's eye view intro, though

polishtext4 - 返信

Tanks you…

I'll look forward for adding this info.

JeanChristophe -

Seemed like I was going to rip the motherboard up where the usb ports are by the audio connector, why isn't the %#*@ thing screwed down? Lol If I push down by the audio connector like you mention and pull it up from the other side will ot be fine, felt and looked like I might snap the board.

Clayton Boyle - 返信

Good job, did have to Emphasis about releasing the audio connectors

Thaine Ferris - 返信

I didn't know how to explain better…

Some trick of trade?

JeanChristophe -

コメントを追加

統計データ:

過去 24時間: 1

過去 7 日: 4

過去 30 日: 37

今までの合計 7,663