メインコンテンツにスキップ

Acer Aspire 3 A315-24P-R7VH Display Assembly Replacement

必要な工具と部品

  1. Acer Aspire 3 A315-24P-R7VH Display Assembly Replacement, Lower Case: 手順 1、 1の画像 1
    • Power off the machine and unplug it from the wall charger.

  2. Acer Aspire 3 A315-24P-R7VH Display Assembly Replacement: 手順 2、 2の画像 1 Acer Aspire 3 A315-24P-R7VH Display Assembly Replacement: 手順 2、 2の画像 2
    • Close the laptop and flip it over.

    • Remove the eleven 6.5 mm Phillips screws from the lower case.

  3. Acer Aspire 3 A315-24P-R7VH Display Assembly Replacement: 手順 3、 1の画像 1
    • Insert an opening pick between the lower case and chassis.

    • Pry around the entire perimeter until the lower case releases.

    • Remove the lower case.

  4. Acer Aspire 3 A315-24P-R7VH Display Assembly Replacement: 手順 4、 1の画像 1
    この手順で使用する道具:
    Anti-Static Wrist Strap
    $7.95
    • Optional: Put on an anti-static wrist strap. Ground yourself by connecting the metal clip at the end to any unpainted metal surface outside of the laptop.

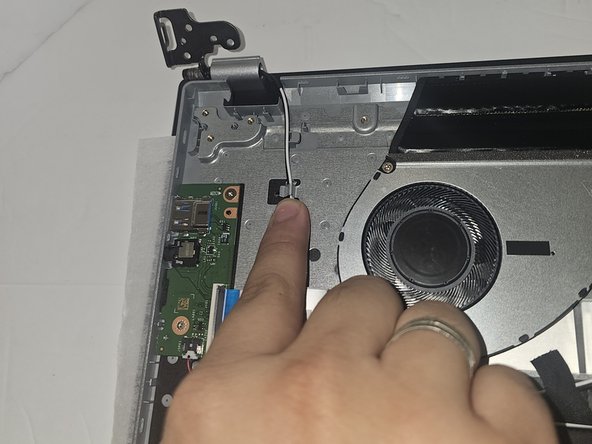
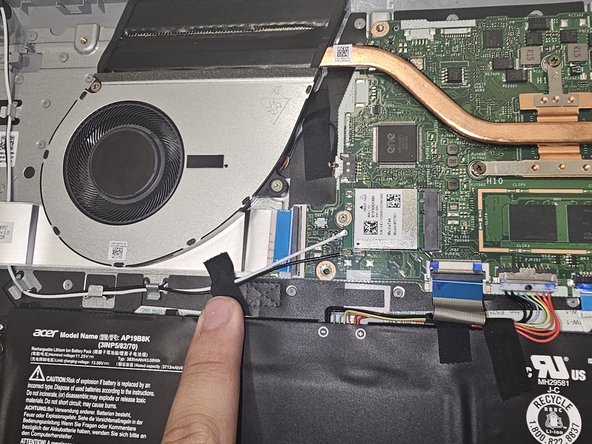
  5. Acer Aspire 3 A315-24P-R7VH Display Assembly Replacement, Display Assembly: 手順 5、 3の画像 1 Acer Aspire 3 A315-24P-R7VH Display Assembly Replacement, Display Assembly: 手順 5、 3の画像 2 Acer Aspire 3 A315-24P-R7VH Display Assembly Replacement, Display Assembly: 手順 5、 3の画像 3
    • Disconnect the black and white antenna cables plugged into the network card on the motherboard.

    • Unscrew the four 5.5 mm Phillips screws holding the hinges of the monitor to the laptop frame.

  6. Acer Aspire 3 A315-24P-R7VH Display Assembly Replacement: 手順 7、 1の画像 1
    • Once the hinges are unscrewed the display assembly will easily come off.

終わりに

To reassemble you will just follow these steps in reverse order.

作成者

5人の作成者と共同で作成されました。

AlexHarpring

メンバー登録日: 09/07/23

319 ポイント

3のガイドは作成済み

チーム

Gateway, Team 1-1, Pee Fall 2023 Gateway, Team 1-1, Pee Fall 2023人のメンバー

GCC-PEE-F23S1G1

4 メンバー

6のガイドは作成済み

0 件のコメント

コメントを追加

統計データ:

過去 24時間: 2

過去 7 日: 18

過去 30 日: 65

今までの合計 635