メインコンテンツにスキップ

ASUS X550LB-DS71 Display Panel Replacement

必要な工具と部品

  1. ASUS X550LB-DS71 Display Panel Replacement, Display Panel: 手順 1、 3の画像 1 ASUS X550LB-DS71 Display Panel Replacement, Display Panel: 手順 1、 3の画像 2 ASUS X550LB-DS71 Display Panel Replacement, Display Panel: 手順 1、 3の画像 3
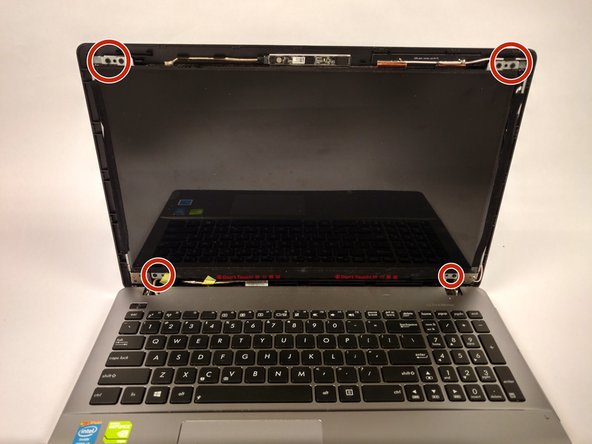
    • Flip open the laptop with the screen facing towards you.

    • Using the plastic opening tool, remove the square tape from the marked locations.

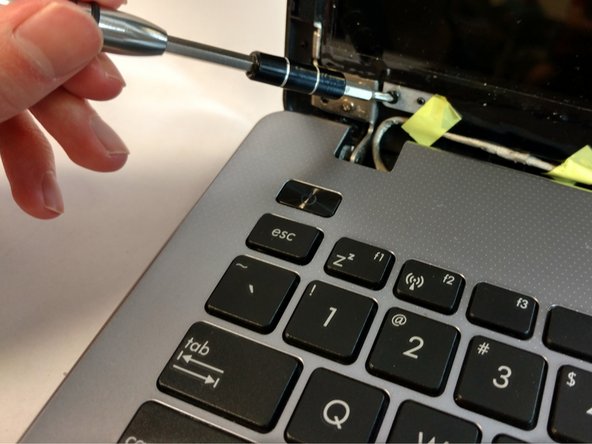
    • Use the Phillips #0 Screwdriver to remove the two 2mm screws from those locations.

  2. ASUS X550LB-DS71 Display Panel Replacement: 手順 2、 2の画像 1 ASUS X550LB-DS71 Display Panel Replacement: 手順 2、 2の画像 2
    • Using the plastic opening tool, open the front cover of the laptop.

    • It is recommended that you start from a corner and run the tool along the edge of the cover.

    • Be careful not to bend or crack the cover.

  3. ASUS X550LB-DS71 Display Panel Replacement: 手順 3、 3の画像 1 ASUS X550LB-DS71 Display Panel Replacement: 手順 3、 3の画像 2 ASUS X550LB-DS71 Display Panel Replacement: 手順 3、 3の画像 3
    • Peel off the tape located on the left and right side of the display monitor.

    • Use the Phillips #0 screwdriver to remove the screws at the marked locations in each corner of the display.

  4. ASUS X550LB-DS71 Display Panel Replacement: 手順 4、 3の画像 1 ASUS X550LB-DS71 Display Panel Replacement: 手順 4、 3の画像 2 ASUS X550LB-DS71 Display Panel Replacement: 手順 4、 3の画像 3
    • Place the display monitor face down to expose the ribbon connector.

    • Remove the ribbon connector to separate the display monitor from the rest of the device.

終わりに

To reassemble your device, follow these instructions in reverse order.

作成者

3人の作成者と共同で作成されました。

Nathan Dyer

メンバー登録日: 09/25/17

550 ポイント

5のガイドは作成済み

チーム

USF Tampa, Team S16-G1, Eyestone Fall 2017 USF Tampa, Team S16-G1, Eyestone Fall 2017人のメンバー

USFT-EYESTONE-F17S16G1

4 メンバー

5のガイドは作成済み

0 件のコメント

コメントを追加

統計データ:

過去 24時間: 3

過去 7 日: 8

過去 30 日: 21

今までの合計 1,003