メインコンテンツにスキップ

ASUS Vivobook Q301LA-BSI5T17 Display Replacement

必要な工具と部品

  1. ASUS Vivobook Q301LA-BSI5T17 Display Replacement, Battery: 手順 1、 1の画像 1
    • Unscrew the (10) screws on the bottom of the computer chassis using the JIS #0 screwdriver.

  2. ASUS Vivobook Q301LA-BSI5T17 Display Replacement: 手順 2、 2の画像 1 ASUS Vivobook Q301LA-BSI5T17 Display Replacement: 手順 2、 2の画像 2
    • Slightly lift the lower case and push it toward the rear of the computer to free the mounting tabs.

  3. ASUS Vivobook Q301LA-BSI5T17 Display Replacement: 手順 3、 3の画像 1 ASUS Vivobook Q301LA-BSI5T17 Display Replacement: 手順 3、 3の画像 2 ASUS Vivobook Q301LA-BSI5T17 Display Replacement: 手順 3、 3の画像 3
    • Remove the (6) six screws attaching the battery to the frame using the JIS #0 screwdriver.

    • Use the black plastic spudger to remove the battery from the device.

  4. ASUS Vivobook Q301LA-BSI5T17 Display Replacement: 手順 4、 3の画像 1 ASUS Vivobook Q301LA-BSI5T17 Display Replacement: 手順 4、 3の画像 2 ASUS Vivobook Q301LA-BSI5T17 Display Replacement: 手順 4、 3の画像 3
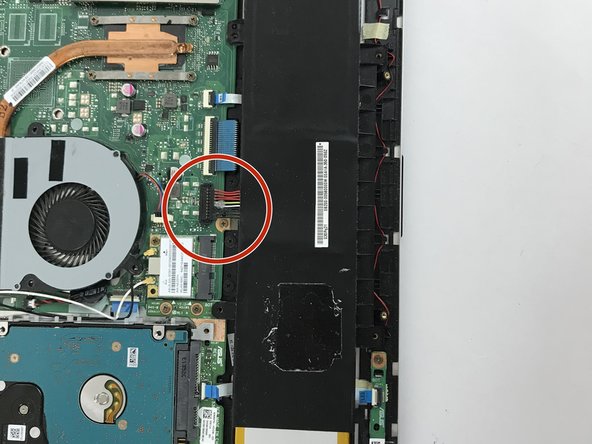
    • Gently take the battery out of the laptop, making sure that all wires connecting to it are disconnected.

  5. ASUS Vivobook Q301LA-BSI5T17 Display Replacement, Display: 手順 5、 1の画像 1
    • Remove the screws connecting the display to the laptop. Furthermore, detach the wires connecting the screen to the motherboard.

終わりに

To reassemble your device, follow these instructions in reverse order.

作成者

2人の作成者と共同で作成されました。

Jens Peter Andersen

メンバー登録日: 10/03/17

658 ポイント

6のガイドは作成済み

チーム

USF Tampa, Team S5-G1, Walkup Fall 2017 USF Tampa, Team S5-G1, Walkup Fall 2017人のメンバー

USFT-WALKUP-F17S5G1

4 メンバー

6のガイドは作成済み

0 件のコメント

コメントを追加

統計データ:

過去 24時間: 0

過去 7 日: 6

過去 30 日: 10

今までの合計 680