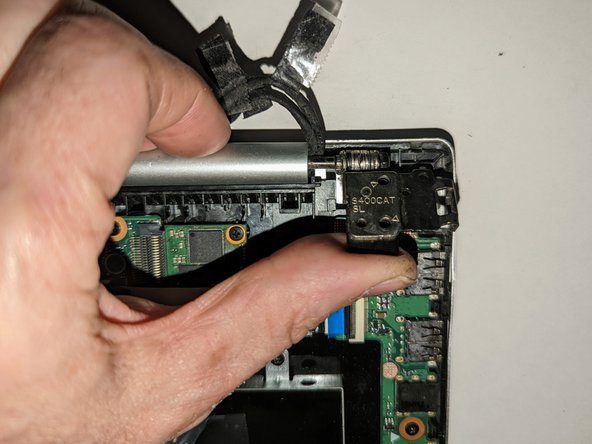
メインコンテンツにスキップ

ASUS VivoBook S400C I/O Board Replacement

必要な工具と部品

  1. ASUS VivoBook S400C I/O Board Replacement, Remove the Bottom Cover: 手順 1、 1の画像 1
    • Flip the device over and remove the ten 5.7 mm screws with a Phillips #0 screwdriver.

  2. ASUS VivoBook S400C I/O Board Replacement: 手順 2、 2の画像 1 ASUS VivoBook S400C I/O Board Replacement: 手順 2、 2の画像 2
    • Use a spudger or your fingers to go around and lift the edges and release the back panel.

  3. ASUS VivoBook S400C I/O Board Replacement, Disconnect the Battery: 手順 3、 1の画像 1
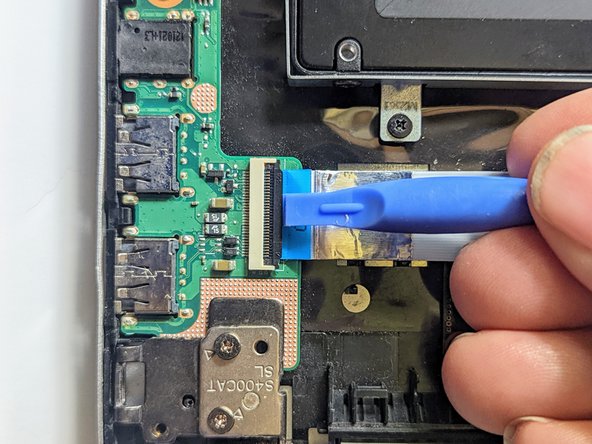
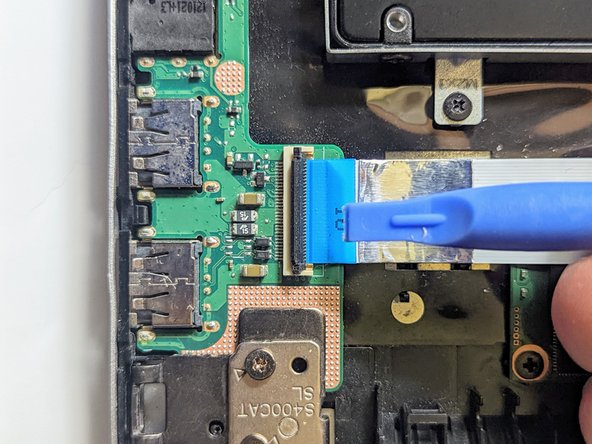
    • Using a spudger, lift up the plug connecting the battery to the motherboard.

  4. ASUS VivoBook S400C I/O Board Replacement, I/O Board: 手順 4、 3の画像 1 ASUS VivoBook S400C I/O Board Replacement, I/O Board: 手順 4、 3の画像 2 ASUS VivoBook S400C I/O Board Replacement, I/O Board: 手順 4、 3の画像 3
    • Flip up the retaining latch on the I/O board ribbon cable.

  5. ASUS VivoBook S400C I/O Board Replacement: 手順 5、 2の画像 1 ASUS VivoBook S400C I/O Board Replacement: 手順 5、 2の画像 2
    • Pull the cable straight out of the connector by the blue tab.

  6. ASUS VivoBook S400C I/O Board Replacement: 手順 6、 2の画像 1 ASUS VivoBook S400C I/O Board Replacement: 手順 6、 2の画像 2
    • Remove the two screws securing the left hinge to the I/O board.

    • Pry the hinge up by hand to a 90 degree angle.

  7. ASUS VivoBook S400C I/O Board Replacement: 手順 7、 1の画像 1
    • Remove the retaining screw.

  8. ASUS VivoBook S400C I/O Board Replacement: 手順 8、 1の画像 1
    • Lift the board on the ribbon cable side far enough to clear the guide pin(s) then pull it back away from the side of the case.

終わりに

To reassemble your device, follow these instructions in reverse order.

作成者

1人の作成者と共同作成されました。

Jerry Wheeler

メンバー登録日: 03/21/22

57,424 ポイント

69のガイドは作成済み

チーム

Oregonians Oregonians人のメンバー

Community

7 メンバー

176のガイドは作成済み

0 件のコメント

コメントを追加

統計データ:

過去 24時間: 0

過去 7 日: 0

過去 30 日: 4

今までの合計 125