メインコンテンツにスキップ

ASUS VivoBook S400C Display Assembly Replacement

必要な工具と部品

  1. ASUS VivoBook S400C Display Assembly Replacement, Remove the Bottom Cover: 手順 1、 1の画像 1
    • Flip the device over and remove the ten 5.7 mm screws with a Phillips #0 screwdriver.

  2. ASUS VivoBook S400C Display Assembly Replacement: 手順 2、 2の画像 1 ASUS VivoBook S400C Display Assembly Replacement: 手順 2、 2の画像 2
    • Use a spudger or your fingers to go around and lift the edges and release the back panel.

  3. ASUS VivoBook S400C Display Assembly Replacement, Disconnect the Battery: 手順 3、 1の画像 1
    • Using a spudger, lift up the plug connecting the battery to the motherboard.

  4. ASUS VivoBook S400C Display Assembly Replacement, Heat Shield: 手順 4、 2の画像 1 ASUS VivoBook S400C Display Assembly Replacement, Heat Shield: 手順 4、 2の画像 2
    • Remove the black shield covering the display connector and the heat sink.

    • You may need to use double-sided adhesive tape to resecure the shield.

  5. ASUS VivoBook S400C Display Assembly Replacement, Display Assembly: 手順 5、 1の画像 1
    • Remove the black tape securing the keyboard ribbon cable to the display connector.

    • Fold the ribbon cable the opposite way, resecuring it to the hard drive to keep it out of the way.

  6. ASUS VivoBook S400C Display Assembly Replacement: 手順 6、 2の画像 1 ASUS VivoBook S400C Display Assembly Replacement: 手順 6、 2の画像 2
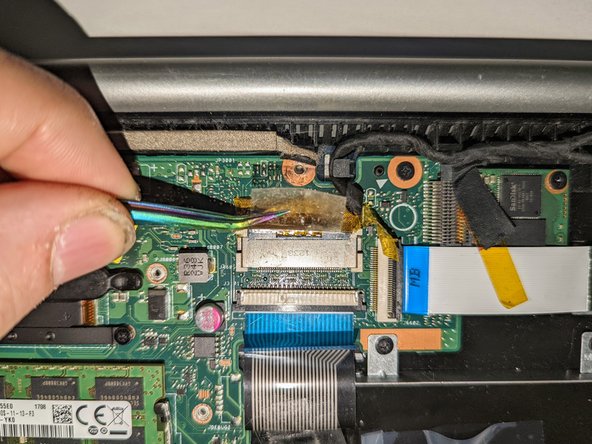
    • Peel off the clear tape from the motherboard display connector.

  7. ASUS VivoBook S400C Display Assembly Replacement: 手順 7、 2の画像 1 ASUS VivoBook S400C Display Assembly Replacement: 手順 7、 2の画像 2
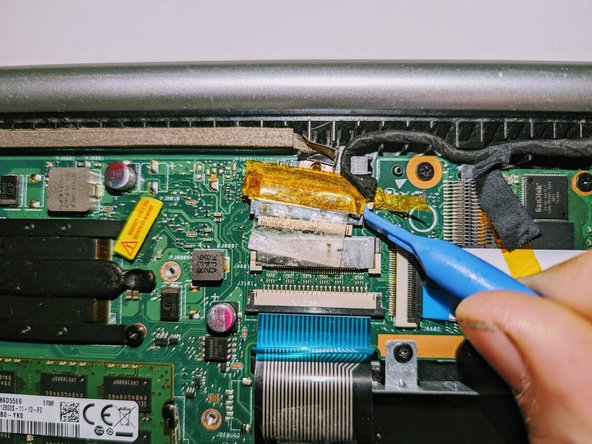
    • Position spudgers on the white tabs on either side of the connector and push evenly to unplug the display.

  8. ASUS VivoBook S400C Display Assembly Replacement: 手順 8、 3の画像 1 ASUS VivoBook S400C Display Assembly Replacement: 手順 8、 3の画像 2 ASUS VivoBook S400C Display Assembly Replacement: 手順 8、 3の画像 3
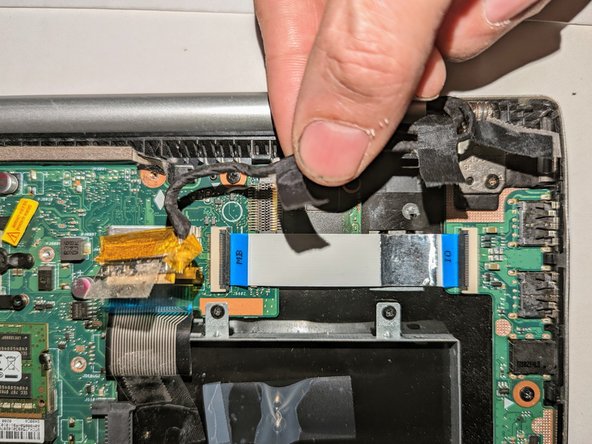
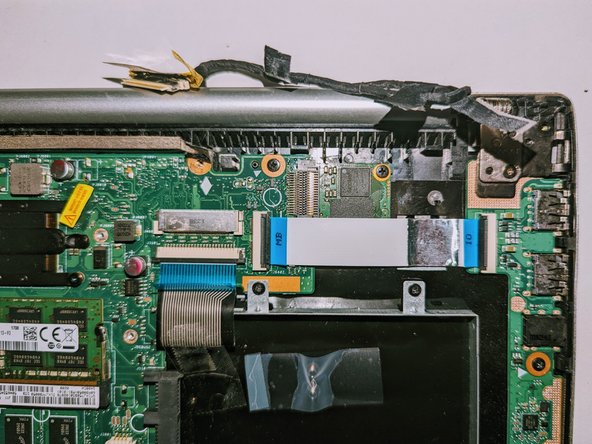
    • Peel off the three pieces of black tape securing the display cable to the motherboard.

    • Deroute the cable from the channel it sits in.

    • Move the cable to the side, out of the way.

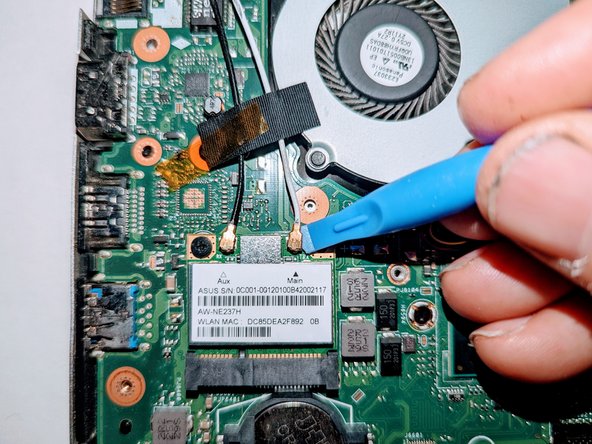
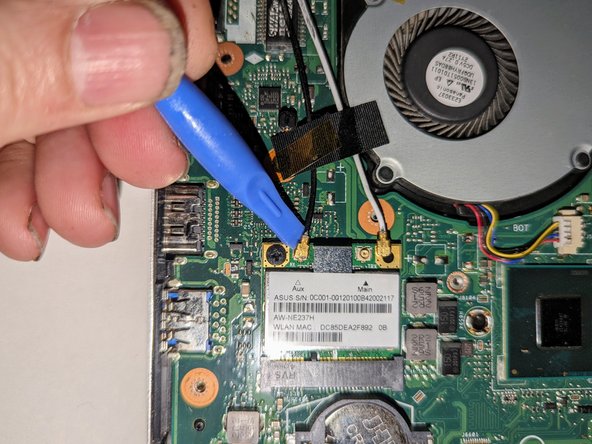
  9. ASUS VivoBook S400C Display Assembly Replacement: 手順 9、 3の画像 1 ASUS VivoBook S400C Display Assembly Replacement: 手順 9、 3の画像 2 ASUS VivoBook S400C Display Assembly Replacement: 手順 9、 3の画像 3
    • Use a spudger to release the cables from the wifi card.

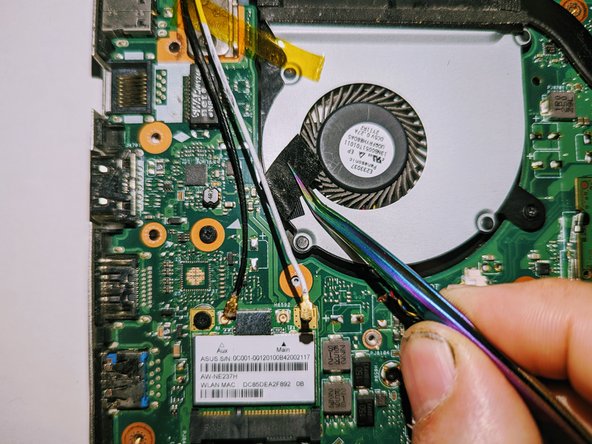
  10. ASUS VivoBook S400C Display Assembly Replacement: 手順 10、 3の画像 1 ASUS VivoBook S400C Display Assembly Replacement: 手順 10、 3の画像 2 ASUS VivoBook S400C Display Assembly Replacement: 手順 10、 3の画像 3
    • Lift the tapes securing the wires to the motherboard.

    • Move the wires to the side out of the way.

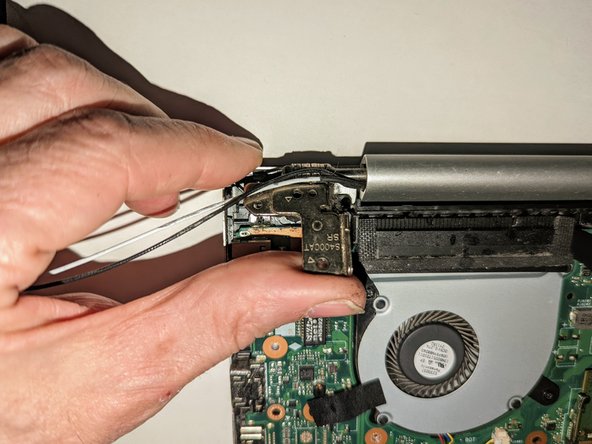
  11. ASUS VivoBook S400C Display Assembly Replacement, Disconnect the Hinges: 手順 11、 2の画像 1 ASUS VivoBook S400C Display Assembly Replacement, Disconnect the Hinges: 手順 11、 2の画像 2
    • Remove the two screws securing the hinge on the left.

    • Pry the hinge up by hand to a 90 degree angle.

  12. ASUS VivoBook S400C Display Assembly Replacement: 手順 12、 2の画像 1 ASUS VivoBook S400C Display Assembly Replacement: 手順 12、 2の画像 2
    • Remove the two screws securing the hinge on the right.

    • Pry the hinge up by hand to a 90 degree angle.

  13. ASUS VivoBook S400C Display Assembly Replacement, Remove the Display: 手順 13、 3の画像 1 ASUS VivoBook S400C Display Assembly Replacement, Remove the Display: 手順 13、 3の画像 2 ASUS VivoBook S400C Display Assembly Replacement, Remove the Display: 手順 13、 3の画像 3
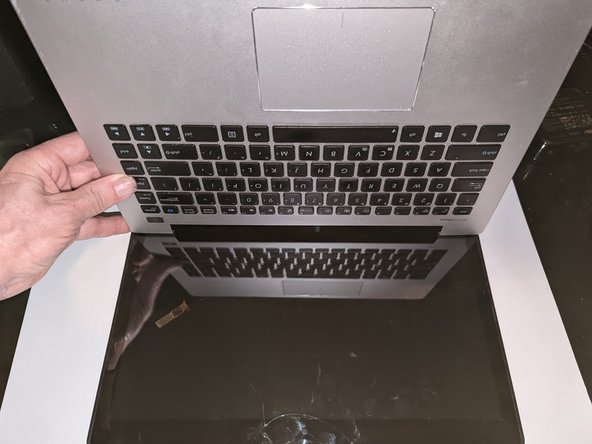
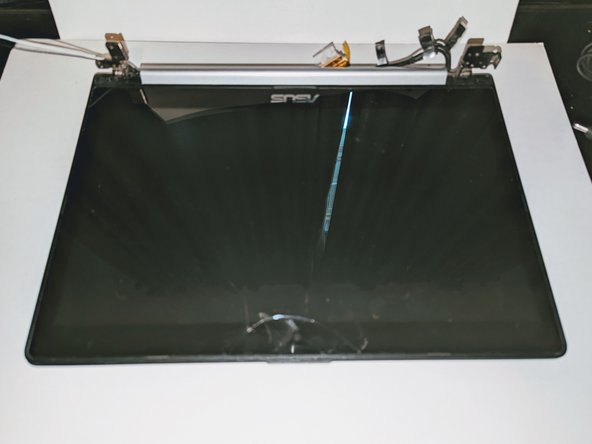
    • Lift the base of the laptop from the front.

    • Raise it to a 90 degree angle.

    • Slide it forward slightly to clear the hinges.

    • The display is now free.

終わりに

To reassemble your device, follow these instructions in reverse order.

作成者

1人の作成者と共同作成されました。

Jerry Wheeler

メンバー登録日: 03/21/22

57,424 ポイント

69のガイドは作成済み

チーム

Oregonians Oregonians人のメンバー

Community

7 メンバー

176のガイドは作成済み

0 件のコメント

コメントを追加

統計データ:

過去 24時間: 0

過去 7 日: 1

過去 30 日: 4

今までの合計 234