メインコンテンツにスキップ

ASUS TUF Gaming A15 (2023) FA507XI RAM Replacement

必要な工具と部品

  1. ASUS TUF Gaming A15 (2023) FA507XI RAM Replacement, Put your laptop down somewhere accessible: 手順 1、 1の画像 1
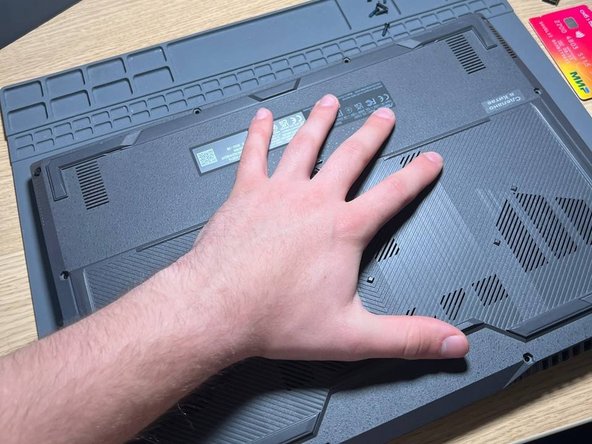
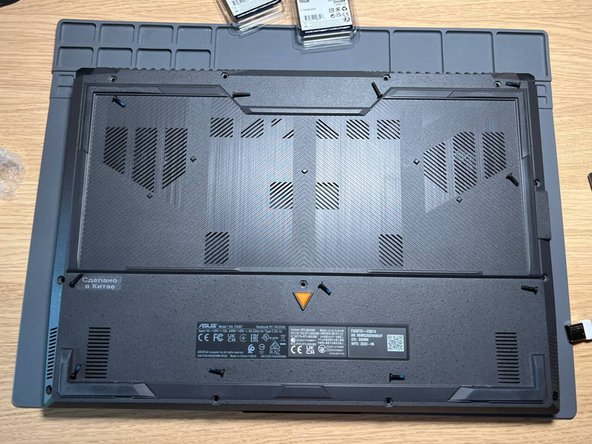
    • Place a soft non-slip mat under the laptop and place the laptop with the lid up.

    • I remind you that you need to turn off the power to the laptop!!!

  2. ASUS TUF Gaming A15 (2023) FA507XI RAM Replacement, Unscrew the screws: 手順 2、 1の画像 1
    • Using a Phillips screwdriver from the Xiaomi Mija set, unscrew all the screws

    • Attention! - The lower right screw is on a latch/lock and cannot be removed from the case

    • Also remember the location of the screws - the two longest ones are central from the top, the short one is installed in the lower left corner. see photo

  3. ASUS TUF Gaming A15 (2023) FA507XI RAM Replacement, Removing the back cover: 手順 3、 3の画像 1 ASUS TUF Gaming A15 (2023) FA507XI RAM Replacement, Removing the back cover: 手順 3、 3の画像 2 ASUS TUF Gaming A15 (2023) FA507XI RAM Replacement, Removing the back cover: 手順 3、 3の画像 3
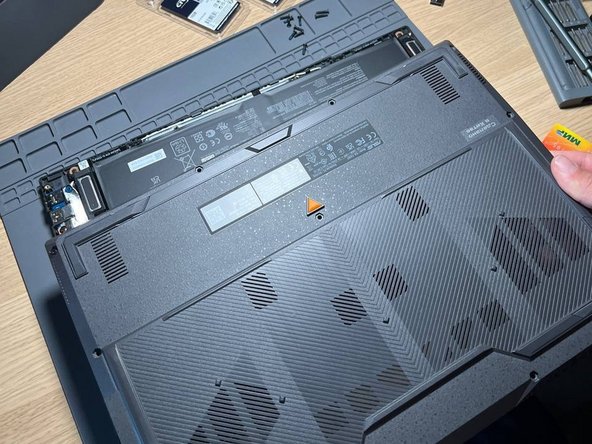
    • Carefully, starting from the lower right corner, we begin to unclip the clips off the back cover and, as a result, we can remove it.

  4. ASUS TUF Gaming A15 (2023) FA507XI RAM Replacement, Removing the battery off the motherboard: 手順 4、 2の画像 1 ASUS TUF Gaming A15 (2023) FA507XI RAM Replacement, Removing the battery off the motherboard: 手順 4、 2の画像 2
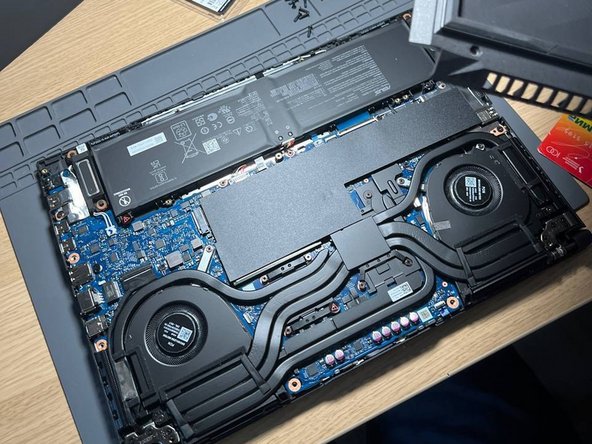
    • MUST!!!! Turn off the power to the laptop from the built-in battery by slightly prying the chip on both sides using a credit card.

  5. ASUS TUF Gaming A15 (2023) FA507XI RAM Replacement, Sticker removal: 手順 5、 2の画像 1 ASUS TUF Gaming A15 (2023) FA507XI RAM Replacement, Sticker removal: 手順 5、 2の画像 2
    • Partially peel off the sticker above the RAM ports.

  6. ASUS TUF Gaming A15 (2023) FA507XI RAM Replacement, Removing old RAM: 手順 6、 3の画像 1 ASUS TUF Gaming A15 (2023) FA507XI RAM Replacement, Removing old RAM: 手順 6、 3の画像 2 ASUS TUF Gaming A15 (2023) FA507XI RAM Replacement, Removing old RAM: 手順 6、 3の画像 3
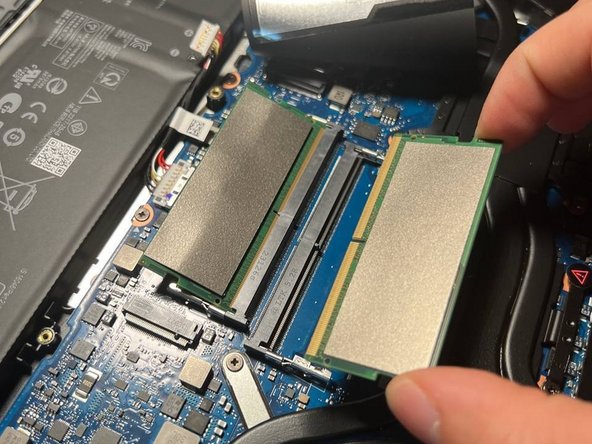
    • Unclip the clips holding the RAM (away from the RAM stick) and remove both sticks of RAM.

  7. ASUS TUF Gaming A15 (2023) FA507XI RAM Replacement, Unboxing the new RAM: 手順 7、 1の画像 1
    • Opening new RAM. Put it in a convenient and accessible place on the table.

    • Do not touch the contacts with your fingers.

  8. ASUS TUF Gaming A15 (2023) FA507XI RAM Replacement, Installing new RAM: 手順 8、 3の画像 1 ASUS TUF Gaming A15 (2023) FA507XI RAM Replacement, Installing new RAM: 手順 8、 3の画像 2 ASUS TUF Gaming A15 (2023) FA507XI RAM Replacement, Installing new RAM: 手順 8、 3の画像 3
    • Carefully install new RAM into the ports. Snap by pressing both corners of the bar at the same time.

  9. ASUS TUF Gaming A15 (2023) FA507XI RAM Replacement, Put the sticker back on: 手順 9、 1の画像 1
    • Return the sticker back and smooth it with our finger along the middle of the sticker (glue line).

  10. ASUS TUF Gaming A15 (2023) FA507XI RAM Replacement, Return power to laptop: 手順 10、 2の画像 1 ASUS TUF Gaming A15 (2023) FA507XI RAM Replacement, Return power to laptop: 手順 10、 2の画像 2
    • Using a credit card and your hand, carefully place the chip back into the battery.

  11. ASUS TUF Gaming A15 (2023) FA507XI RAM Replacement, Housing Assembly: 手順 11、 2の画像 1 ASUS TUF Gaming A15 (2023) FA507XI RAM Replacement, Housing Assembly: 手順 11、 2の画像 2
    • We return the cover to its rightful place and, according to the photo, tighten the screws with light force into the laptop.

  12. ASUS TUF Gaming A15 (2023) FA507XI RAM Replacement, Launch bios: 手順 12、 3の画像 1 ASUS TUF Gaming A15 (2023) FA507XI RAM Replacement, Launch bios: 手順 12、 3の画像 2 ASUS TUF Gaming A15 (2023) FA507XI RAM Replacement, Launch bios: 手順 12、 3の画像 3
    • We start the laptop with the PWR button and when the ASUS logo appears, press the F2 button to enter the BIOS.

  13. ASUS TUF Gaming A15 (2023) FA507XI RAM Replacement, Entering Diagnostic Mode: 手順 13、 2の画像 1 ASUS TUF Gaming A15 (2023) FA507XI RAM Replacement, Entering Diagnostic Mode: 手順 13、 2の画像 2
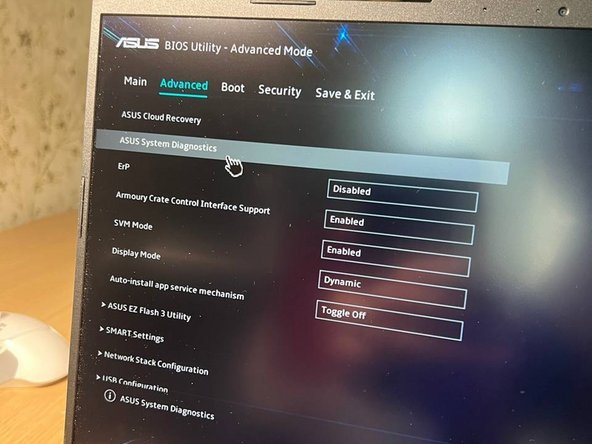
    • Already in the main BIOS menu, our RAM strips are initialized, press the F7 button or select the advanced settings item in the lower right corner. Then click ASUS System Diagnostics.

  14. ASUS TUF Gaming A15 (2023) FA507XI RAM Replacement, RAM test: 手順 14、 3の画像 1 ASUS TUF Gaming A15 (2023) FA507XI RAM Replacement, RAM test: 手順 14、 3の画像 2 ASUS TUF Gaming A15 (2023) FA507XI RAM Replacement, RAM test: 手順 14、 3の画像 3
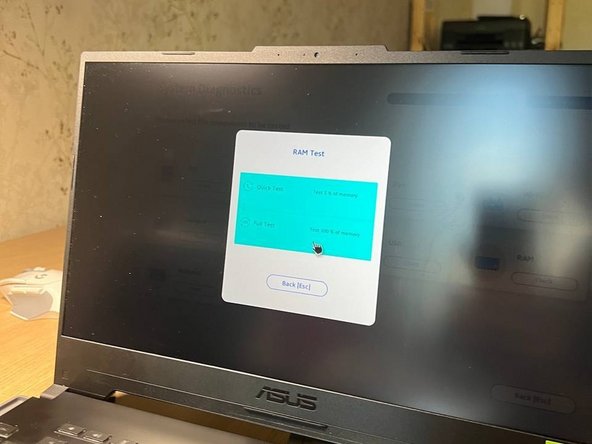
    • Once in the diagnostics menu, select RAM - diagnostics of RAM. Next, select 100% in the drop-down window and wait for the verification to complete. If successful, you will receive a window like this.

  15. ASUS TUF Gaming A15 (2023) FA507XI RAM Replacement, Congratulations!: 手順 15、 2の画像 1 ASUS TUF Gaming A15 (2023) FA507XI RAM Replacement, Congratulations!: 手順 15、 2の画像 2
    • Congratulations, you have successfully upgraded the RAM on your laptop! This cake is for you!

終わりに

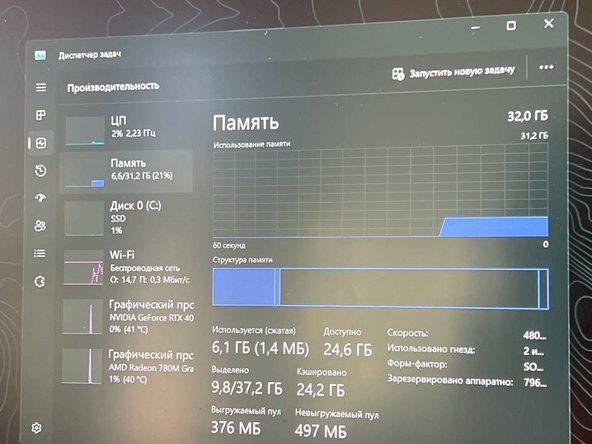
Congratulations on replacing your RAM!

3 の人々がこのガイドを完成させました。

以下の翻訳者の皆さんにお礼を申し上げます:

ru en

100%

Corbanizerさんは世界中で修理する私たちを助けてくれています! あなたも貢献してみませんか?
翻訳を始める ›

作成者

1人の作成者と共同作成されました。

Dislikedd

メンバー登録日: 10/04/23

351 ポイント

1ガイドが承認済み

2 件のコメント

я владею английским языком. этот гид был великолепен и в нем было много очарования. я перевел для вас на английский. хорошего дня!

Corbanizer - 返信

コメントを追加

統計データ:

過去 24時間: 8

過去 7 日: 65

過去 30 日: 338

今までの合計 1,261