はじめに
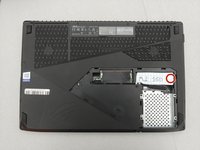
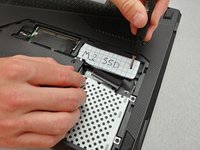
If your ASUS ROG Strix GL503VD-DB71 laptop’s storage becomes full or is running slow due to you having a lot of files on your laptop, this guide will help you solve that by adding an SSD to the laptop. An SSD is a solid-state drive, which acts as and extra storage drive you can attach to your laptop. The SSD uses integrated circuit assemblies to store data for your laptop. You may have to add or replace an SSD if you run out of storage or your laptop becomes slow due to the storage being full. Before beginning, make sure to power off laptop completely and disconnect from any external power source.
必要な工具と部品


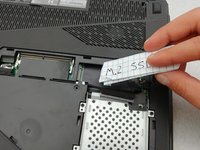
To reassemble your device, follow these instructions in reverse order.
3 の人々がこのガイドを完成させました。
チーム

Embry-Riddle Aeronautical University, Team S17-G8, Lamothe Spring 2020 Embry-Riddle Aeronautical University, Team S17-G8, Lamothe Spring 2020人のメンバー
ERAU-LAMOTHE-S20S17G8
4 メンバー
5のガイドは作成済み