メインコンテンツにスキップ

ASUS Q536F Fan Replacement

必要な工具と部品

  1. ASUS Q536F Fan Replacement, Back Panel: 手順 1、 2の画像 1 ASUS Q536F Fan Replacement, Back Panel: 手順 1、 2の画像 2
    • Remove ten 2 mm screws using a Phillips #0 screwdriver.

    • Remove the screw in the center using a T4 Torx screwdriver.

    • Use an iFixit opening tool to pry open the back panel.

    • It's normal to hear some cracking, but proceed with caution.

  2. ASUS Q536F Fan Replacement, Fan: 手順 2、 2の画像 1 ASUS Q536F Fan Replacement, Fan: 手順 2、 2の画像 2
    • Use a Phillips #0 screwdriver to remove the six 2 mm fan screws.

    • Use a Phillips #0 screwdriver to remove the five 2 mm heatsink screws.

    • Warped Screw

    • Heatsink shown has warped screw, so unable to remove

  3. ASUS Q536F Fan Replacement: 手順 3、 1の画像 1
    この手順で使用する道具:
    Tweezers
    $4.99
    購入する
    • Disconnect white and black antennae cables.

    • Using tweezers for this would be helpful.

  4. ASUS Q536F Fan Replacement: 手順 4、 2の画像 1 ASUS Q536F Fan Replacement: 手順 4、 2の画像 2
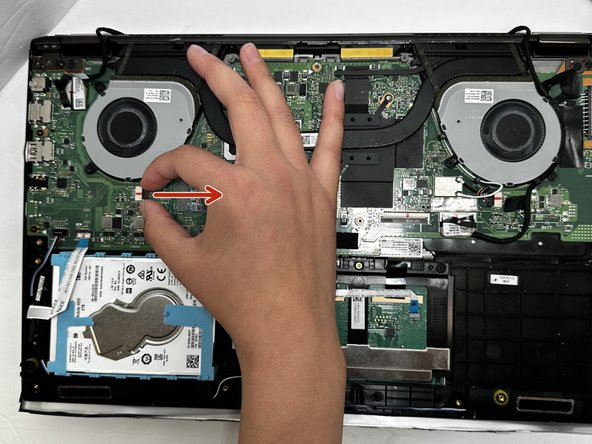
    • Disconnect fan cables pulling outwards as shown.

  5. ASUS Q536F Fan Replacement: 手順 5、 3の画像 1 ASUS Q536F Fan Replacement: 手順 5、 3の画像 2 ASUS Q536F Fan Replacement: 手順 5、 3の画像 3
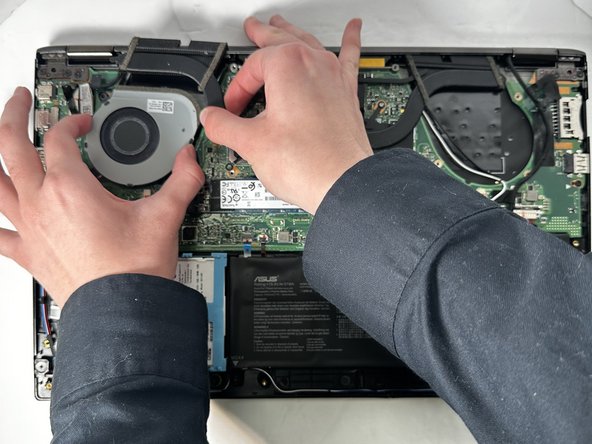
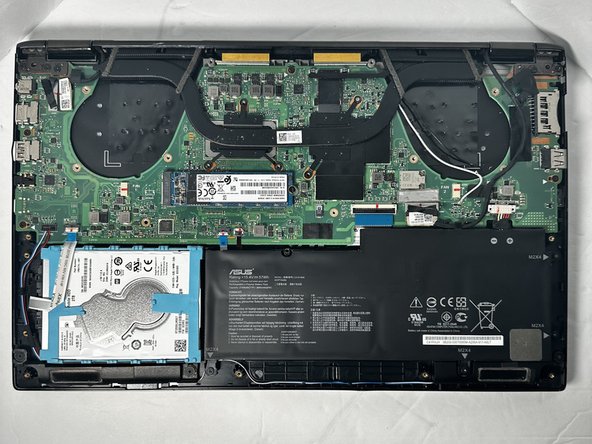
    • Carefully lift heatsink upward using a Ifixit opening tool or Fingers pull fan out from under the heat sink.

    • The fan can be removed without removing the heatsink, although it may be easier to remove.

終わりに

To reassemble your device, follow these instructions in reverse order.

作成者

4人の作成者と共同で作成されました。

Adra Ledward

メンバー登録日: 09/07/23

557 ポイント

5のガイドは作成済み

チーム

Gateway, Team 88-8, Gonzalez Fall 2023 Gateway, Team 88-8, Gonzalez Fall 2023人のメンバー

GCC-GONZALEZ-F23S88G8

5 メンバー

6のガイドは作成済み

0 件のコメント

コメントを追加

統計データ:

過去 24時間: 0

過去 7 日: 1

過去 30 日: 6

今までの合計 108