メインコンテンツにスキップ

ASUS PadFone X Vibration Motor Replacement

必要な工具と部品

  1. ASUS PadFone X Vibration Motor Replacement, Vibration Motor: 手順 1、 2の画像 1 ASUS PadFone X Vibration Motor Replacement, Vibration Motor: 手順 1、 2の画像 2
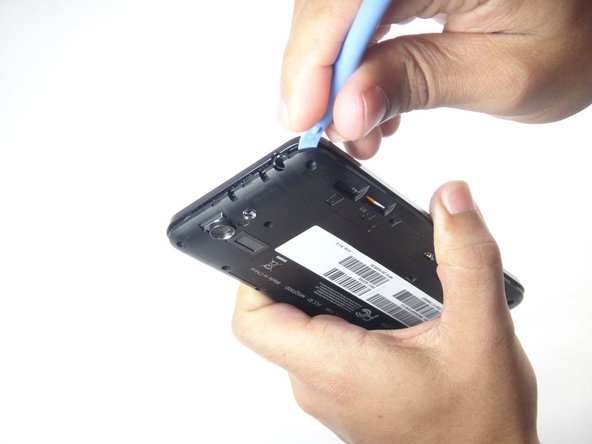
    • Using the blue plastic opening tool, insert the tip into the crease between the back cover and the phone and pry it upwards.

    • Work your way around the phone until the entire back cover is loose.

  2. ASUS PadFone X Vibration Motor Replacement: 手順 2、 2の画像 1 ASUS PadFone X Vibration Motor Replacement: 手順 2、 2の画像 2
    • Remove the thirteen 3.6 mm screws using the torx T5 bit in the screwdriver.

  3. ASUS PadFone X Vibration Motor Replacement: 手順 3、 2の画像 1 ASUS PadFone X Vibration Motor Replacement: 手順 3、 2の画像 2
    • Using the blue plastic opening tool, insert the tip into the crease between the mid-frame and the phone and pry it upwards.

    • Work your way around the phone until the entire back cover is loose and remove the mid-frame.

  4. ASUS PadFone X Vibration Motor Replacement: 手順 4、 1の画像 1
    • Using a spudger, pry the vibration motor connector from the motherboard.

  5. ASUS PadFone X Vibration Motor Replacement: 手順 5、 1の画像 1
    • Gently pry the vibration motor upwards using the spudger.

    • The vibration motor is held down by some adhesive, force might be needed to remove it.

終わりに

To reassemble your device, follow these instructions in reverse order.

作成者

8人の作成者と共同で作成されました。

Ryan

メンバー登録日: 05/14/12

223 ポイント

2のガイドは作成済み

チーム

USF Tampa, Team 8-4, Leahy Fall 2014 USF Tampa, Team 8-4, Leahy Fall 2014人のメンバー

USFT-LEAHY-F14S8G4

4 メンバー

5のガイドは作成済み

コメント 1 件

That is not the speaker, that is the motor for the vibrate functions...

The speaker is located in the plastic back of the housing near the camera hole.

tee1331 - 返信

コメントを追加

統計データ:

過去 24時間: 0

過去 7 日: 0

過去 30 日: 0

今までの合計 1,299