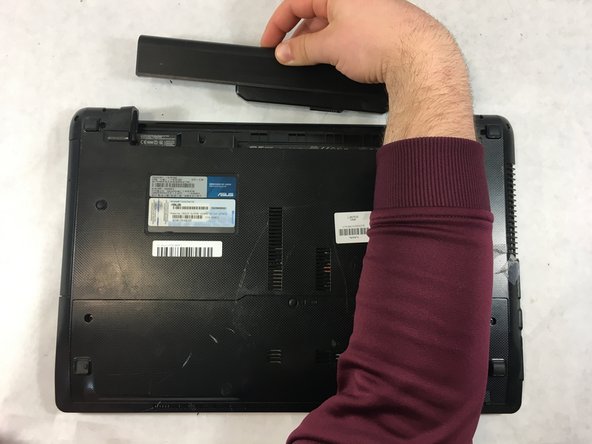
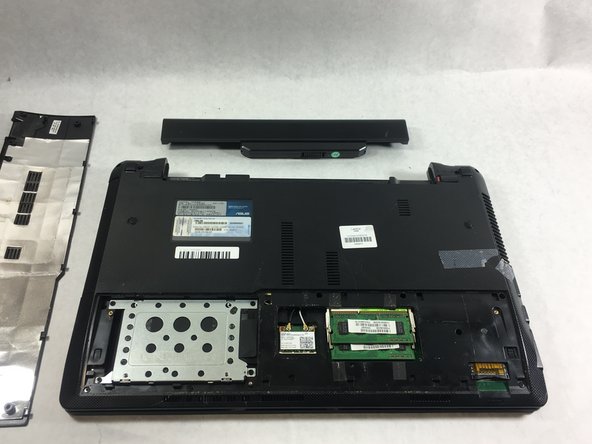
メインコンテンツにスキップ

ASUS K53E-BBR1 Hard Drive Replacement

必要な工具と部品

  1. ASUS K53E-BBR1 Hard Drive Replacement, Battery: 手順 1、 1の画像 1
    • Flip the laptop over so you can see the battery.

  2. ASUS K53E-BBR1 Hard Drive Replacement: 手順 2、 1の画像 1
    • Slide the lock on the right side of the battery to the right. If done correctly the slider will stay in place and there will be a red indicator.

  3. ASUS K53E-BBR1 Hard Drive Replacement: 手順 3、 3の画像 1 ASUS K53E-BBR1 Hard Drive Replacement: 手順 3、 3の画像 2 ASUS K53E-BBR1 Hard Drive Replacement: 手順 3、 3の画像 3
    • Slide the other sliding lock on the left side of the battery to the left, and with your other hand slide the battery out from the laptop.

  4. ASUS K53E-BBR1 Hard Drive Replacement, Hard Drive: 手順 4、 2の画像 1 ASUS K53E-BBR1 Hard Drive Replacement, Hard Drive: 手順 4、 2の画像 2
    • Remove the two 4mm Phillips #0 screws on either side of the laptop.

  5. ASUS K53E-BBR1 Hard Drive Replacement: 手順 5、 2の画像 1 ASUS K53E-BBR1 Hard Drive Replacement: 手順 5、 2の画像 2
    • Slide the back panel towards you until it stops.

    • Lift the panel up out of the laptop casing.

  6. ASUS K53E-BBR1 Hard Drive Replacement: 手順 6、 1の画像 1
    • Remove the four 3mm Phillips #0 screws holding the hard drive in place.

  7. ASUS K53E-BBR1 Hard Drive Replacement: 手順 7、 1の画像 1
    • Disconnect the hard drive from the laptop by sliding it towards the outside edge.

  8. ASUS K53E-BBR1 Hard Drive Replacement: 手順 8、 2の画像 1 ASUS K53E-BBR1 Hard Drive Replacement: 手順 8、 2の画像 2
    • Grab hold of the black cloth tab and pull the hard drive out from the laptop.

終わりに

To reassemble your device, follow these instructions in reverse order.

作成者

2人の作成者と共同で作成されました。

Matthew Merlo

メンバー登録日: 03/20/19

267 ポイント

2のガイドは作成済み

チーム

UMass Dartmouth, Team S6-G4, Peak Spring 2019 UMass Dartmouth, Team S6-G4, Peak Spring 2019人のメンバー

UMASSD-PEAK-S19S6G4

3 メンバー

4のガイドは作成済み

0 件のコメント

コメントを追加

統計データ:

過去 24時間: 0

過去 7 日: 1

過去 30 日: 8

今までの合計 258