メインコンテンツにスキップ

ASUS K200MA-DS01T Trackpad Replacement

必要な工具と部品

  1. ASUS K200MA-DS01T Trackpad Replacement, Back Panel: 手順 1、 2の画像 1 ASUS K200MA-DS01T Trackpad Replacement, Back Panel: 手順 1、 2の画像 2
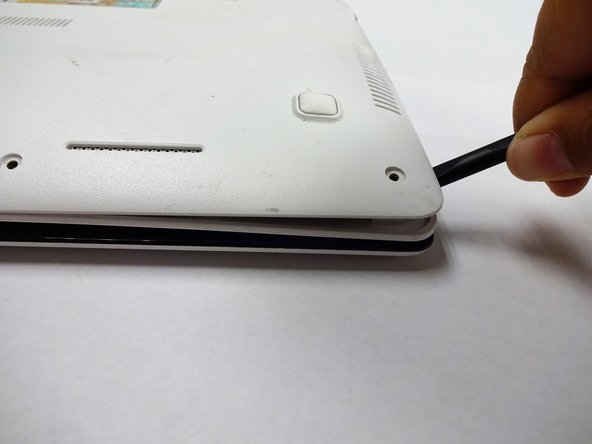
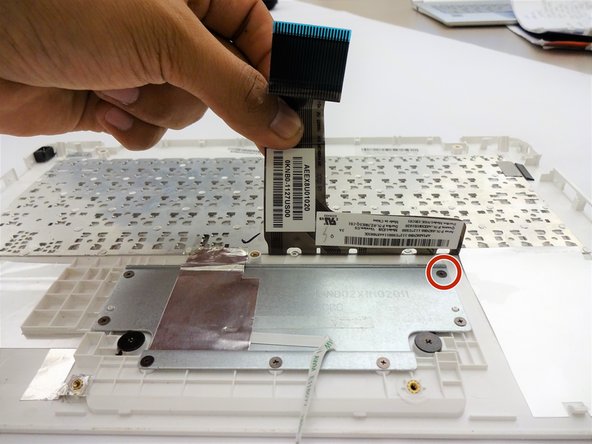
    • With the opening facing you, flip the laptop over and remove the following screws from the back panel:

    • Six 4mm Phillips screws using a Phillips #0 screwdriver.

    • One 12mm Phillips screw in the center using a Phillips #0 screwdriver.

  2. ASUS K200MA-DS01T Trackpad Replacement: 手順 2、 2の画像 1 ASUS K200MA-DS01T Trackpad Replacement: 手順 2、 2の画像 2
    • Using a plastic spudger, remove the two rubber stoppers closest to the hinge to reveal the screws underneath.

  3. ASUS K200MA-DS01T Trackpad Replacement: 手順 3、 1の画像 1
    • Remove the following screws:

    • Two 4mm Phillips screws using a Phillips #0 screwdriver.

  4. ASUS K200MA-DS01T Trackpad Replacement: 手順 4、 3の画像 1 ASUS K200MA-DS01T Trackpad Replacement: 手順 4、 3の画像 2 ASUS K200MA-DS01T Trackpad Replacement: 手順 4、 3の画像 3
    • Using a plastic spudger (and a fair amount of force), pry the back panel up from the keyboard to separate.

    • You may have to use one spudger to wedge between the back panel and keyboard while using another to pry it open in a different spot.

  5. ASUS K200MA-DS01T Trackpad Replacement, Keyboard: 手順 5、 2の画像 1 ASUS K200MA-DS01T Trackpad Replacement, Keyboard: 手順 5、 2の画像 2
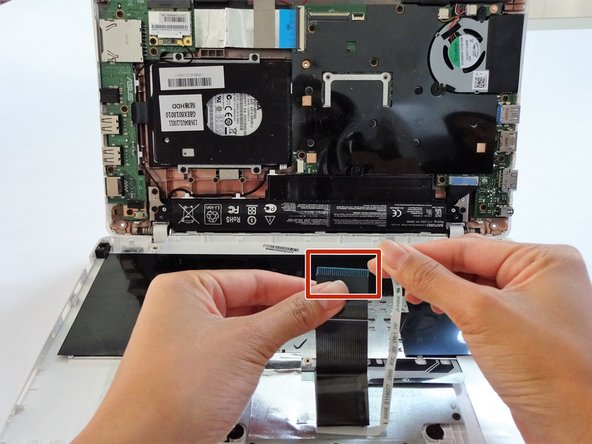
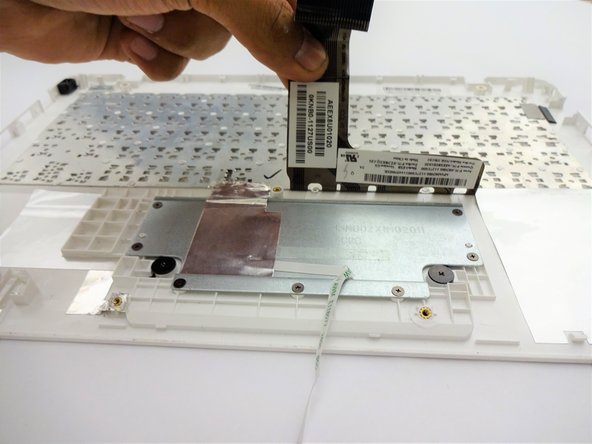
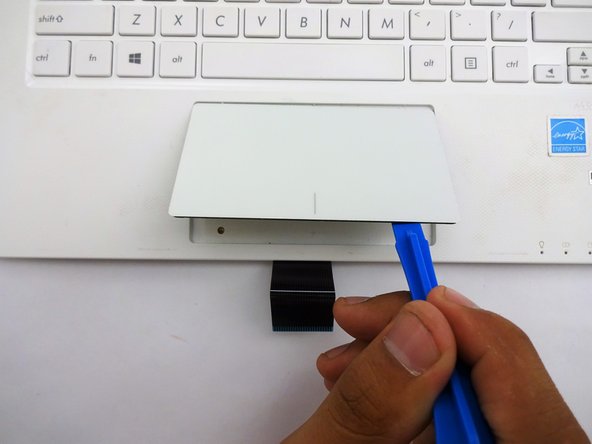
    • To disconnect the keyboard connectors from keyboard and back panel, gently pull wide keyboard connector out.

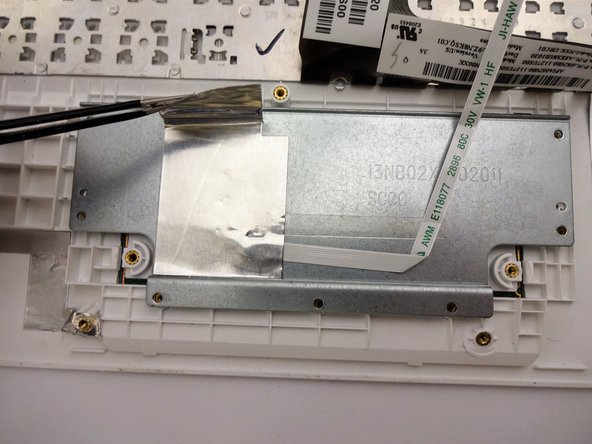
    • Gently pull the narrow connector away from the keyboard.

  6. ASUS K200MA-DS01T Trackpad Replacement: 手順 6、 2の画像 1 ASUS K200MA-DS01T Trackpad Replacement: 手順 6、 2の画像 2
    • Now that the keyboard connectors are unplugged, pull the keyboard off and away from the back panel hinges.

  7. ASUS K200MA-DS01T Trackpad Replacement, Track Pad: 手順 7、 2の画像 1 ASUS K200MA-DS01T Trackpad Replacement, Track Pad: 手順 7、 2の画像 2
    • Lift the keyboard connector from the keyboard.

  8. ASUS K200MA-DS01T Trackpad Replacement: 手順 8、 2の画像 1 ASUS K200MA-DS01T Trackpad Replacement: 手順 8、 2の画像 2
    • Lift the foil sheet.

  9. ASUS K200MA-DS01T Trackpad Replacement: 手順 9、 2の画像 1 ASUS K200MA-DS01T Trackpad Replacement: 手順 9、 2の画像 2
    • Remove the following screws:

    • Eight 3 mm screws using Phillips screwdriver.

    • Be sure to remove the screw underneath the keyboard connector.

  10. ASUS K200MA-DS01T Trackpad Replacement: 手順 10、 1の画像 1
    • Remove the following screws:

    • Two 2 mm screws using a Phillips #00 screwdriver.

  11. ASUS K200MA-DS01T Trackpad Replacement: 手順 11、 2の画像 1 ASUS K200MA-DS01T Trackpad Replacement: 手順 11、 2の画像 2
    • Using a plastic spudger, remove the metal plate.

  12. ASUS K200MA-DS01T Trackpad Replacement: 手順 12、 3の画像 1 ASUS K200MA-DS01T Trackpad Replacement: 手順 12、 3の画像 2 ASUS K200MA-DS01T Trackpad Replacement: 手順 12、 3の画像 3
    • Flip the keyboard over.

    • Using a plastic spudger, pry the track pad off the plastic piece underneath.

    • Don't be afraid to use some force in this step because the track pad and the plastic piece are glued together.

終わりに

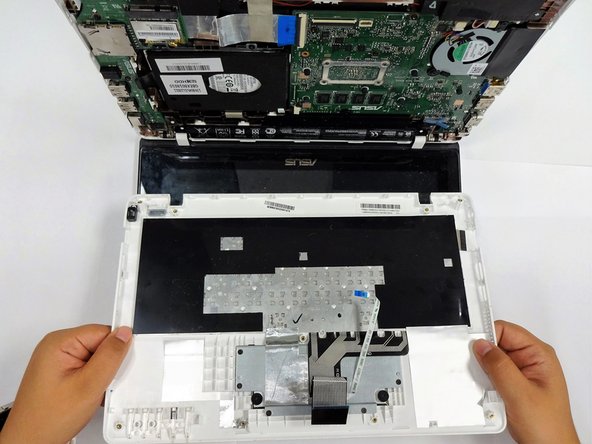
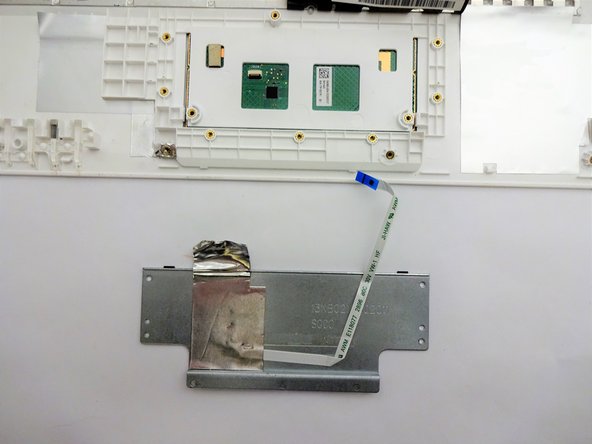
To reassemble your device, follow these instructions in reverse order.

作成者

3人の作成者と共同で作成されました。

Terrinda

メンバー登録日: 09/17/18

526 ポイント

4のガイドは作成済み

チーム

CSU Fullerton, Team S2-G5, Bruce Fall 2018 CSU Fullerton, Team S2-G5, Bruce Fall 2018人のメンバー

CSUF-BRUCE-F18S2G5

4 メンバー

7のガイドは作成済み

0 件のコメント

コメントを追加

統計データ:

過去 24時間: 0

過去 7 日: 0

過去 30 日: 1

今までの合計 95