メインコンテンツにスキップ

ASUS Eee PC 900HD Hard Drive Replacement

必要な工具と部品

  1. ASUS Eee PC 900HD Hard Drive Replacement, Hard Drive: 手順 1、 3の画像 1 ASUS Eee PC 900HD Hard Drive Replacement, Hard Drive: 手順 1、 3の画像 2 ASUS Eee PC 900HD Hard Drive Replacement, Hard Drive: 手順 1、 3の画像 3
    • Remove the four 4.76 mm Philips screws on the back of the laptop using the Phillips J0 Screwdriver.

  2. ASUS Eee PC 900HD Hard Drive Replacement: 手順 2、 2の画像 1 ASUS Eee PC 900HD Hard Drive Replacement: 手順 2、 2の画像 2
    • Use a plastic opening tool to remove the back cover.

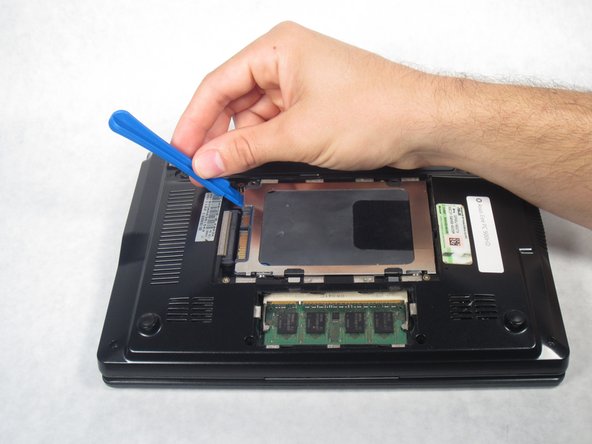
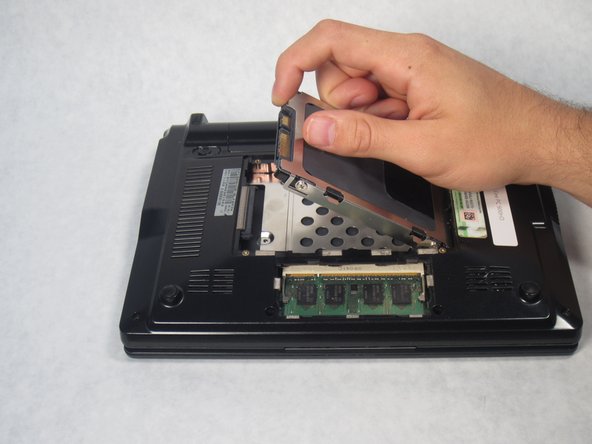
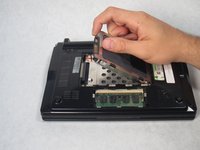
  3. ASUS Eee PC 900HD Hard Drive Replacement: 手順 3、 3の画像 1 ASUS Eee PC 900HD Hard Drive Replacement: 手順 3、 3の画像 2 ASUS Eee PC 900HD Hard Drive Replacement: 手順 3、 3の画像 3
    • Starting from the left, use a plastic opening tool to slide the hard drive all the way to the right.

    • Once the hard drive is completely to the right, pull up on the hard drive to remove.

終わりに

To reassemble your device, follow these instructions in reverse order.

ある他の人がこのガイドを完成しました。

作成者

3人の作成者と共同で作成されました。

Kendall Marie Mehlhorn

メンバー登録日: 10/13/15

557 ポイント

5のガイドは作成済み

チーム

Sam Houston State, Team 1-6, Blackburne Fall 2015 Sam Houston State, Team 1-6, Blackburne Fall 2015人のメンバー

SHSU-BLACKBURNE-F15S1G6

4 メンバー

9のガイドは作成済み

0 件のコメント

コメントを追加

統計データ:

過去 24時間: 0

過去 7 日: 4

過去 30 日: 15

今までの合計 757