メインコンテンツにスキップ

ASUS E210MA-TB.CL464BK Battery Replacement

必要な工具と部品

  1. ASUS E210MA-TB.CL464BK Battery Replacement, Battery: 手順 1、 3の画像 1 ASUS E210MA-TB.CL464BK Battery Replacement, Battery: 手順 1、 3の画像 2 ASUS E210MA-TB.CL464BK Battery Replacement, Battery: 手順 1、 3の画像 3
    • Place the laptop with the bottom side facing up. Have the front (where the mousepad is) facing toward you.

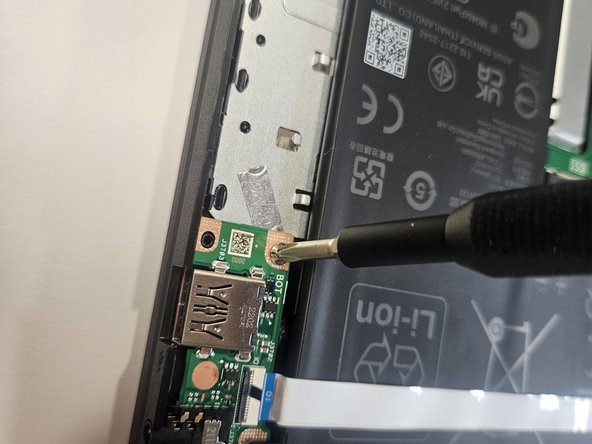
    • Start by removing the ten 7mm screws on the bottom of the laptop using a JIS #00 JIS screwdriver.

  2. ASUS E210MA-TB.CL464BK Battery Replacement: 手順 2、 1の画像 1
    • Double-check to make sure all of the screws are removed.

    • If you have a Jimmy or other flat, straight-edge object, slide it in the crack where the halves of the case meet.

    • When the parts are separated, pull them apart to expose the insides of the case.

  3. ASUS E210MA-TB.CL464BK Battery Replacement: 手順 3、 2の画像 1 ASUS E210MA-TB.CL464BK Battery Replacement: 手順 3、 2の画像 2
    • Remove the 4 mm screws around the USB port.

  4. ASUS E210MA-TB.CL464BK Battery Replacement: 手順 4、 2の画像 1 ASUS E210MA-TB.CL464BK Battery Replacement: 手順 4、 2の画像 2
    • Remove the 3 mm screws around the battery.

    • Carefully lift up the USB port and set it to the side.

  5. ASUS E210MA-TB.CL464BK Battery Replacement: 手順 5、 2の画像 1 ASUS E210MA-TB.CL464BK Battery Replacement: 手順 5、 2の画像 2
    • Unplug the connection between the motherboard and the battery by pulling towards the speaker side.

    • Repeat the same process to remove the blue tape on the second picture.

  6. ASUS E210MA-TB.CL464BK Battery Replacement: 手順 6、 1の画像 1
    • Lift up and remove the battery.

終わりに

To reassemble your device, follow these instructions in reverse order.

作成者

2人の作成者と共同で作成されました。

John Hutchins

メンバー登録日: 02/07/23

763 ポイント

5のガイドは作成済み

チーム

Gateway, Team 73-6, Gonzalez Spring 2023 Gateway, Team 73-6, Gonzalez Spring 2023人のメンバー

GCC-GONZALEZ-S23S73G6

5 メンバー

5のガイドは作成済み

0 件のコメント

コメントを追加

統計データ:

過去 24時間: 2

過去 7 日: 5

過去 30 日: 33

今までの合計 439