メインコンテンツにスキップ

ASUS Chromebook C300MA-DH01 Motherboard Replacement

必要な工具と部品

  1. ASUS Chromebook C300MA-DH01 Motherboard Replacement, Motherboard: 手順 1、 1の画像 1
    • Flip the Chromebook over so the bottom of the device is facing up.

  2. ASUS Chromebook C300MA-DH01 Motherboard Replacement: 手順 2、 2の画像 1 ASUS Chromebook C300MA-DH01 Motherboard Replacement: 手順 2、 2の画像 2
    • Using the JIS J0 Screwdriver, remove the following screws from the bottom:

    • (5) Five 6mm screws

    • (6) Six 8mm screws

  3. ASUS Chromebook C300MA-DH01 Motherboard Replacement: 手順 3、 3の画像 1 ASUS Chromebook C300MA-DH01 Motherboard Replacement: 手順 3、 3の画像 2 ASUS Chromebook C300MA-DH01 Motherboard Replacement: 手順 3、 3の画像 3
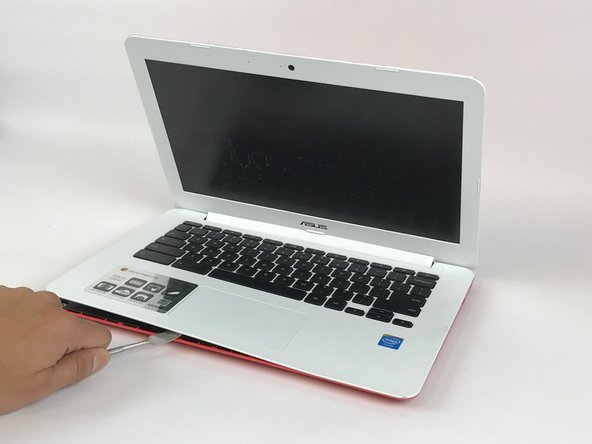
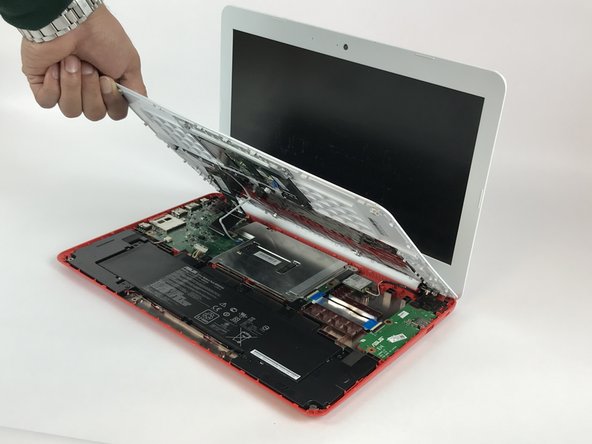
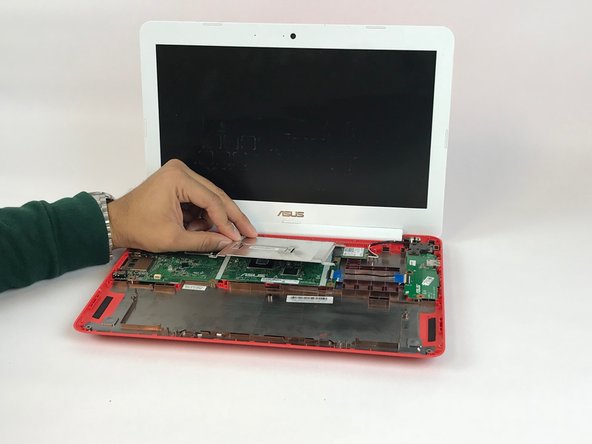
    • Gently wedge the spudger in between the bottom of the device and the keyboard, and carefully pry the cover open. Then, carefully lift up on keyboard.

  4. ASUS Chromebook C300MA-DH01 Motherboard Replacement: 手順 4、 3の画像 1 ASUS Chromebook C300MA-DH01 Motherboard Replacement: 手順 4、 3の画像 2 ASUS Chromebook C300MA-DH01 Motherboard Replacement: 手順 4、 3の画像 3
    • Gently detach connecting cables.

    • Carefully flip up the large black tab.

    • Carefully flip up the small white tab.

    • Remove its corresponding black cable.

    • Remove its corresponding white cable.

    • The keyboard will be fully detached at this point. Set it aside for now.

  5. ASUS Chromebook C300MA-DH01 Motherboard Replacement: 手順 5、 1の画像 1
    • Using the JIS J0 Screwdriver, unscrew and remove the (6) six 6mm screws from the device.

  6. ASUS Chromebook C300MA-DH01 Motherboard Replacement: 手順 6、 1の画像 1
    • Using the plastic opening tool, gently push the connector tab away from the battery to detach the cable.

    • The battery will be fully detached at this point. Carefully lift it out of the device.

  7. ASUS Chromebook C300MA-DH01 Motherboard Replacement: 手順 7、 1の画像 1
    • Using the plastic opening tool, disconnect the audio connection by pushing the audio tab toward the speakers.

    • With the audio cable detached, carefully lift the speakers out of the device.

  8. ASUS Chromebook C300MA-DH01 Motherboard Replacement: 手順 8、 1の画像 1
    • Remove the LCD cable from the motherboard.

    • Peel back the tape and then gently pull back on the connector cable.

  9. ASUS Chromebook C300MA-DH01 Motherboard Replacement: 手順 9、 1の画像 1
    • Using the JIS J0 screwdriver, unscrew the 3mm screw.

    • Remove the Wi-Fi card from the motherboard.

  10. ASUS Chromebook C300MA-DH01 Motherboard Replacement: 手順 10、 1の画像 1
    • Using the plastic opening tool, lift up on data cable for the daughterboard to remove it from the device.

  11. ASUS Chromebook C300MA-DH01 Motherboard Replacement: 手順 11、 2の画像 1 ASUS Chromebook C300MA-DH01 Motherboard Replacement: 手順 11、 2の画像 2
    • Using the JIS J0 Screwdriver unscrew and remove the (2) two 3 mm screws from the heat shield.

    • Gently lift up on the heat shield to remove it.

  12. ASUS Chromebook C300MA-DH01 Motherboard Replacement: 手順 12、 1の画像 1
    • Using the JIS J0 Screwdriver, unscrew and remove the (3) three 6mm screws from the left hinge.

  13. ASUS Chromebook C300MA-DH01 Motherboard Replacement: 手順 13、 2の画像 1 ASUS Chromebook C300MA-DH01 Motherboard Replacement: 手順 13、 2の画像 2
    • Using the JIS J0 Screwdriver, unscrew and removing the following:

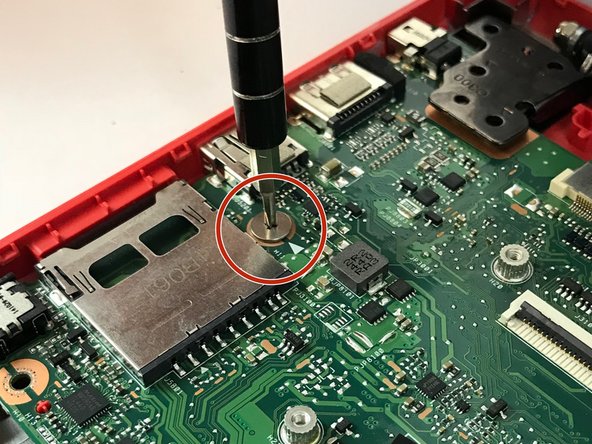
    • (1) One 3mm screw from the right side of the motherboard.

    • (1) One 4mm silver screw from the left side of the motherboard.

    • The motherboard can now be carefully removed from the device.

終わりに

To reassemble your device, follow these instructions in reverse order.

作成者

2人の作成者と共同で作成されました。

Gina Altimari

メンバー登録日: 09/28/17

401 ポイント

4のガイドは作成済み

チーム

USF Tampa, Team S2-G5, Passmore Fall 2017 USF Tampa, Team S2-G5, Passmore Fall 2017人のメンバー

USFT-PASSMORE-F17S2G5

3 メンバー

10のガイドは作成済み

0 件のコメント

コメントを追加

統計データ:

過去 24時間: 1

過去 7 日: 2

過去 30 日: 3

今までの合計 204