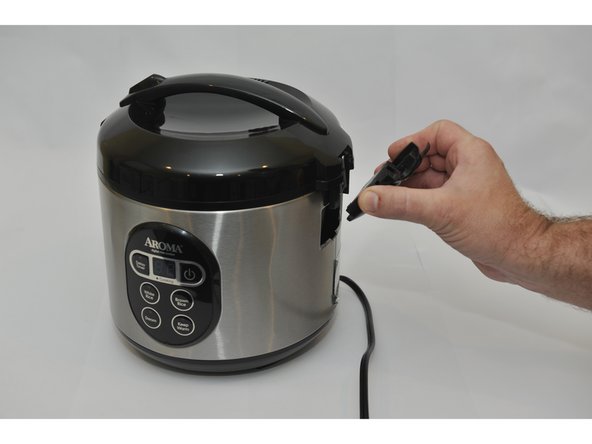
メインコンテンツにスキップ

Aroma ARC-914SBD Heating Element/ Thermostat Replacement

必要な工具と部品

  1. Aroma ARC-914SBD Heating Element/ Thermostat Replacement, Lid: 手順 1、 2の画像 1 Aroma ARC-914SBD Heating Element/ Thermostat Replacement, Lid: 手順 1、 2の画像 2
    • The first step is removing the condensation catcher in order to reach the control panel. We do this by pinching the condensation catcher as shown, on both sides and pull the condensation catcher away from the cooker.

  2. Aroma ARC-914SBD Heating Element/ Thermostat Replacement: 手順 2、 1の画像 1
    • Once the condensation catcher has been removed, set it aside for reassembly later.

    • Now make sure you have a a Phillips head screwdriver, size PH2. This tool will allow you to remove the screw that was behind the condensation catcher.

  3. Aroma ARC-914SBD Heating Element/ Thermostat Replacement: 手順 3、 2の画像 1 Aroma ARC-914SBD Heating Element/ Thermostat Replacement: 手順 3、 2の画像 2
    • Gently remove the piece that was held in place by the screw, you do this by pulling out from the top, then pulling up. This will expose the hinges for the lid.

  4. Aroma ARC-914SBD Heating Element/ Thermostat Replacement: 手順 4、 3の画像 1 Aroma ARC-914SBD Heating Element/ Thermostat Replacement: 手順 4、 3の画像 2 Aroma ARC-914SBD Heating Element/ Thermostat Replacement: 手順 4、 3の画像 3
    • To remove the hinge, gently rotate the bottom of the rod upwards, then push inward to pull the rod out. Repeat the process for each rod. This will allow the lid to be removed.

  5. Aroma ARC-914SBD Heating Element/ Thermostat Replacement, Heating Element/ Thermostat: 手順 5、 2の画像 1 Aroma ARC-914SBD Heating Element/ Thermostat Replacement, Heating Element/ Thermostat: 手順 5、 2の画像 2
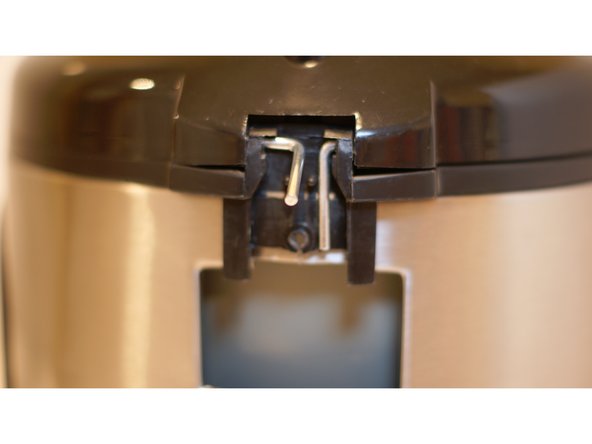
    • Locate the piece on the black plastic trim that is opposite from where the hinges were. Carefully, pry this piece from the bottom to get the tab from behind the stainless steel to in front of the steel as shown.

  6. Aroma ARC-914SBD Heating Element/ Thermostat Replacement: 手順 6、 2の画像 1 Aroma ARC-914SBD Heating Element/ Thermostat Replacement: 手順 6、 2の画像 2
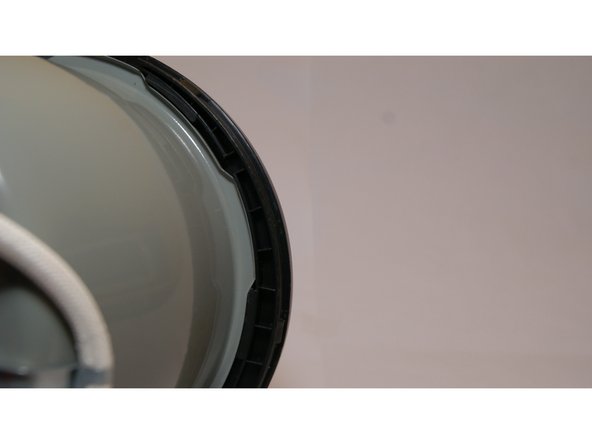
    • Next, you must remove the upper black trim which is connected to the inside liner with tabs. To do this you must hold the interior walls still, while rotating the trim so that the tabs line up with the slots. (tabs cannot be seen at this point, pics are to give you an idea of what you cannot see inside the device)

  7. Aroma ARC-914SBD Heating Element/ Thermostat Replacement: 手順 7、 2の画像 1 Aroma ARC-914SBD Heating Element/ Thermostat Replacement: 手順 7、 2の画像 2
    • Using a Phillips head screwdriver, size PH2, remove the screws from the control module to expose wired connections.

  8. Aroma ARC-914SBD Heating Element/ Thermostat Replacement: 手順 8、 1の画像 1
    • Unplug thermostat from control module

  9. Aroma ARC-914SBD Heating Element/ Thermostat Replacement: 手順 9、 1の画像 1
    • Remove red and blue wires from heating element to fully detach from control module. This is done by removing the screws on the heating element terminals using a Phillips head screwdriver, size PH2.

  10. Aroma ARC-914SBD Heating Element/ Thermostat Replacement: 手順 10、 2の画像 1 Aroma ARC-914SBD Heating Element/ Thermostat Replacement: 手順 10、 2の画像 2
    • Again, using a Phillips head screwdriver, size PH2, remove the three screws holding the heating element assembly to the bowl. This will remove the heating element and the thermostat.

終わりに

To reassemble your device, follow these instructions in reverse order.

ある他の人がこのガイドを完成しました。

作成者

5人の作成者と共同で作成されました。

Brandon Nieves

メンバー登録日: 09/04/15

956 ポイント

8のガイドは作成済み

チーム

USF Tampa, Team 2-3, Sullivan Fall 2015 USF Tampa, Team 2-3, Sullivan Fall 2015人のメンバー

USFT-SULLIVAN-F15S2G3

3 メンバー

8のガイドは作成済み

2 件のコメント

Where do you get a replacement thermostat?

4forums - 返信

https://www.amazon.com/Aexit-Terminal-Co... or https://www.aliexpress.us/item/225580067... or try googling some combinations of the keywords: 2 pin/wire rice cooker temperature/thermostat magnetic probe/sensor replacement

JAR -

コメントを追加

統計データ:

過去 24時間: 3

過去 7 日: 8

過去 30 日: 19

今までの合計 1,946