はじめに
If your ABXY buttons or D-Pad have become unresponsive and remain so after being cleaned, the conductive sticker under them is likely worn out or damaged. Use this guide to replace the sticker and make your buttons work normally again
必要な工具と部品
-
-
Before you begin, power off the console and remove:
-
The stylus
-
Any game cartridge
-
The microSD card
 FixBotに聞いてみる
-
-
-
Use a tri‑point Y00 screwdriver to remove the four 6 mm‑long screws located at the four corners of the bottom panel.
-
-
-
Use a spudger to gently pry around the two short edges and front edge (with the stylus cut‑out) to release the clips securing the back cover.
-
Swing the back cover open from its front edge to release the clips along the hinge edge. Don't remove it fully—three cables are connecting it to the motherboard (two on each side and one in the rear).
-
-
-
この手順で使用する道具:Tweezers$4.99
-
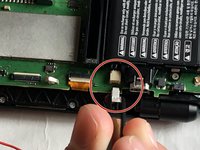
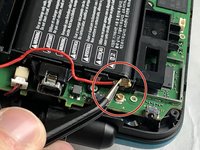
Use tweezers to disconnect the two cables that connect the rear buttons on either side to the motherboard by gently pulling them upwards.
-
Fold the back cover over the hinge edge, keeping the cable connected. Don't strain the cable.
-
-
-
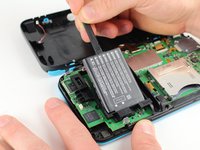
Use the flat end of a spudger to gently pry the battery out of its plastic enclosure.
-
-
この手順で使用する道具:Tweezers$4.99
-
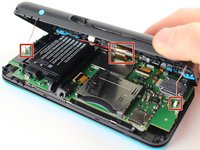
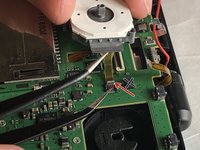
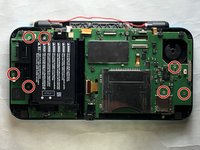
There are 8 ribbon cables that need to be removed as shown in the picture.
-
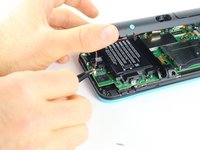
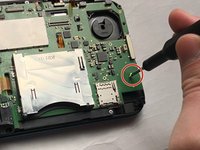
For the remaining 6 (in red), use a pair of tweezers to flip the latches up and pull the ribbon cable out.
-
Note that the second picture shows a broken ribbon connector next to the joystick ribbon connector (to the right of the red arrow). Do not attempt to unlatch this connector as shown in the picture!
-
-
-
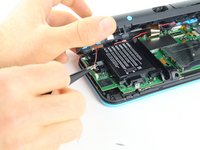
Remove the seven 4.4 mm screws using a J00 (or iFixit's Phillips #00) screwdriver bit.
-
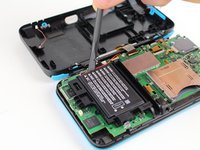
Remove the motherboard from the device.
-
-
-
Flip the board over so the cartridge slot is on the bottom
-
Peel off the damaged sticker and replace it with the new one
-
ABXY buttons
-
D-pad
-


To reassemble your device, follow these instructions in reverse order.
2 の人々がこのガイドを完成させました。
