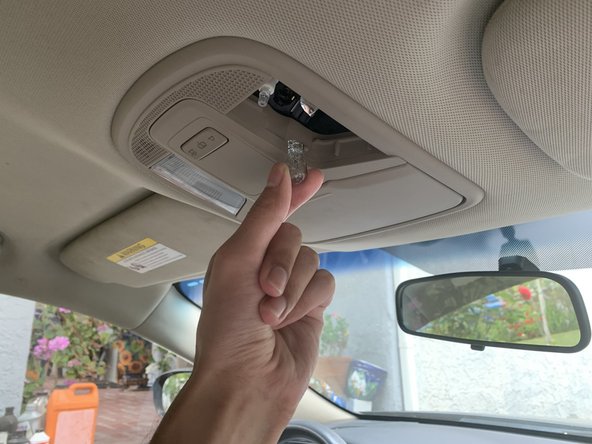
メインコンテンツにスキップ

2011-2015 Kia Optima Interior Map Light Replacement

必要な工具と部品

  1. 2011-2015 Kia Optima Interior Map Light Replacement, Interior Map Light: 手順 1、 1の画像 1
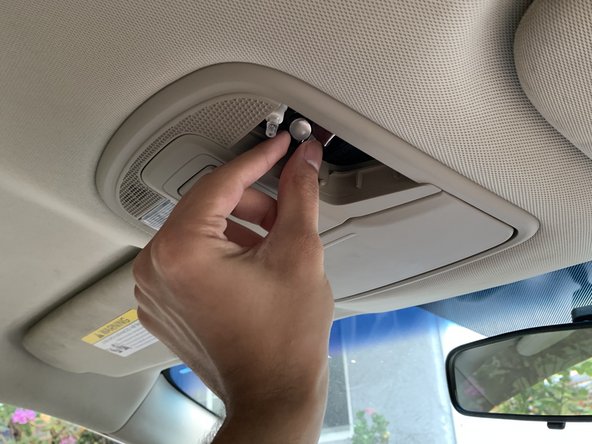
    • Wedge the tip of the prying tool between the lens and the console.

    • Gently pry the lens off of the console.

  2. 2011-2015 Kia Optima Interior Map Light Replacement: 手順 2、 1の画像 1
    • Separate the lens from the clips connecting the lens and the console.

  3. 2011-2015 Kia Optima Interior Map Light Replacement: 手順 3、 2の画像 1 2011-2015 Kia Optima Interior Map Light Replacement: 手順 3、 2の画像 2
    • Gently twist or pull away the bulb from the connection.

  4. 2011-2015 Kia Optima Interior Map Light Replacement: 手順 4、 2の画像 1 2011-2015 Kia Optima Interior Map Light Replacement: 手順 4、 2の画像 2
    • Insert the new bulb into the connection.

    • Some bulbs are polarity specific, so if at first the bulb does not work, try flipping it 180 degrees and connect it again.

  5. 2011-2015 Kia Optima Interior Map Light Replacement: 手順 5、 1の画像 1
    • Reattach the lens back onto the console by clipping it back into place.

  6. 2011-2015 Kia Optima Interior Map Light Replacement: 手順 6、 1の画像 1
    • Push the lens into the console. When you hear a click, the lens has been attached properly.

ゴール

2 の人々がこのガイドを完成させました。

作成者

2人の作成者と共同で作成されました。

Ariel Miranda

メンバー登録日: 04/20/21

175 ポイント

1ガイドが承認済み

チーム

CSU Los Angeles, Team S1-G120, Harris Spring 2021 CSU Los Angeles, Team S1-G120, Harris Spring 2021人のメンバー

CSULA-HARRIS-S21S1G120

1 メンバー

1のガイドは作成済み

0 件のコメント

コメントを追加

統計データ:

過去 24時間: 0

過去 7 日: 11

過去 30 日: 33

今までの合計 1,508