はじめに
The factory springs can be replaced for several reasons, they might be broken or uneven from years of uneven load. You can also replace the factory springs with higher or lower ones.
必要な工具と部品
-
-
Put the jack under the rear frame hook and jack up the back of the car until the jack stands can be put under the jack supports.
-
Put jack stands under the rear jack supports. Slowly lower the weight of the car onto them by lowering the jack.
-
Put the jack under the front sub frame and jack up the front of the car until the jack stands can be put under the jack supports.
-
Put jack stands under the front jack supports. Slowly lower the weight of the car onto them by lowering the jack.
-
-
-
Using the 17mm socket, unbolt the wheel nuts and remove the tire from the hub.
-
-
-
-
Put the jack under the wheel arm and let the jack bear the weight of the arm but not lift the arm.
-
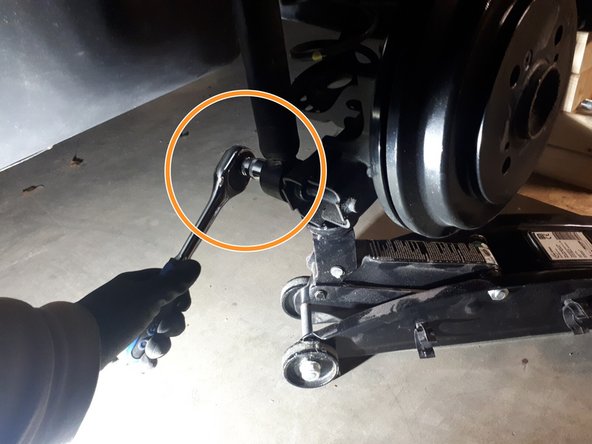
Using the 17mm socket, unscrew the nut attaching the bottom of the shock absorber to the wheel arm.
-
Push the shock absorber towards the car to slide the bottom from the bolt.
-
Drop the jack holding the wheel arm to unload the spring.
-
-
-
Using the crowbar, lift the bottom of the spring out while pushing down on the wheel hub.
-
Add the new spring from below. Push down on the wheel hub to ensure clearance at the bottom of the spring.
-
Ensure the bottom end of the spring aligns with the bulge on the rubber.
-
-
-
With the jack, push up the wheel arm until the shock absorber aligns with the wheel arm bolt.
-
Slide the shock absorber back on.
-
Apply threadlocker, put the washer and the nut back on and tighten to 90 N·m.
-
-
-
Place the tire flat against the wheel hub and make sure the hub holes line up with the rim holes.
-
With the 17mm socket, screw the wheelnuts back in. Tighten to 85 N·m.
-


To replace the other rear spring, repeat the process on the other side of the car. When you’re finished, lower the car with the jack.
To replace the other rear spring, repeat the process on the other side of the car. When you’re finished, lower the car with the jack.
2 の人々がこのガイドを完成させました。
