メインコンテンツにスキップ

2009 Subaru Impreza WRX Rear Door Panel Replacement

必要な工具と部品

  1. 2009 Subaru Impreza WRX Rear Door Panel Replacement, Rear Door Panel: 手順 1、 1の画像 1
    • Pry off the plastic tab inside the rear door handle.

  2. 2009 Subaru Impreza WRX Rear Door Panel Replacement: 手順 2、 1の画像 1
    • Use the Phillips screwdriver to unscrew the 8x3/4" Phillips screw inside the door handle.

  3. 2009 Subaru Impreza WRX Rear Door Panel Replacement: 手順 3、 1の画像 1
    • Use a flathead screwdriver to pry up the plastic tab inside the rear door armrest.

  4. 2009 Subaru Impreza WRX Rear Door Panel Replacement: 手順 4、 1の画像 1
    • Use the Phillips screwdriver to unscrew the 8x3/4" Phillips screw inside the armrest.

  5. 2009 Subaru Impreza WRX Rear Door Panel Replacement: 手順 5、 2の画像 1 2009 Subaru Impreza WRX Rear Door Panel Replacement: 手順 5、 2の画像 2
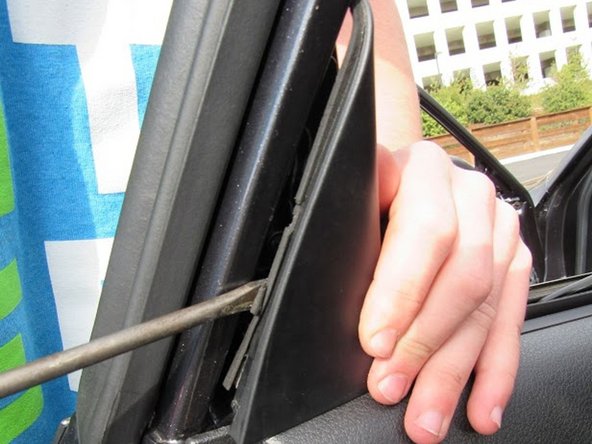
    • Use flathead to pry off the upper panel located at the top of the rear door panel.

  6. 2009 Subaru Impreza WRX Rear Door Panel Replacement: 手順 6、 2の画像 1 2009 Subaru Impreza WRX Rear Door Panel Replacement: 手順 6、 2の画像 2
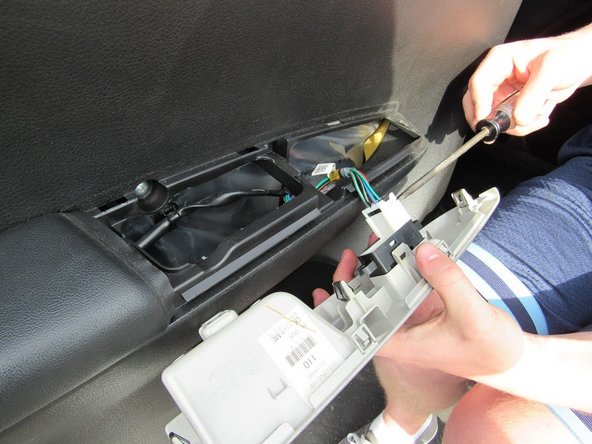
    • Use the flathead screwdriver to pry off and remove the panel over the door handle.

  7. 2009 Subaru Impreza WRX Rear Door Panel Replacement: 手順 7、 1の画像 1
    • Remove the bundle of wires from the panel by pressing the tabs on the sides of the large white plastic connector.

  8. 2009 Subaru Impreza WRX Rear Door Panel Replacement: 手順 8、 1の画像 1
    • Use the Phillips screwdriver to unscrew the 8x3/4" screws behind the door handle panel that was just removed.

  9. 2009 Subaru Impreza WRX Rear Door Panel Replacement: 手順 9、 1の画像 1
    • Use the flathead screwdriver to pry off the door panel, starting from the outside edge of the door.

  10. 2009 Subaru Impreza WRX Rear Door Panel Replacement: 手順 10、 1の画像 1
    • Use your hands to pull off and remove the door panel from the frame.

  11. 2009 Subaru Impreza WRX Rear Door Panel Replacement: 手順 11、 1の画像 1
    • Using your hands, remove the two remaining wires connecting the door panel to the frame.

    • The door panel is now completely removed from the frame.

終わりに

To reassemble your device, follow these instructions in reverse order.

作成者

4人の作成者と共同で作成されました。

Joseph Coplon

メンバー登録日: 04/20/15

101 ポイント

1ガイドが承認済み

チーム

Cal Poly, Team 8-3, Regan Spring 2015 Cal Poly, Team 8-3, Regan Spring 2015人のメンバー

CPSU-REGAN-S15S8G3

5 メンバー

5のガイドは作成済み

0 件のコメント

コメントを追加

統計データ:

過去 24時間: 0

過去 7 日: 6

過去 30 日: 17

今までの合計 2,446