メインコンテンツにスキップ

2003 Honda CRF 450 Carburetor Disassembly

必要な工具と部品

  1. 2003 Honda CRF 450 Carburetor Disassembly, Turn Fuel Off: 手順 1、 1の画像 1
    • Move the fuel lever from the on position to the off.

  2. 2003 Honda CRF 450 Carburetor Disassembly, Drain Pan: 手順 2、 1の画像 1
    • Place a drain pan under the motorcycle to catch any excess fuel.

  3. 2003 Honda CRF 450 Carburetor Disassembly, Remove Seat: 手順 3、 3の画像 1 2003 Honda CRF 450 Carburetor Disassembly, Remove Seat: 手順 3、 3の画像 2 2003 Honda CRF 450 Carburetor Disassembly, Remove Seat: 手順 3、 3の画像 3
    • Remove the two bolts from each side of the seat with a 10mm socket.

    • Lift up on the rear of the seat to remove.

  4. 2003 Honda CRF 450 Carburetor Disassembly, Loosen Air Intake Boot: 手順 4、 1の画像 1
    • Loosen the screw with a phillips head screwdriver so the clamp can move freely.

  5. 2003 Honda CRF 450 Carburetor Disassembly, Exhaust Bolt: 手順 5、 2の画像 1 2003 Honda CRF 450 Carburetor Disassembly, Exhaust Bolt: 手順 5、 2の画像 2
    • Loosen the 12mm bolt to separate the exhaust muffler from the exhaust header.

  6. 2003 Honda CRF 450 Carburetor Disassembly, Lower Sub-Frame Bolts: 手順 6、 2の画像 1 2003 Honda CRF 450 Carburetor Disassembly, Lower Sub-Frame Bolts: 手順 6、 2の画像 2
    • Remove the 10mm lower sub-frame bolts on each side of the motorcycle.

  7. 2003 Honda CRF 450 Carburetor Disassembly, Upper Sub-Frame Bolt: 手順 7、 2の画像 1 2003 Honda CRF 450 Carburetor Disassembly, Upper Sub-Frame Bolt: 手順 7、 2の画像 2
    • Remove the 10mm upper sub-frame bolt from the motorcycle.

  8. 2003 Honda CRF 450 Carburetor Disassembly, Sub-Frame Removal: 手順 8、 2の画像 1 2003 Honda CRF 450 Carburetor Disassembly, Sub-Frame Removal: 手順 8、 2の画像 2
    • Remove the sub-frame assembly from the rest of the motorcycle.

  9. 2003 Honda CRF 450 Carburetor Disassembly, Remove Fuel Line: 手順 9、 3の画像 1 2003 Honda CRF 450 Carburetor Disassembly, Remove Fuel Line: 手順 9、 3の画像 2 2003 Honda CRF 450 Carburetor Disassembly, Remove Fuel Line: 手順 9、 3の画像 3
    • Using needle-nose pliers, loosen the clamp and slide it forward on the fuel line. Then remove the fuel line.

    • The fuel line should contain a small amount of fuel, so beware of spillage.

  10. 2003 Honda CRF 450 Carburetor Disassembly, Loosen Clamp: 手順 10、 2の画像 1 2003 Honda CRF 450 Carburetor Disassembly, Loosen Clamp: 手順 10、 2の画像 2
    • Loosen the clamp on the front of the carburetor with the Phillips head screwdriver.

  11. 2003 Honda CRF 450 Carburetor Disassembly, Remove Shock Bolts: 手順 11、 2の画像 1 2003 Honda CRF 450 Carburetor Disassembly, Remove Shock Bolts: 手順 11、 2の画像 2
    • Remove the top and bottom shock bolts with 17mm socket.

  12. 2003 Honda CRF 450 Carburetor Disassembly, Remove Shock: 手順 12、 1の画像 1
    • Remove the shock from the motorcycle.

  13. 2003 Honda CRF 450 Carburetor Disassembly, Plastic Cover: 手順 13、 2の画像 1 2003 Honda CRF 450 Carburetor Disassembly, Plastic Cover: 手順 13、 2の画像 2
    • Remove this screw with the 4mm hex key

    • Now remove the plastic cover, allowing access for the removal of the throttle cables.

  14. 2003 Honda CRF 450 Carburetor Disassembly, Slack Adjusters: 手順 14、 2の画像 1 2003 Honda CRF 450 Carburetor Disassembly, Slack Adjusters: 手順 14、 2の画像 2
    • Loosen the top and bottom slack adjusters. This will allow you to slide the slack adjusters out from the body of the carburetor.

  15. 2003 Honda CRF 450 Carburetor Disassembly, Side Shrouds: 手順 15、 1の画像 1
    • Remove the side shrouds from the motorcycle by loosening the four 8mm screws. Complete this step for both sides of the bike.

  16. 2003 Honda CRF 450 Carburetor Disassembly, Fuel Tank Bolts: 手順 16、 2の画像 1 2003 Honda CRF 450 Carburetor Disassembly, Fuel Tank Bolts: 手順 16、 2の画像 2
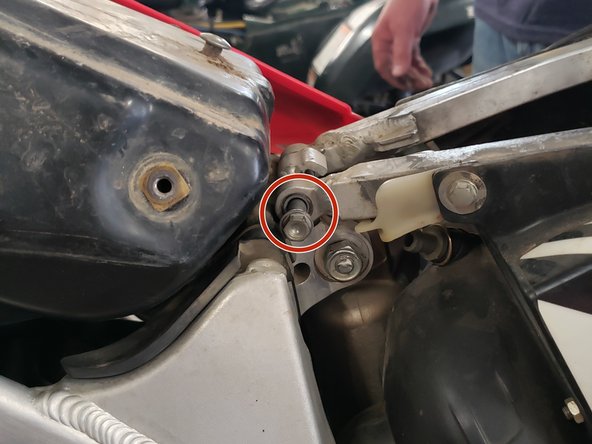
    • Remove the 8mm bolt above the fuel tank.

    • Remove the safety clip at the bottom of the fuel tank.

  17. 2003 Honda CRF 450 Carburetor Disassembly, Fuel Tank Removal: 手順 17、 2の画像 1 2003 Honda CRF 450 Carburetor Disassembly, Fuel Tank Removal: 手順 17、 2の画像 2
    • Remove the 8mm bolt from the fuel petcock.

    • Then remove the fuel tank from the motorcycle.

    • Tilting the fuel tank (second picture) will keep it from draining/spilling.

  18. 2003 Honda CRF 450 Carburetor Disassembly, Wiring Harness: 手順 18、 1の画像 1
    • Gently press on the plastic release on the clip to separate the wiring harness from the carburetor.

    • Be careful not to break the plastic clip.

  19. 2003 Honda CRF 450 Carburetor Disassembly, Hot Start Cable: 手順 19、 2の画像 1 2003 Honda CRF 450 Carburetor Disassembly, Hot Start Cable: 手順 19、 2の画像 2
    • Un-thread the 13mm plastic hot start cable from the carburetor.

  20. 2003 Honda CRF 450 Carburetor Disassembly, Remove Carburetor: 手順 20、 2の画像 1 2003 Honda CRF 450 Carburetor Disassembly, Remove Carburetor: 手順 20、 2の画像 2
    • At this stage, everything should be disconnected and the carburetor can be removed from the motorcycle.

    • The carburetor will more than likely still contain fuel, so be careful transporting it to the area where you will disassemble it.

  21. 2003 Honda CRF 450 Carburetor Disassembly, Clean Carburetor: 手順 21、 2の画像 1 2003 Honda CRF 450 Carburetor Disassembly, Clean Carburetor: 手順 21、 2の画像 2
    • Gently brush and blow off any debris from the carburetor.

  22. 2003 Honda CRF 450 Carburetor Disassembly, Disassemble Carburetor: 手順 22、 2の画像 1 2003 Honda CRF 450 Carburetor Disassembly, Disassemble Carburetor: 手順 22、 2の画像 2
    • Loosen and remove the 5 screws at the bottom of the carburetor, with the Phillips head screwdriver, to detach the bowl. Then remove the bowl.

  23. 2003 Honda CRF 450 Carburetor Disassembly, Remove Float: 手順 23、 3の画像 1 2003 Honda CRF 450 Carburetor Disassembly, Remove Float: 手順 23、 3の画像 2 2003 Honda CRF 450 Carburetor Disassembly, Remove Float: 手順 23、 3の画像 3
    • Remove the shaft from the two posts sticking up on the inside of the carburetor.

    • Remove the float.

  24. 2003 Honda CRF 450 Carburetor Disassembly, Remove Jets: 手順 24、 3の画像 1 2003 Honda CRF 450 Carburetor Disassembly, Remove Jets: 手順 24、 3の画像 2 2003 Honda CRF 450 Carburetor Disassembly, Remove Jets: 手順 24、 3の画像 3
    • Remove the jets from the body of the carburetor.

    • Thoroughly clean all jets and body of carburetor.

終わりに

To reassemble your device, follow these instructions in reverse order.

作成者

3人の作成者と共同で作成されました。

Tony Rhodes

メンバー登録日: 03/31/22

349 ポイント

1ガイドが承認済み

0 件のコメント

コメントを追加

統計データ:

過去 24時間: 3

過去 7 日: 14

過去 30 日: 72

今までの合計 1,277