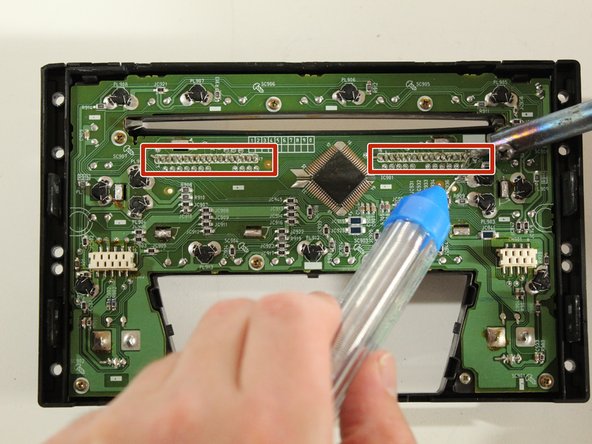
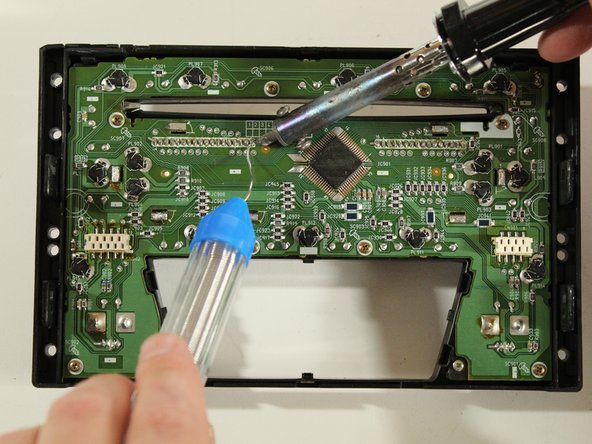
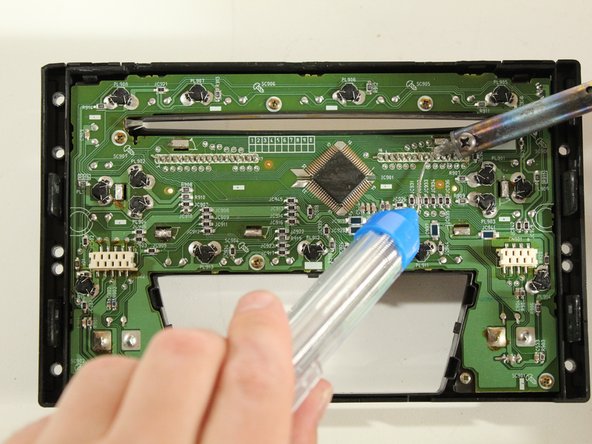
メインコンテンツにスキップ

1998-2003 Mazda Protégé Radio LCD Screen Repair.

必要な工具と部品

  1. 1998-2003 Mazda Protégé Radio LCD Screen Repair., 1998-2003 Mazda Protégé Radio LCD Screen Repair.: 手順 1、 2の画像 1 1998-2003 Mazda Protégé Radio LCD Screen Repair., 1998-2003 Mazda Protégé Radio LCD Screen Repair.: 手順 1、 2の画像 2
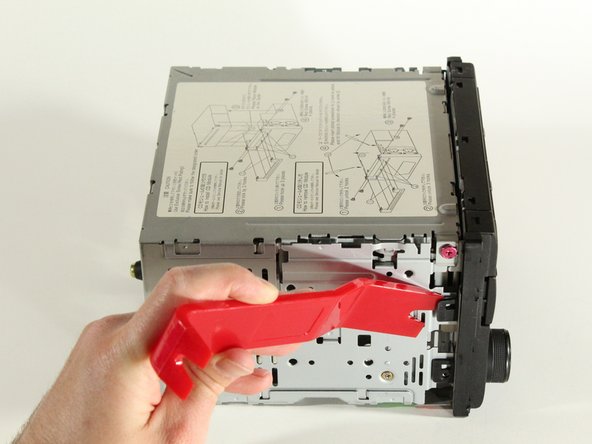
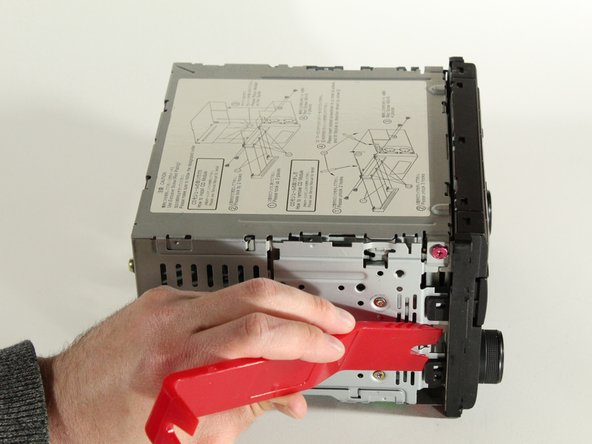
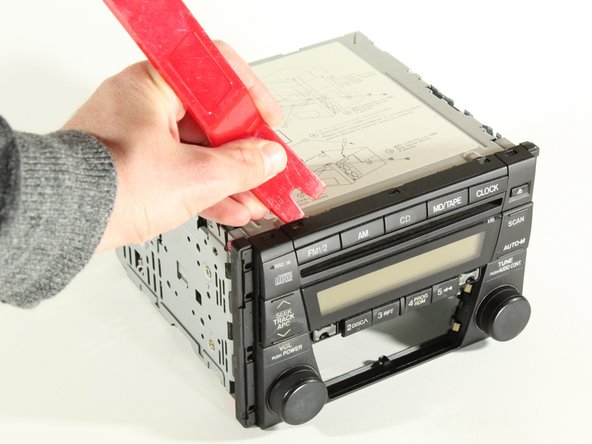
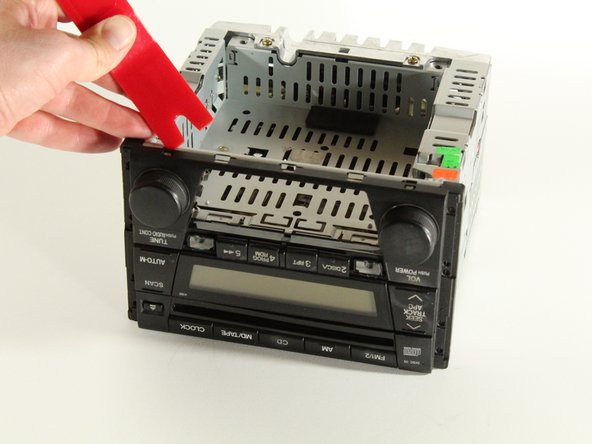
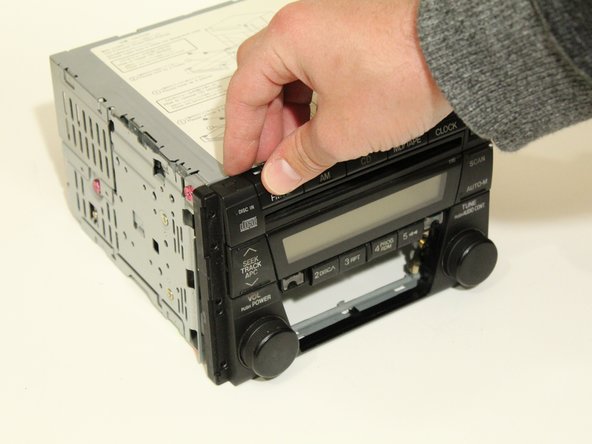
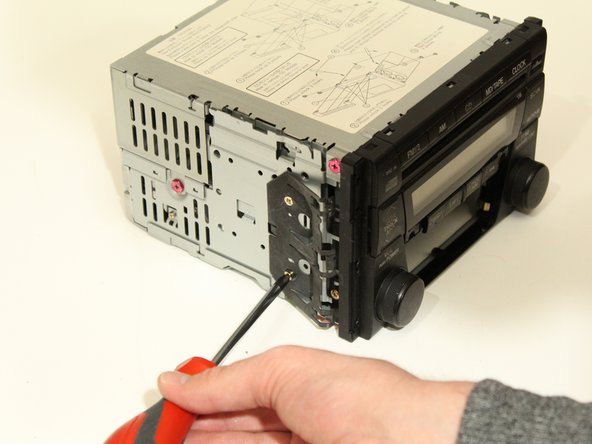
    • Use the spudger to remove both side covers to access the radio removal holes.

  2. 1998-2003 Mazda Protégé Radio LCD Screen Repair.: 手順 2、 2の画像 1 1998-2003 Mazda Protégé Radio LCD Screen Repair.: 手順 2、 2の画像 2
    • Use the spudger to remove this plastic cover to make the radio removal easier.

  3. 1998-2003 Mazda Protégé Radio LCD Screen Repair.: 手順 3、 2の画像 1 1998-2003 Mazda Protégé Radio LCD Screen Repair.: 手順 3、 2の画像 2
    • Remove each side of the radio separately. Starting with the left side, put the 'radio removal tool' in the bottom 4 holes until you hear a "click"

    • The top hole is not for the radio removal tool.

    • Then pull the left side of the radio out.

    • It may be easier if 2 sets of radio removal tools are used (2 come in one set). Then both sides can be removed at the same time.

  4. 1998-2003 Mazda Protégé Radio LCD Screen Repair.: 手順 4、 2の画像 1 1998-2003 Mazda Protégé Radio LCD Screen Repair.: 手順 4、 2の画像 2
    • Then repeat the process with the right side.

  5. 1998-2003 Mazda Protégé Radio LCD Screen Repair.: 手順 5、 2の画像 1 1998-2003 Mazda Protégé Radio LCD Screen Repair.: 手順 5、 2の画像 2
    • Pull the radio out, you may have to wiggle it back-and-forth several times to get it out.

  6. 1998-2003 Mazda Protégé Radio LCD Screen Repair.: 手順 6、 3の画像 1 1998-2003 Mazda Protégé Radio LCD Screen Repair.: 手順 6、 3の画像 2 1998-2003 Mazda Protégé Radio LCD Screen Repair.: 手順 6、 3の画像 3
    • Remove the radio Antenna.

    • You will have to pull the antenna very hard to remove it, but don't worry, it will not damage it.

    • Remove the wiring harness by pressing on the clip on the underside of the harness.

  7. 1998-2003 Mazda Protégé Radio LCD Screen Repair.: 手順 7、 2の画像 1 1998-2003 Mazda Protégé Radio LCD Screen Repair.: 手順 7、 2の画像 2
    • Using the Phillips #2 screwdriver, remove the two 5.0 mm screws on either side of the control panel.

  8. 1998-2003 Mazda Protégé Radio LCD Screen Repair.: 手順 8、 2の画像 1 1998-2003 Mazda Protégé Radio LCD Screen Repair.: 手順 8、 2の画像 2
    • Pry-off the control panel tabs with the spudger.

  9. 1998-2003 Mazda Protégé Radio LCD Screen Repair.: 手順 9、 1の画像 1
    • Using the spudger, pry the top control panel tabs off.

  10. 1998-2003 Mazda Protégé Radio LCD Screen Repair.: 手順 10、 1の画像 1
    • Using the spudger, pry the bottom control panel tabs off.

  11. 1998-2003 Mazda Protégé Radio LCD Screen Repair.: 手順 11、 1の画像 1
    • Remove the control panel.

  12. 1998-2003 Mazda Protégé Radio LCD Screen Repair.: 手順 12、 3の画像 1 1998-2003 Mazda Protégé Radio LCD Screen Repair.: 手順 12、 3の画像 2 1998-2003 Mazda Protégé Radio LCD Screen Repair.: 手順 12、 3の画像 3
    • Re-solder the LCD connections with a soldering iron.

    • You may or may not need extra solder. Just be sure that all solder connections look good. (Refer to attached soldering guide)

    • The soldering iron is hot so please be careful not to burn yourself.

  13. 1998-2003 Mazda Protégé Radio LCD Screen Repair.: 手順 13、 2の画像 1 1998-2003 Mazda Protégé Radio LCD Screen Repair.: 手順 13、 2の画像 2
    • Re-clip the control panel back onto the radio.

  14. 1998-2003 Mazda Protégé Radio LCD Screen Repair.: 手順 14、 2の画像 1 1998-2003 Mazda Protégé Radio LCD Screen Repair.: 手順 14、 2の画像 2
    • Using a Phillips #2 screwdriver, screw in both 5 mm screws on either side of the radio.

  15. 1998-2003 Mazda Protégé Radio LCD Screen Repair.: 手順 15、 1の画像 1
    • Insert the radio back into it's place in the same way that you removed it.

  16. 1998-2003 Mazda Protégé Radio LCD Screen Repair.: 手順 16、 2の画像 1 1998-2003 Mazda Protégé Radio LCD Screen Repair.: 手順 16、 2の画像 2
    • I removed the anti-theft clip from my radio (as you can see that it's not in any of the pictures) making it's removal very easy. I do not need my radio removal tools any more. I can simply pull it out with my hands.

終わりに

To reassemble your device, follow these instructions in reverse order.

2 の人々がこのガイドを完成させました。

作成者

1人の作成者と共同作成されました。

Shmuel Ament

メンバー登録日: 04/11/20

307 ポイント

1ガイドが承認済み

チーム

Purdue University Northwest, Team S6-G10, Hingst Spring 2020 Purdue University Northwest, Team S6-G10, Hingst Spring 2020人のメンバー

PNW-HINGST-S20S6G10

1 メンバー

1のガイドは作成済み

3 件のコメント

Great guide! When I was taking mine out to swap in an aftermarket, I by accidently didn't disconnect the battery and when attempting to remove deck with the 4 C clips, I guess I shorted the backlit LED in the original. The wires of my new (old aftermarket deck) just keep messing around so I want to put this original stock one back. I was wondering if you knew or could help me find out which piece of the board or LED to replace? The LCD itself works, just not the red LED backlight when the car lights are on.

IS there any way you can help me identify this piece that I might have shorted out by pulling your deck again? I'm guessing the LED's are on the opposite side of the picture 12.

Only if you are willing. I would really appreciate any help.

Thank you

-David

iron_maiden80 - 返信

كيفية اصلاح الانارة الامامية . وهل يوجد توماتيك للانارة الامامية ام لا ؟

سؤال - 返信

كيفية اصلاح الانارة الامامية. وهل يوجد تومتيك للانارة الامامية؟

سؤال - 返信

コメントを追加

統計データ:

過去 24時間: 1

過去 7 日: 20

過去 30 日: 68

今までの合計 2,381