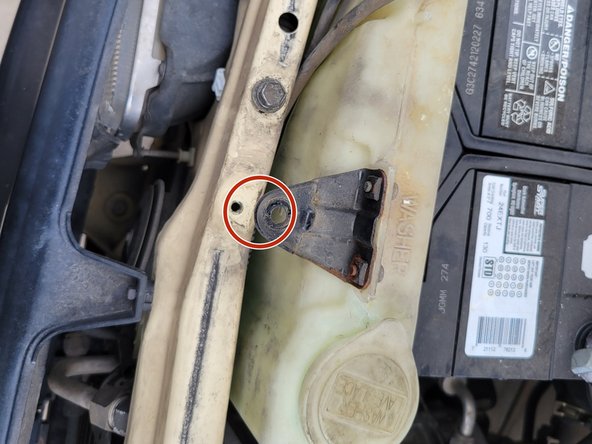
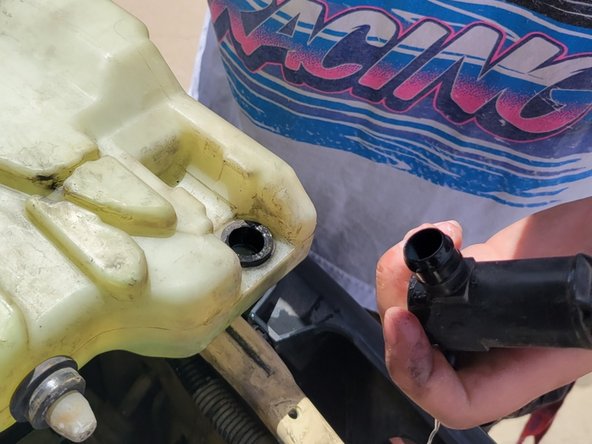
メインコンテンツにスキップ

1986 Toyota Pickup Windshield Washer Pump Replacement

必要な工具と部品

  1. 1986 Toyota Pickup Windshield Washer Pump Replacement, Windshield Washer Pump: 手順 1、 3の画像 1 1986 Toyota Pickup Windshield Washer Pump Replacement, Windshield Washer Pump: 手順 1、 3の画像 2 1986 Toyota Pickup Windshield Washer Pump Replacement, Windshield Washer Pump: 手順 1、 3の画像 3
    • Open the hood.

  2. 1986 Toyota Pickup Windshield Washer Pump Replacement: 手順 2、 3の画像 1 1986 Toyota Pickup Windshield Washer Pump Replacement: 手順 2、 3の画像 2 1986 Toyota Pickup Windshield Washer Pump Replacement: 手順 2、 3の画像 3
    • Using a ratchet and a 12 mm socket, remove the 12 mm bolt and 12 mm nut on either side of the battery hold-down bracket.

    • Lift the bracket off of the battery and set it aside.

  3. 1986 Toyota Pickup Windshield Washer Pump Replacement: 手順 3、 2の画像 1 1986 Toyota Pickup Windshield Washer Pump Replacement: 手順 3、 2の画像 2
    • Using a ratchet and a 10 mm socket, remove the 10 mm bolt that holds the washer bottle in place.

  4. 1986 Toyota Pickup Windshield Washer Pump Replacement: 手順 4、 3の画像 1 1986 Toyota Pickup Windshield Washer Pump Replacement: 手順 4、 3の画像 2 1986 Toyota Pickup Windshield Washer Pump Replacement: 手順 4、 3の画像 3
    • Disconnect the pump electrical connector.

    • You may have to partially or fully remove the washer bottle to access the connector.

    • You can also remove or slide the battery over in its spot to have more space to access the connector.

    • To unplug the connector, push up on the tab of the female connector and pull the two apart. Be patient, as the plastic can be very brittle.

  5. 1986 Toyota Pickup Windshield Washer Pump Replacement: 手順 5、 2の画像 1 1986 Toyota Pickup Windshield Washer Pump Replacement: 手順 5、 2の画像 2
    • Lift the washer bottle out of place. Be mindful of the hose that connects the pump to the sprayers.

    • Disconnect the hose from the pump using the needle nose pliers (optional).

    • Remove the hose from its slot in the washer bottle and empty the washer fluid into a temporary container.

    • This is also optional, but will save you from having to balance the bottle to keep it from spilling.

  6. 1986 Toyota Pickup Windshield Washer Pump Replacement: 手順 6、 3の画像 1 1986 Toyota Pickup Windshield Washer Pump Replacement: 手順 6、 3の画像 2 1986 Toyota Pickup Windshield Washer Pump Replacement: 手順 6、 3の画像 3
    • Carefully pry the pump out of the washer bottle with the flathead screwdriver.

    • If your new washer pump did not come with an O-ring, be mindful to not damage the old one.

    • If you have a new O-ring, remove and replace the O-ring as well.

終わりに

To reassemble your device, follow these instructions in reverse order.

作成者

1人の作成者と共同作成されました。

Devin B Dafoe

メンバー登録日: 02/23/24

133 ポイント

1ガイドが承認済み

チーム

University of Arizona, Team 1-14, Cools Stephens Spring 2024 University of Arizona, Team 1-14, Cools Stephens Spring 2024人のメンバー

ARIZONA-COOLS STEPHENS-S24S1G14

2 メンバー

1のガイドは作成済み

0 件のコメント

コメントを追加

統計データ:

過去 24時間: 0

過去 7 日: 2

過去 30 日: 25

今までの合計 97