必要な工具と部品
-
-
Open Git Bash and type the following commands:
-
cd ~/Documents
-
mkdir Perfect_Cell
-
cd ~/Documents/Perfect_Cell
-
cd perfect-cell
-
git checkout sd_logger
-
-
-
You need to open the file using the Project/Workspace tab, not the File tab.
-
It’s file path should be: “Perfect-cell\perfect-cell.cydsn\perfect-cell.cyprj” (you might need to show “All files (*.*)”)
-
-
-
-
If you are using a lab computer, it should be on the Desktop somewhere. If you don't see it go find a grad student and ask.
-
We are coming up with a better way of doing this. The config.h file contains sensitive information like node passwords, so we don't have it on our github repo, and we don't want to spread it around.
-
You might have to add config.h file to filepath (right click “Headers” click add > add existing, click on config.h file)
-
-
-
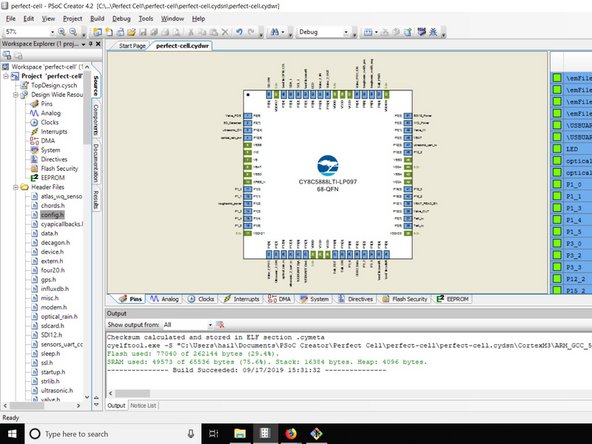
Go to “Build” → “Build perfect-cell” (this’ll take a lil’ bit)
-
If you get any “FLAG” errors, you probably have an old config.h file. That’s alright, you just need to add that variable into the config file code.
-
Eg, #define V420_FLAG 0u
-
When your build is complete, you will see a "Build Succeeded!" message.
-
-
-
Before you can program the board, make sure all the necessary pins have jumpers. Jumpers allow you to toggle between different board settings.
-
The jumpers you need are:
-
JP1 - Power the board directly from the battery (not the voltage regulator) JP1 (the bottom two pins are jumped)
-
JP2 - top two pins - controls how we power the modem
-
ST and XB - jump all of the status LEDs
-
-
-
Before you get any further, make sure the board has an SD card and a modem (with activated SIM card) attached. Make sure the modem is correctly connected to the board!
-
Using the board programming cable, connect your board to your computer via USB port
-
The pin end connects to the white port on the board.
-
If you have a problem connecting, check that the programmer is using the correct port.
-
Once you have a connection, debug the project.
-


3 の人々がこのガイドを完成させました。
チーム
