はじめに
バッテリを交換するには、微細なはんだ付け作業の必要があり、経験豊富な熟練者だけに許される難しい仕事です。
必要な工具と部品
-
-
-
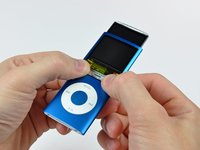
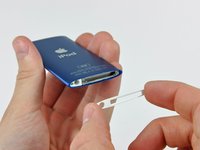
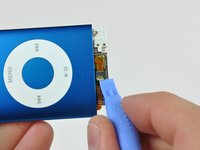
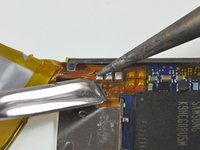
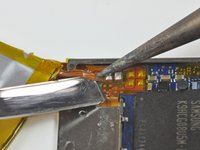
ホールドスイッチのケーブルをバッテリーの端に沿って剥がし、脇に置きます。ホールドスイッチケーブルはバッテリに接続されていません。
-
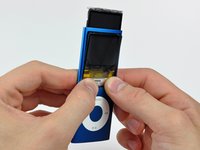
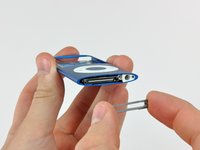
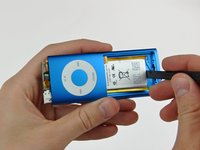
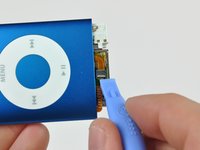
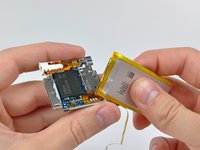
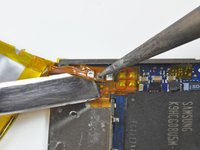
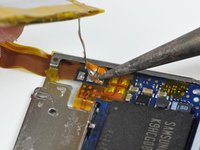
ロジックボードの金属トレイに固定されているバッテリーを接着剤からはがします。
-


組み立てる場合、分解の逆順で行ってください。
組み立てる場合、分解の逆順で行ってください。
173 の人々がこのガイドを完成させました。
以下の翻訳者の皆さんにお礼を申し上げます:
100%

これらの翻訳者の方々は世界を修理する私たちのサポートをしてくれています。 あなたも貢献してみませんか?
翻訳を始める ›

39 件のコメント
There is one small point which is worth a mention here.After disconnnecting the screen by flicking up a little black bit on the ZIF Connector, I went on to open the next ZiF (The Click Switch)
Yes- bits of ZIF connector everywhere.I actually had to examine a new Click Switch circuit carefully to find that this one is different.
Yes - you flick the White bit. Do apple do this just to keep us on our toes?
Pete Green - 返信
I have taken the nano apart and started to use a solder iron to remove the old battery. I must have pulled on the battery before fully melting the solder and have pulled off two of the three tabs from the board.
Can this be fixed?
I think you might have to get a new board or figure out how to fix the pads with wire. I believe there are tutorials on that.
Ad123re -
I tried what Bradley suggested because it really seems easier than to solder the new battery to the iPod circuit board, which is really tiny. Still I couldn't do it. The battery pads are very fragile and I had an hard time folding the leads and the battery circuit board so that it looked the way it originally was. This was the part where I failed because afterwards I wasn't able to insert the battery plus the iPod circuit board inside its case again and ended it breaking it.
ruigsantos - 返信
When I soldered my battery in I first touched the top and bottom of the pads on the new battery with flux and then added a little solder to the top and bottom of the pads. When I put the pads in place I only had to apply a quick touch and it soldered on perfectly.
Overall it was a real pain! :)