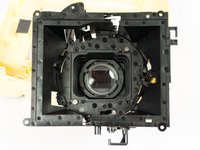
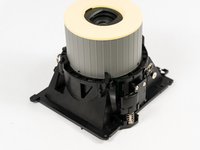
はじめに
修理をする前に、カメラのフラッシュコンデンサーの電圧から生じるショックのリスクがあることを必ず念頭に置いてください。
必要な工具と部品
デバイスを再組み立てする際は、これらのインストラクションを逆の順番に従って作業を進めてください。
デバイスを再組み立てする際は、これらのインストラクションを逆の順番に従って作業を進めてください。
8 の人々がこのガイドを完成させました。
以下の翻訳者の皆さんにお礼を申し上げます:
100%
Midori Doiさんは世界中で修理する私たちを助けてくれています! あなたも貢献してみませんか?
翻訳を始める ›
13 件のコメント
the lens covers on my lens broke (the small black pieces that cover the lenses) and i am unable to put back on, will this affect my camera and pictures because of the ex poser?
When I dropped my instax mini 8, none of the lense pieces broke, they just fell apart, I just need to puzzle them back together. Can you make a tutorial to put the yellow and black parts in the lense back together?
My daughter dropped her camera and the round, hard plastic part that goes over the lens fell out along with a black piece that has four prongs. There is also a spring attached at a section that would look like 4-5 o'clock if looking at the camera head on. I am not sure where the other end of spring attaches to. Please help
I too am having the same problem as the people in the posts above. Is there a solution somewhere? Thanks
I followed this tutorial but when I initally took the case apart a small rectangular piece fell out and I'm not sure where it should go. The piece has a hole which is set to one side, and a slight groove and arch. I can't see the piece on any of the tutorials. Can anyone help? Thanks


