メインコンテンツにスキップ
リペアコミュニティに参加 - アカウントの作成

プラスチック製ジッパーの問題の診断

    1. プラスチック製ジッパーの問題の診断, ジッパーの各部名称: 手順 1、 2の画像 1 プラスチック製ジッパーの問題の診断, ジッパーの各部名称: 手順 1、 2の画像 2
      • スライダー

      • 引手

      • 上止(前止)

      • 箱・箱棒(箱に固定されている部分)・蝶棒(箱に挿入される部分)

      • エレメント(務歯)

      • テープ

      FixBotに聞いてみる

      コメントを追加

    2. プラスチック製ジッパーの問題の診断, 壊れたスライダー: 手順 2、 2の画像 1 プラスチック製ジッパーの問題の診断, 壊れたスライダー: 手順 2、 2の画像 2
      • プラスチック製ジッパーでよくある問題は、スライダーの破損です。

      • 緩くなったスライダーはエレメントを効率的に噛み合わせることができなくなり、スライダーを引き上げてもジッパーが開いたままになります(1枚目の画像を参照)。

      • 押しつぶされたスライダーは隙間が狭くなり、引き上げるのが難しくなります(2枚目の画像を参照)。

      • 上述のような場合や、スライダーが完全になくなってしまった場合には、プラスチック製ジッパーのスライダー交換で直ると思われます。

      • 先にジッパーの状態が手順3〜5に該当しないことを確認してからスライダーの交換を始めて下さい。

      FixBotに聞いてみる

      コメントを追加

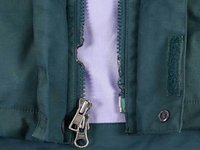
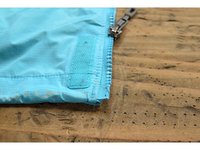
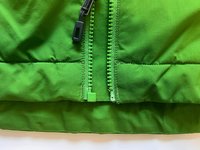
    3. プラスチック製ジッパーの問題の診断, なくなったり破損したエレメント: 手順 3、 2の画像 1 プラスチック製ジッパーの問題の診断, なくなったり破損したエレメント: 手順 3、 2の画像 2
      • 最初の画像のジッパーは一部のエレメントがなくなっています。2枚目の画像のジッパーはエレメントが溶けています。このような問題を完全に解決する唯一の方法は、ジッパー全体を交換することです。

      • 一時的な応急処置については、縫わずにジッパーを直す上級テクニックを参照して下さい。

      FixBotに聞いてみる

      コメントを追加

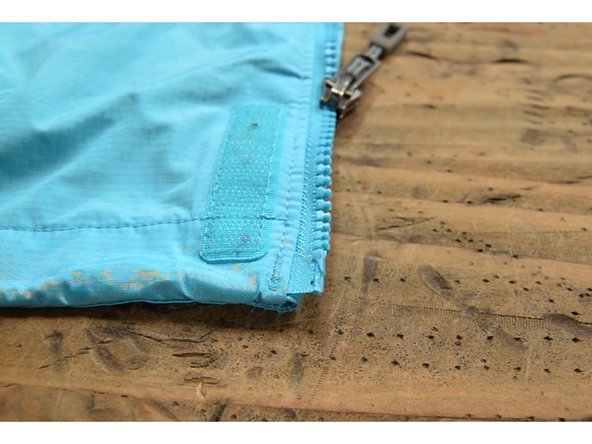
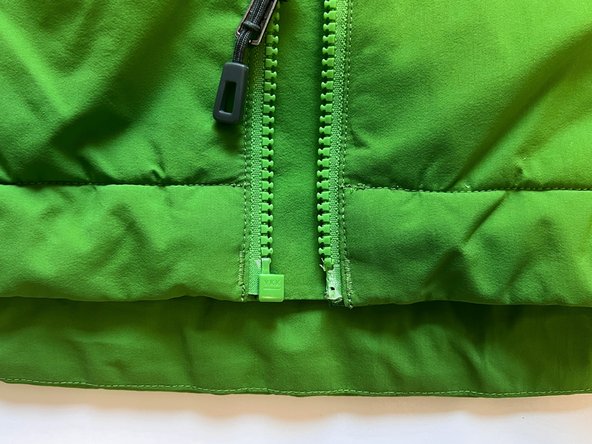
    4. プラスチック製ジッパーの問題の診断, 箱や蝶棒の破損: 手順 4、 3の画像 1 プラスチック製ジッパーの問題の診断, 箱や蝶棒の破損: 手順 4、 3の画像 2 プラスチック製ジッパーの問題の診断, 箱や蝶棒の破損: 手順 4、 3の画像 3
      • 最初の画像のジッパーは箱が破損しています。2枚目の画像のジッパーは箱全体がなくなっています。3枚目の画像のジッパーは蝶棒がなくなっています。このような問題を完全に修理するにはジッパー全体を交換する必要があります。

      • 一時的な応急処置については、縫わずにジッパーを直す上級テクニックを参照して下さい。

      FixBotに聞いてみる

      コメントを追加

    5. プラスチック製ジッパーの問題の診断, 裂けたテープ: 手順 5、 1の画像 1
      • 画像のジッパーはプラスチックのエレメントに沿ってテープが裂けています。このような問題を完全に直すには、ジッパー全体を交換する必要があります。

      • 一時的な応急処置については、縫わずにジッパーを直す上級テクニックを参照して下さい。

      FixBotに聞いてみる

      コメントを追加

ゴール

キャンセル: このガイドを終了できませんでした。

10 の人々がこのガイドを完成させました。

以下の翻訳者の皆さんにお礼を申し上げます:

en jp

100%

これらの翻訳者の方々は世界を修理する私たちのサポートをしてくれています。 あなたも貢献してみませんか?
翻訳を始める ›

作成者

7人の作成者と共同で作成されました。

Brittany McCrigler

メンバー登録日: 03/05/12

91,032 ポイント

142のガイドは作成済み

7件のガイドコメント

The link in Step 5 for the slider replacement guide is incorrect. It points to a Powerbook HD replacement guide. TG.

tgarrity - 返信 共有

What if there's no reason other than one side of the slider came off?

Donna Brock - 返信 共有

You can replace just the slider / retrack the one you have!

If the slider is missing, you will need to identify which type of zipper it is (size, is it molded plastic / coil / metal, and what "generation" because some are not compatible with each other). Once you have the right slider, then:

- for a jacket zipper, you take the top stop off the side of the zipper that has the box at the bottom (which is the side the slider lives on). You then put the slider on that side, test it by zipping the jacket up, and then add a new top stop where you took the old one off. You can find these easily online or at a sewing store.

- for a zipper that's sewn in or has a stop over both sides on the bottom, you will open up the bottom of the zipper and guide it onto both sides. You can find tips and tutorials to put a slider onto a zipper on youtube, etc... You'll then need to sew the bottom back together or use a bottom stop to close it. These can be found at a variety of places online and at most sewing stores.

Hope it helps!

Wolveriner:) - 返信 共有

What about if the zipper zips up but the teeth do not keep closed. I.e. zip up the jacket, part of the teeth stay interlocked but from one point on the teeth become undone and do not lock.

Juan Umana - 返信 共有

That's an issue with the zipper slider itself and I have experience fixing it. It's difficult to maneuver the tool because of fabric in the way and it's in a generally awkward spot but possible. Take needle pliers and squeeze down *a little bit* on the back of the zipper slider itself. Doesn't need too much of an adjustment, so squeeze a little and check, and squeeze a little and check. It's the small end of the zipper slider.

Malm - 返信 共有

コメントを追加

統計データ:

過去 24時間: 24

過去 7 日: 107

過去 30 日: 454

今までの合計 56,006